Richard and his Norton. Now with indicators and better starting

Yamaha XS650 switch cluster looks right. (So does the BMW grip.)

A Commando without the clutter
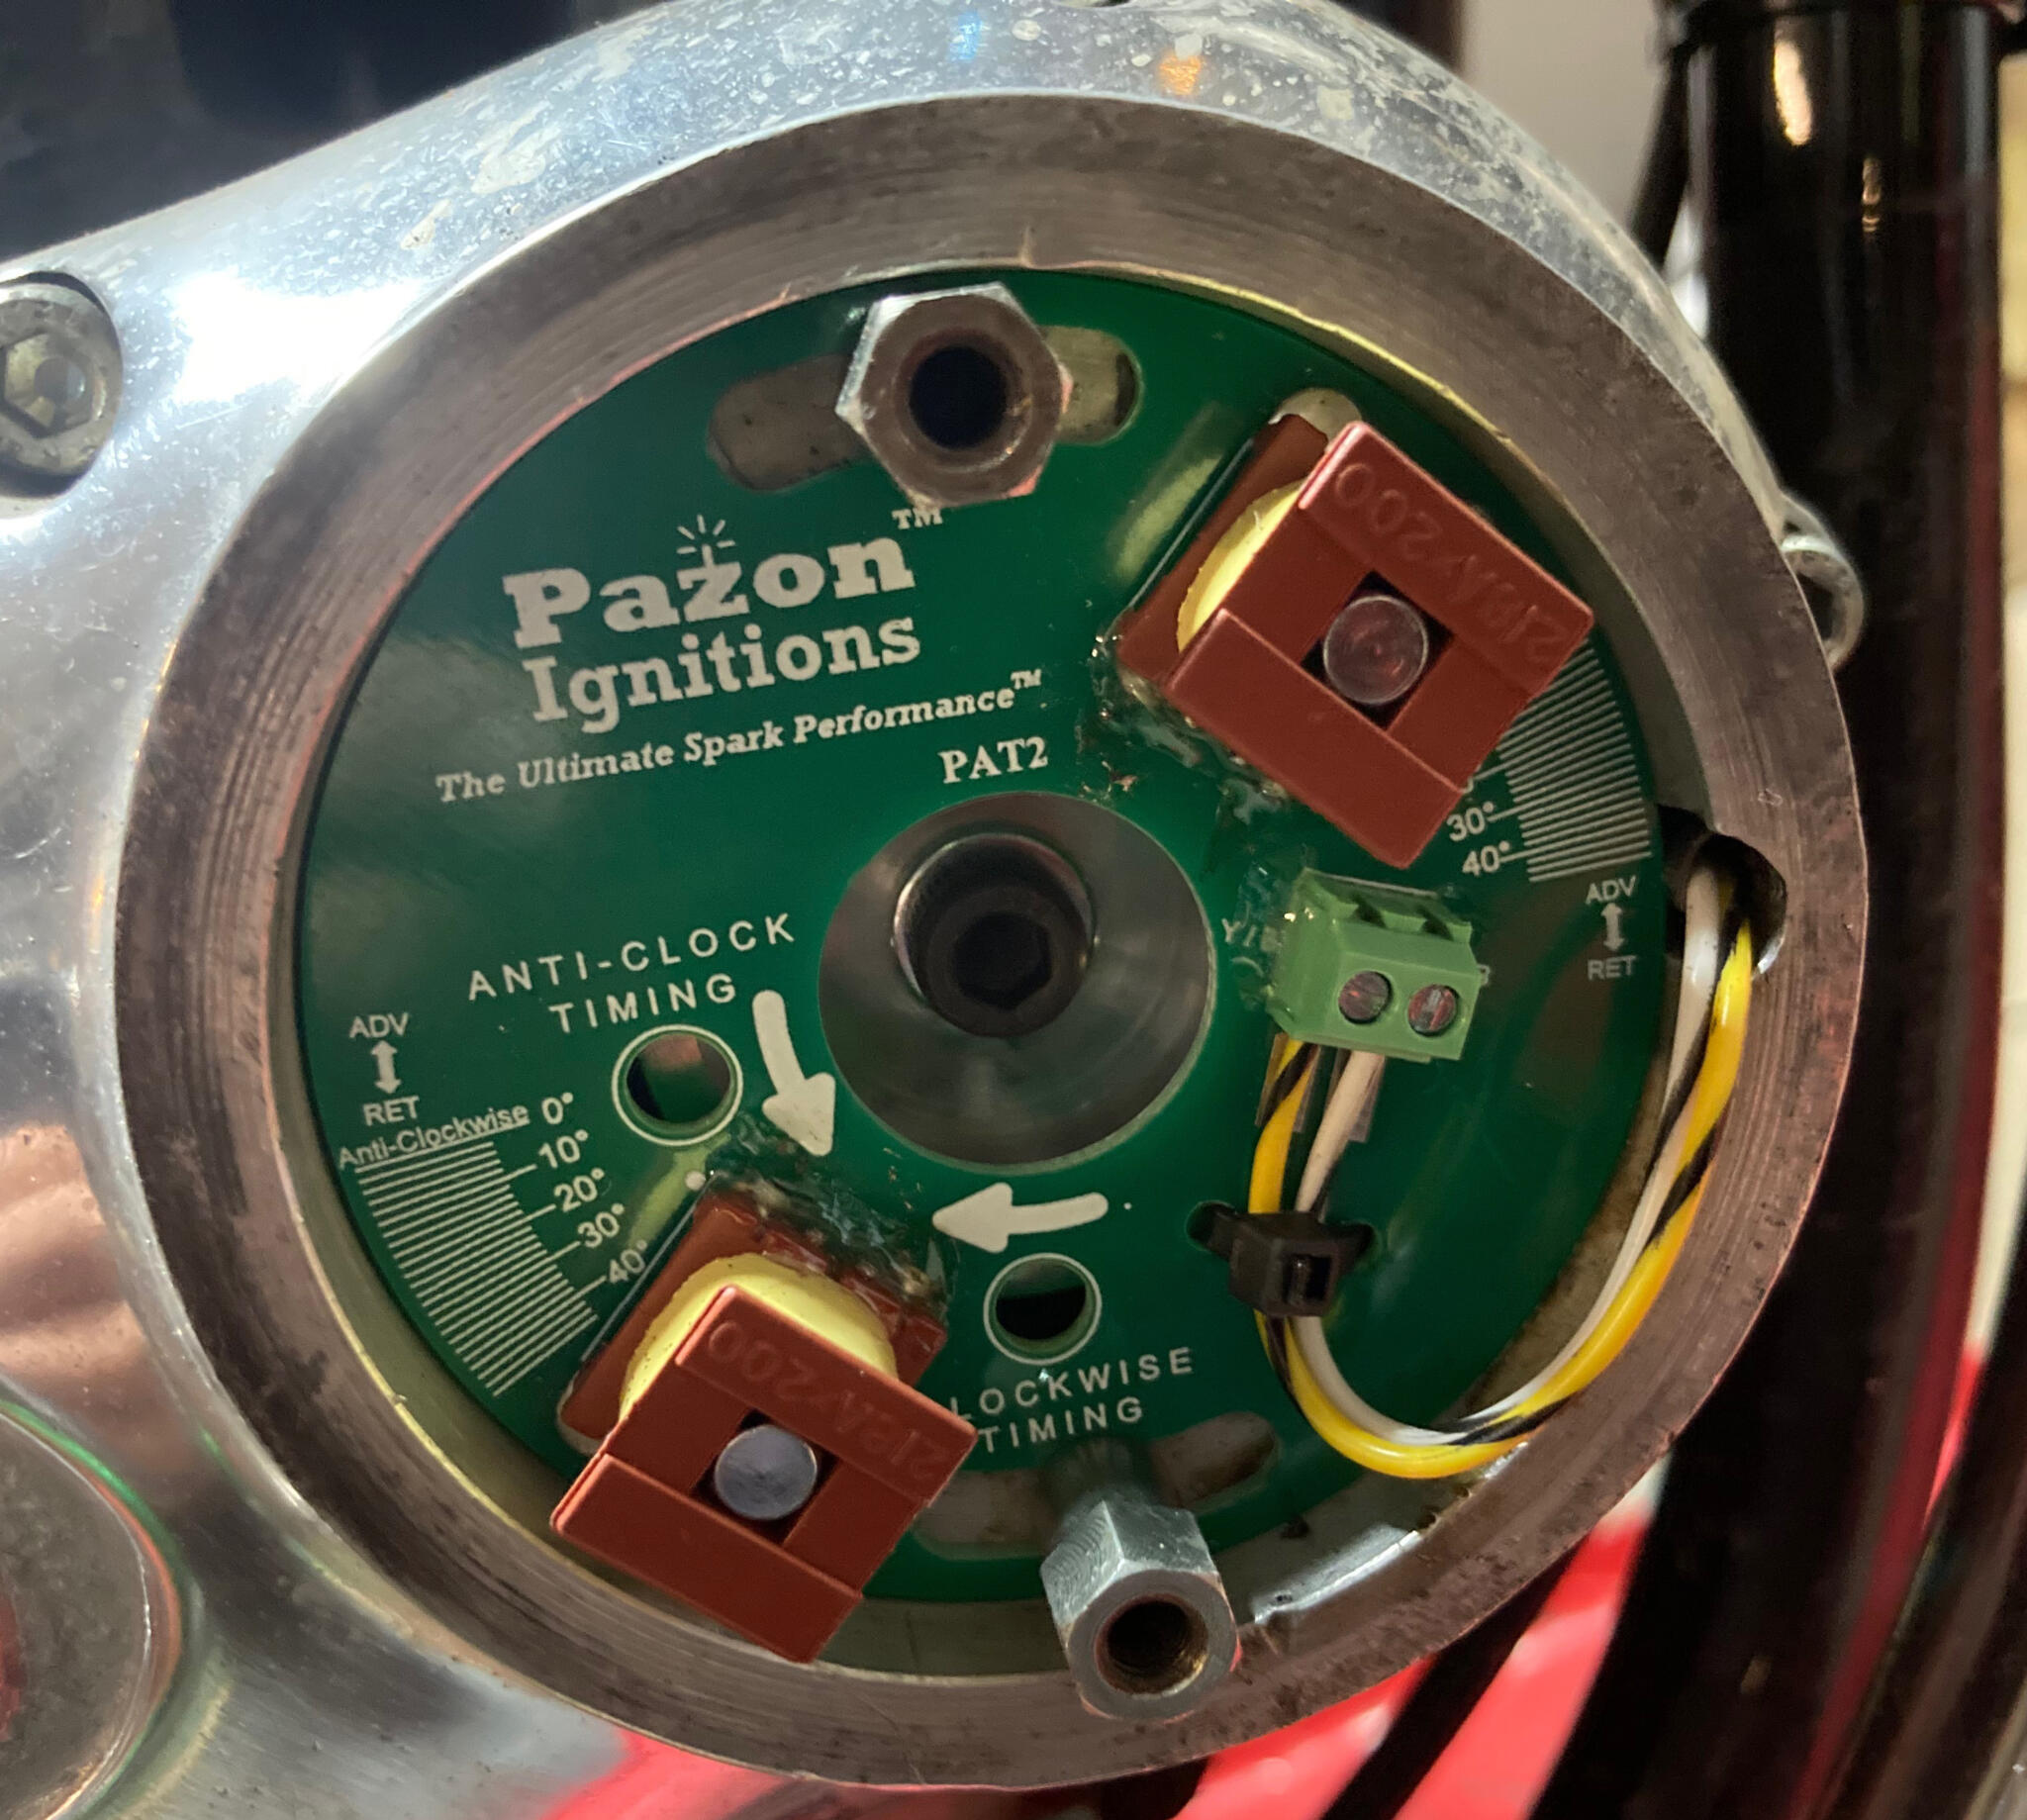
Pazon is an excellent ignition system, and dead easy to install
Richard’s Norton Commando 750
Richard is a mate of mine, and I can attest that he rides this superbly sorted Norton beautifully.
It was built as a stock bike about ten years ago, by Norton race engineer Norman White. Richard wrote about the whole project in Classic Bike magazine. Back then it was white, and looked like this. A couple of years ago he took his 750 to Jim Hodges, who is a genius at building and re-engineering old Brit bikes, and owns a very neat Commando himself. Richard also took the expensive step of switching to Maxton suspension.
Jim tidied up the back end, fitted a cool front and rear light, cool bars, push-button switchgear, and the short mudguards. He also painted the bike satin black.
All was well, but Richard’s mates observed that the rear light was dim, and there were no indicators. There was also a mysterious ignition failure on a tour of Yorkshire, when the Boyer ignition stopped sparking for a couple of hours. Whatever the cause, Richard decided to get a new ignition, this time by Pazon.
Adding indicators immediately begets two problems: 1) choosing which ones, and 2) finding the best way of mounting them on the bike. Richard’s Norton already looked extremely stylish, and we didn’t want to spoil that. He eventually chose a set of torpedo type indicators made in Japan by Posh. They are fabulous quality, and suit the way the Norton looks. We decided they would look best in bare aluminium up front, and black at the rear. Richard also snapped up a Posh tail light.
We now needed a hi/lo switch, a horn button, and a left/right switch. We couldn’t do it with push buttons without massive complexity, so the solution was a replica Yamaha XS650 switch.
Fitting the front indicators was fairly simple. I drilled the headlamp mounting bolts on the lathe, fitted the indicators using 8mm threaded bar, did it up tight, and ran the wires through the middle. At the rear, ideally we’d weld on brackets – but the frame loop was already painted. I made up some custom brackets, drilled and tapped the frame, and screwed them in place, using threadlock and Tiger Seal. From above, the brackets are almost invisible.
The tail light was tricky: a flat mounting bracket bolted to a curved mudguard. I made up some slash-cut spacers in Acetal bar, coated them with heat shrink, and used them to take up the wedge-shaped spaces where the screws go. Running the wiring meant either drilling another hole in the mudguard, or making a sort of pigtail into the existing hole. I chose the latter.
We both think the new bits look really good on the bike. And on today’sroads, indicators are really handy. Alas, the tail light is not much brighter than the old one. If we can find a brighter bulb, we will.
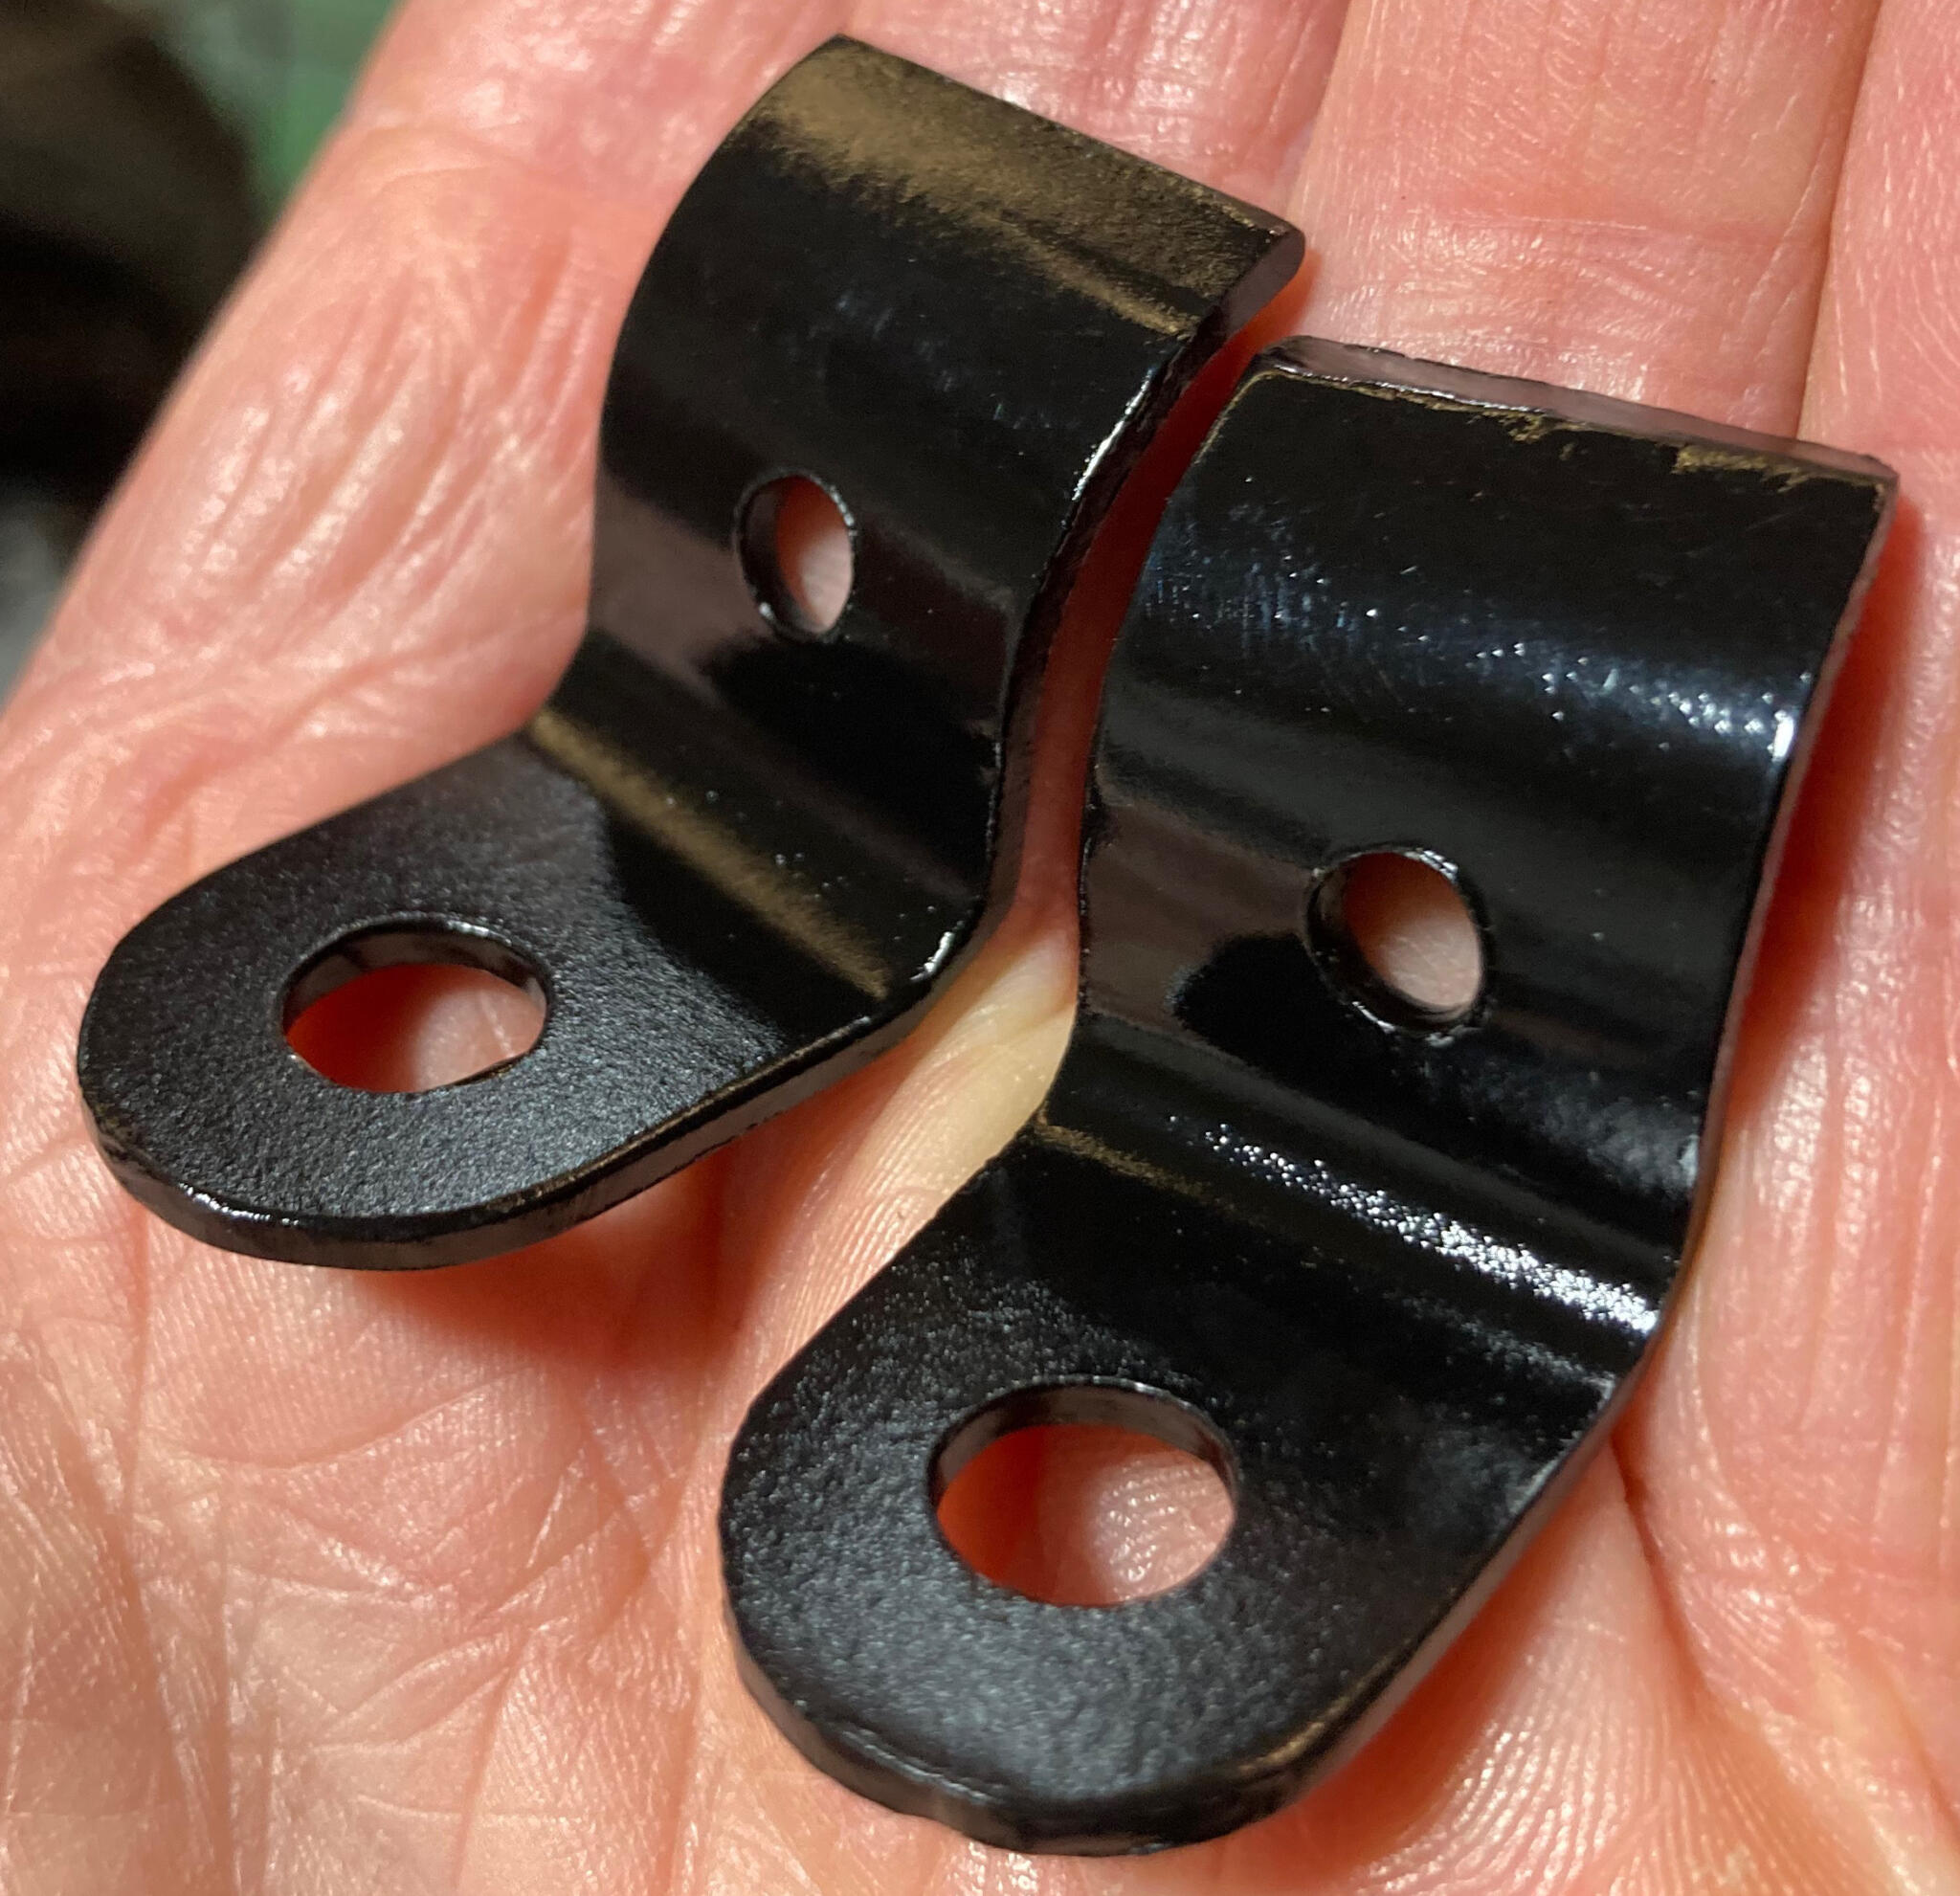
Custom rear indicator brackets
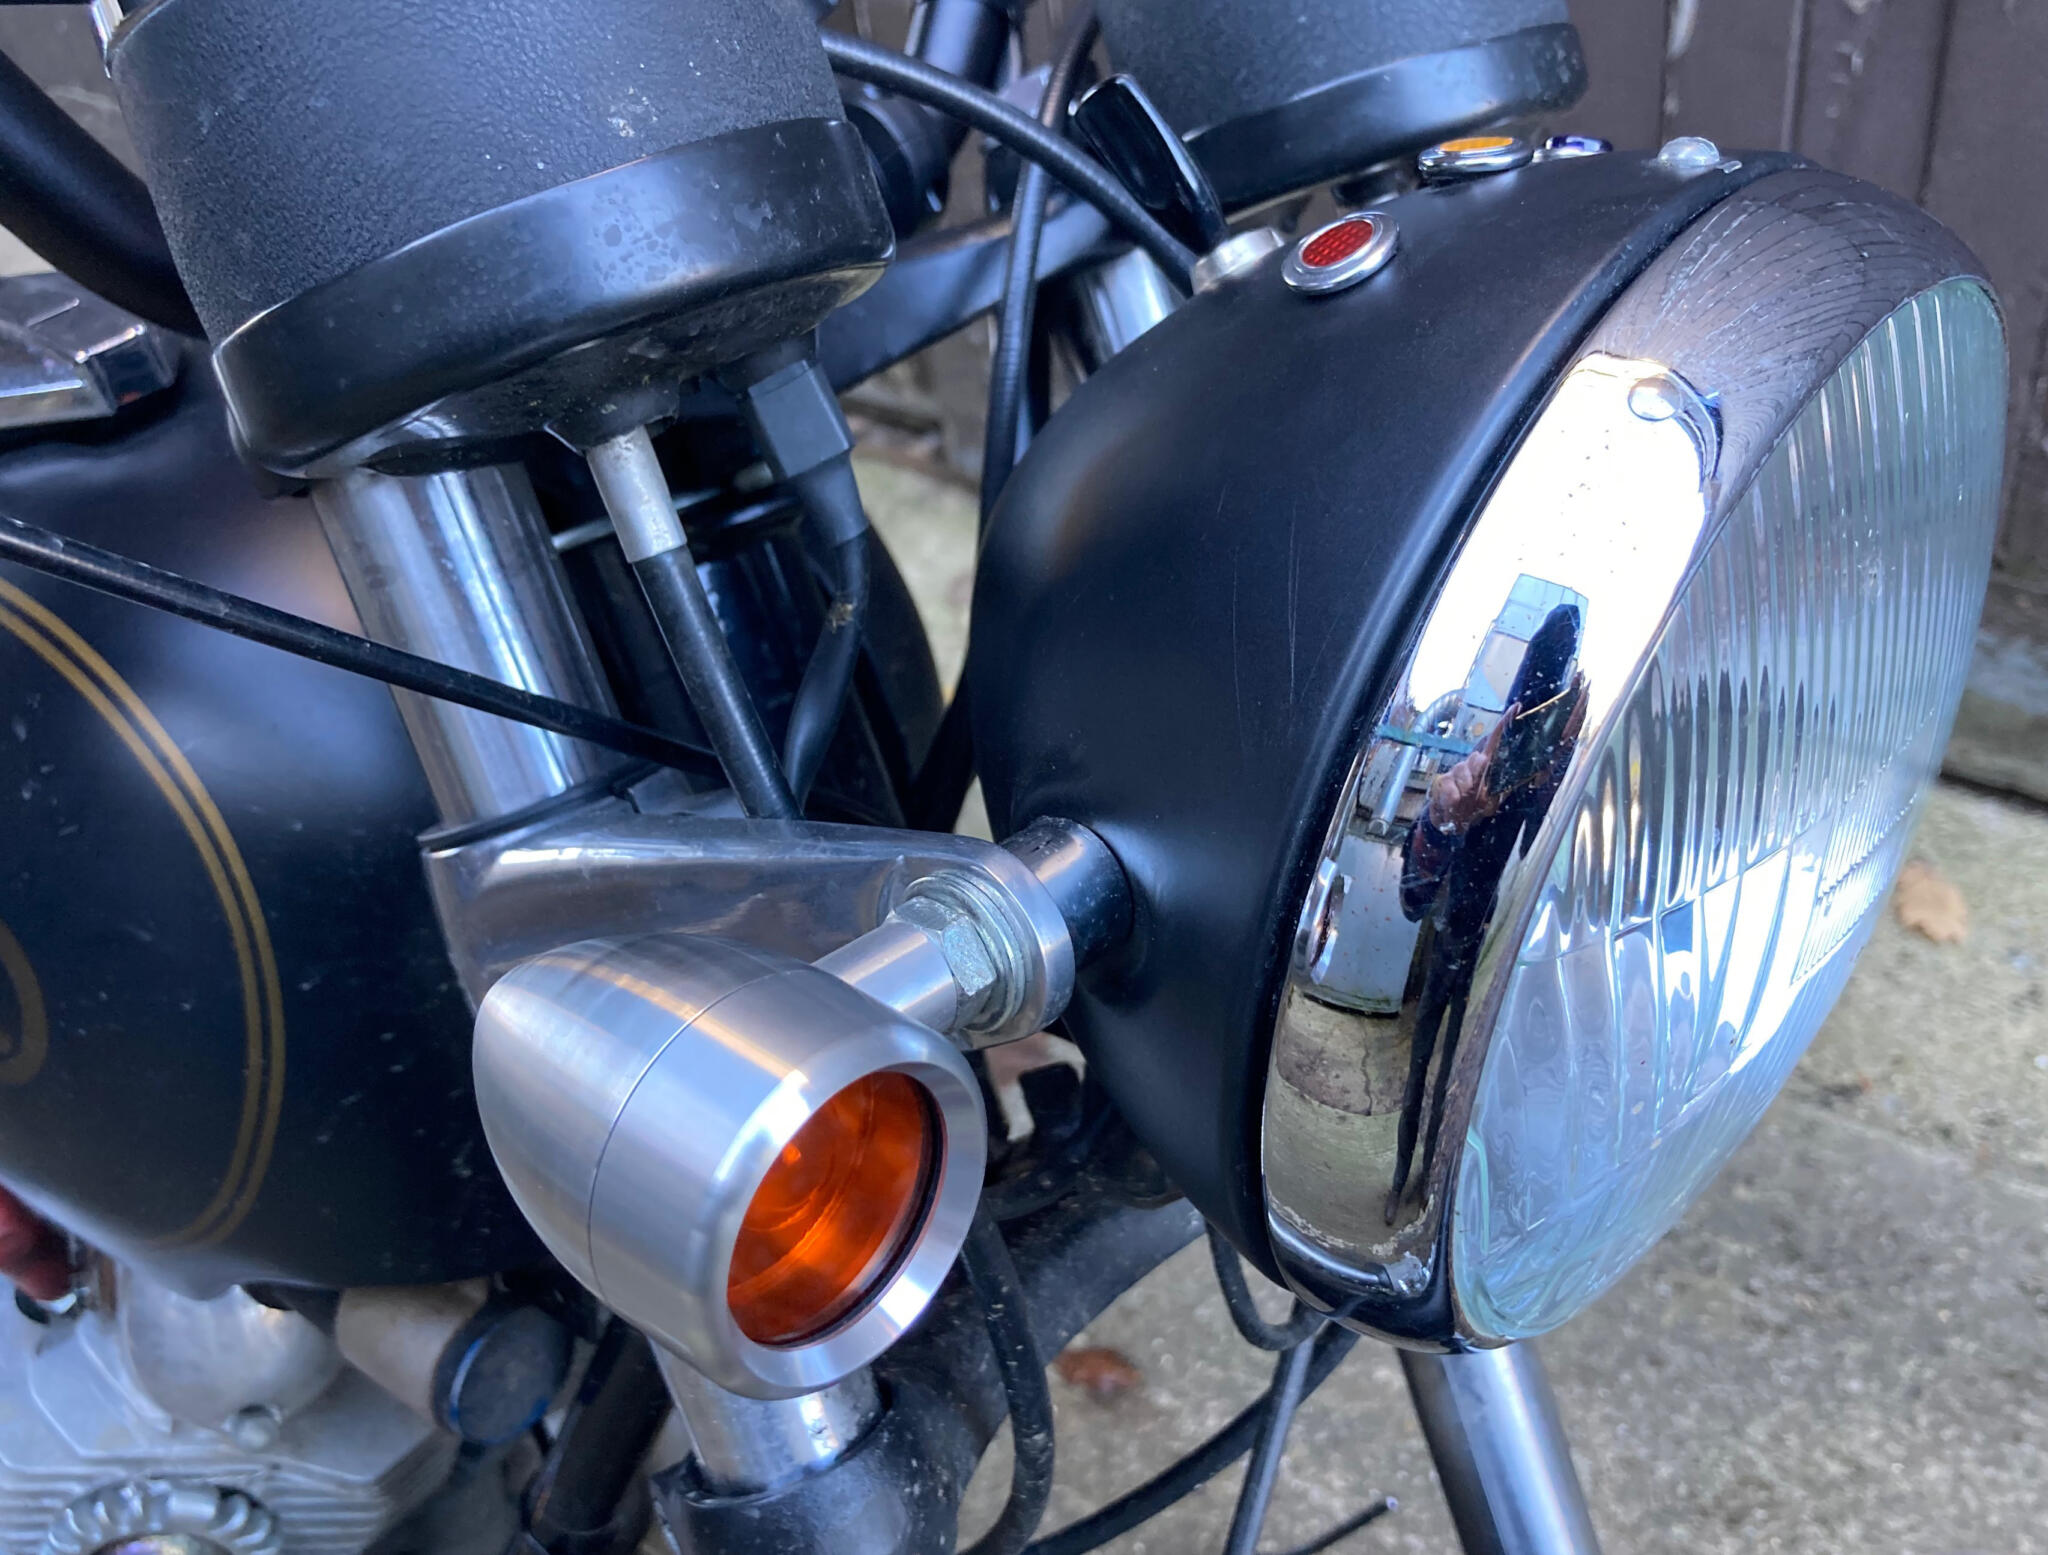
Japanese-made Posh indicators: the best quality I’ve ever seen
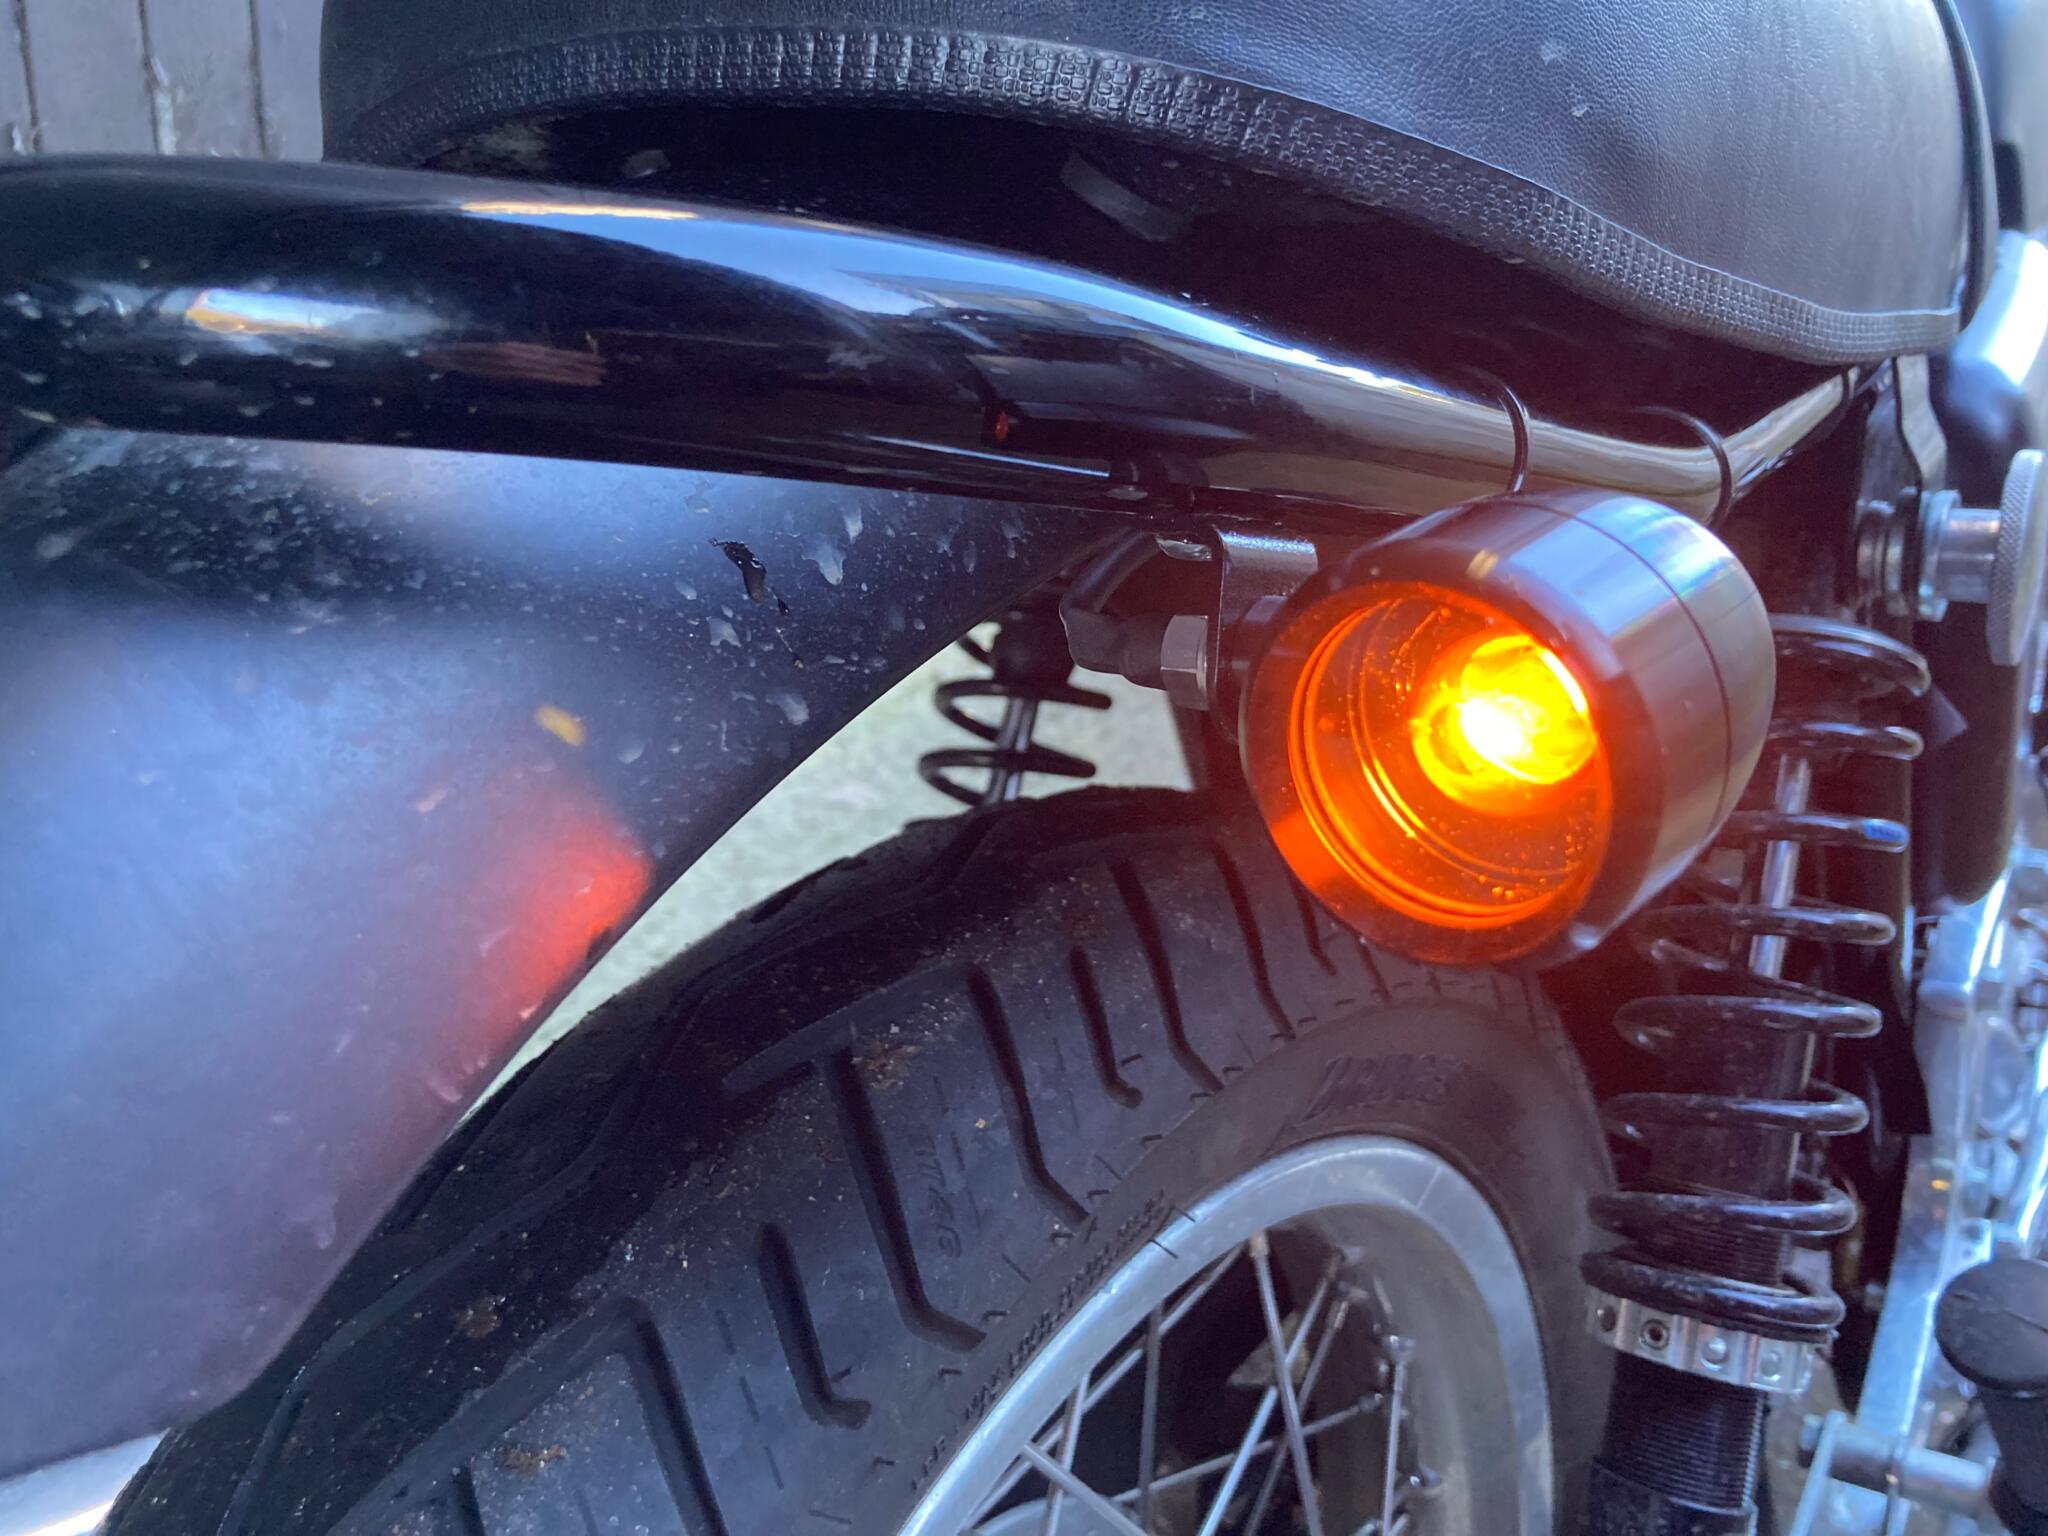
And at the rear, mounted on the custom brackets

Posh tail light looks great and is beautifully made. But it could do with being brighter

Pretty much perfect