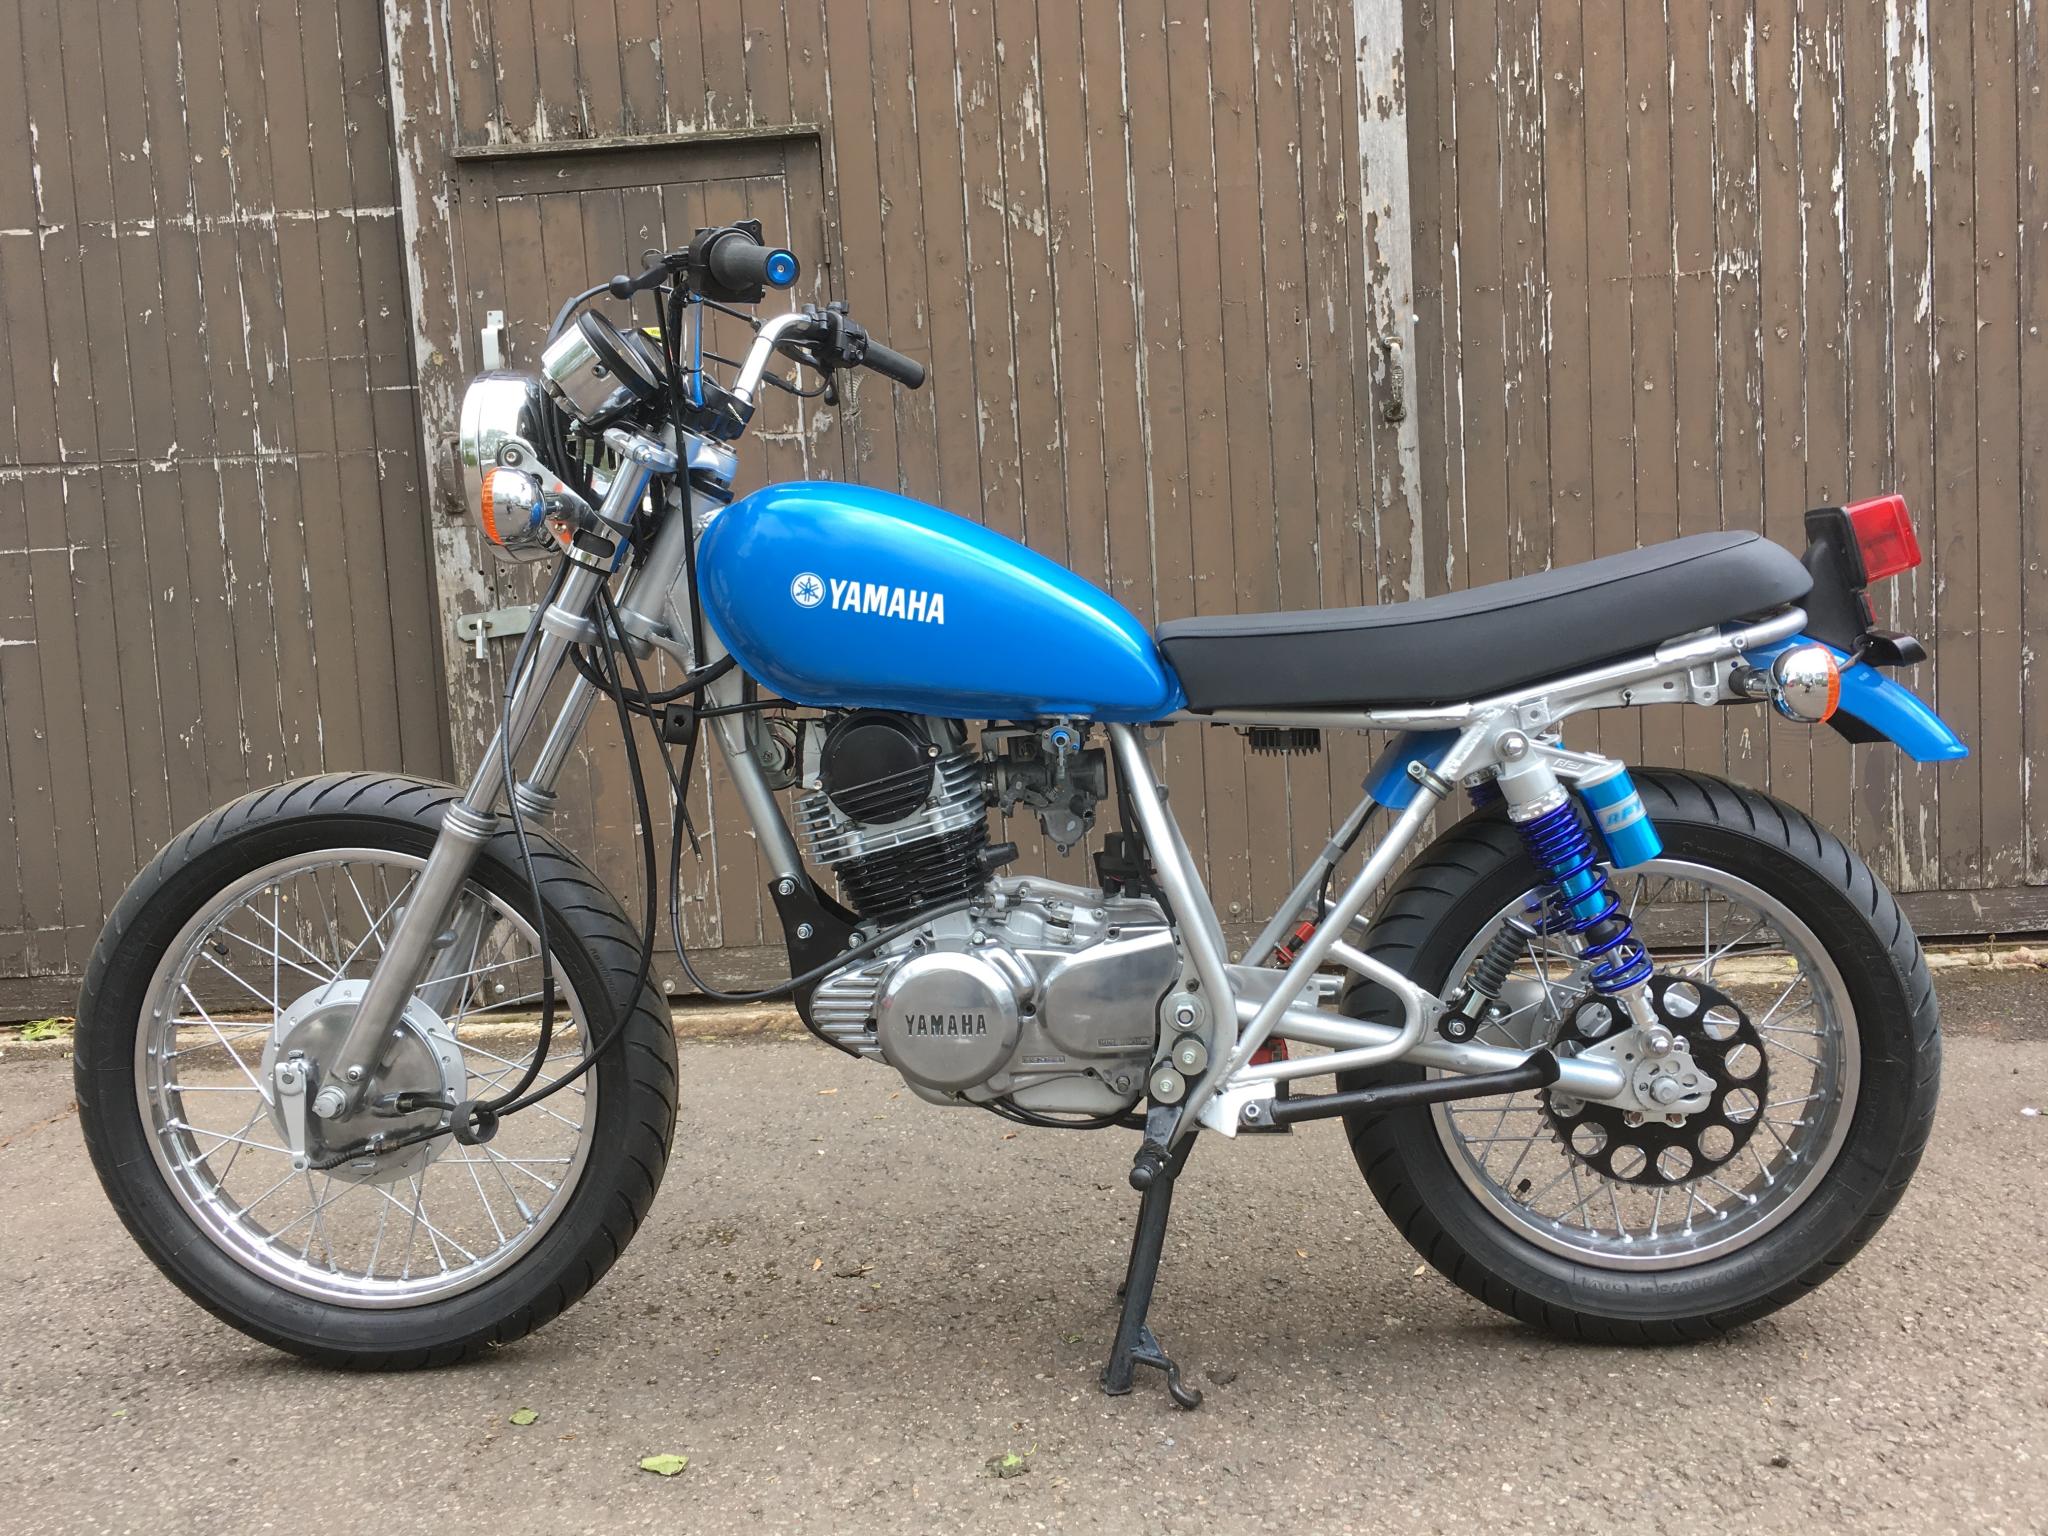
Colin had used an aftermarket kit to change the angle of the tank and fit a new seat
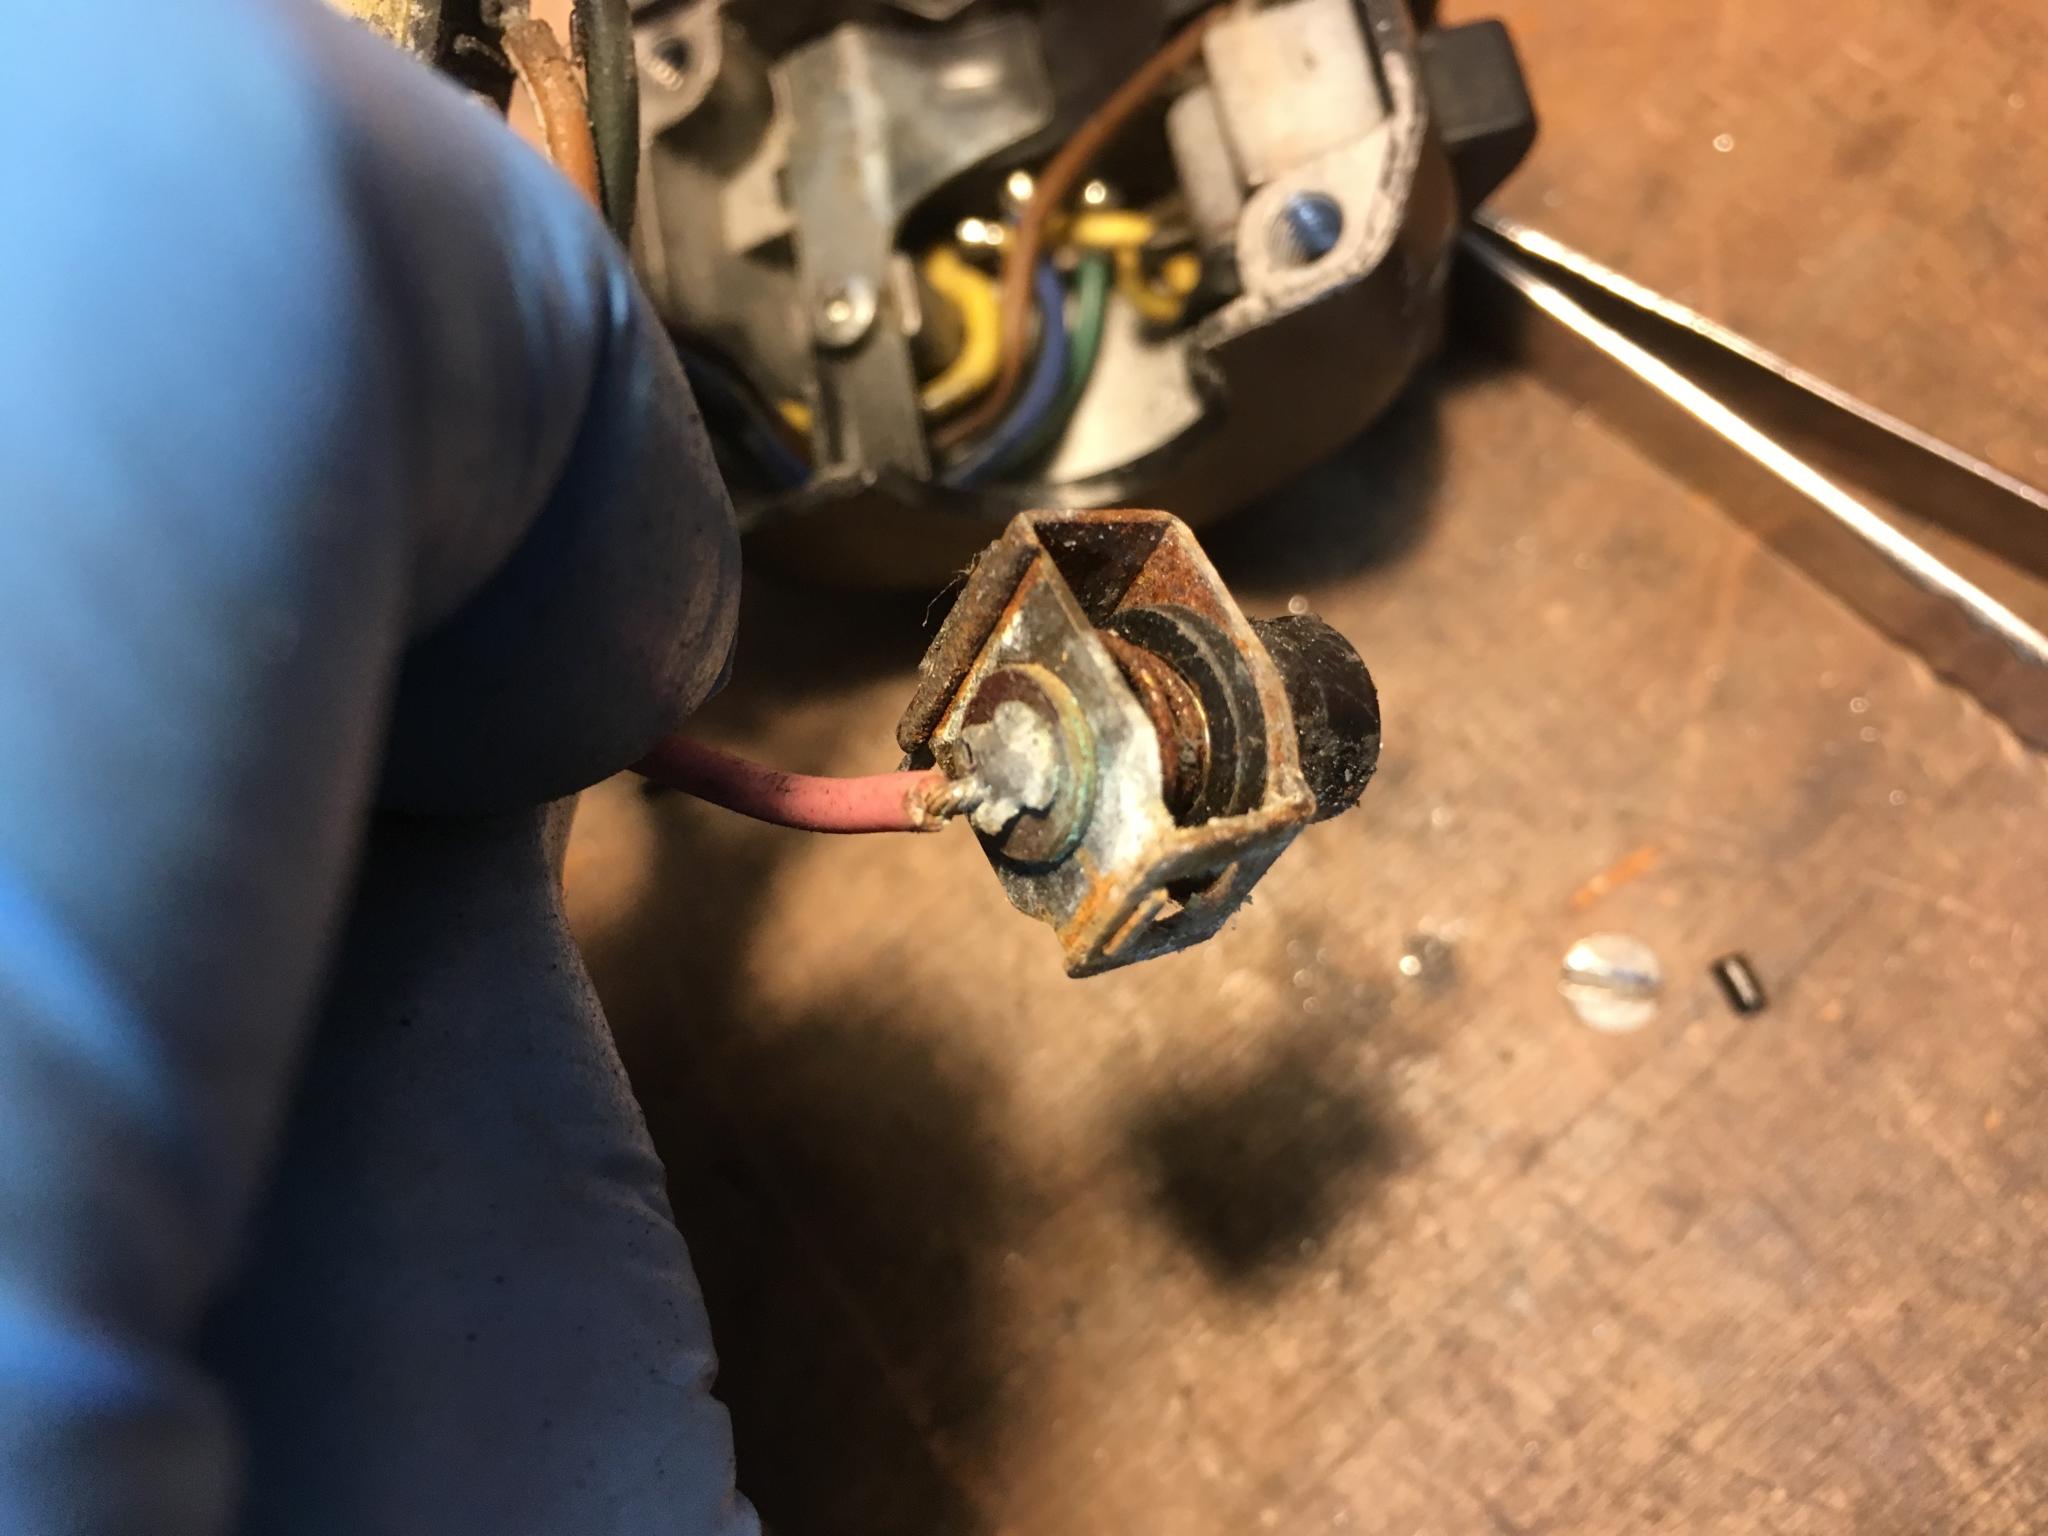
No wonder the horn button didn’t work

And here’s the indicator switch. It was on the blink too – and not in a good way
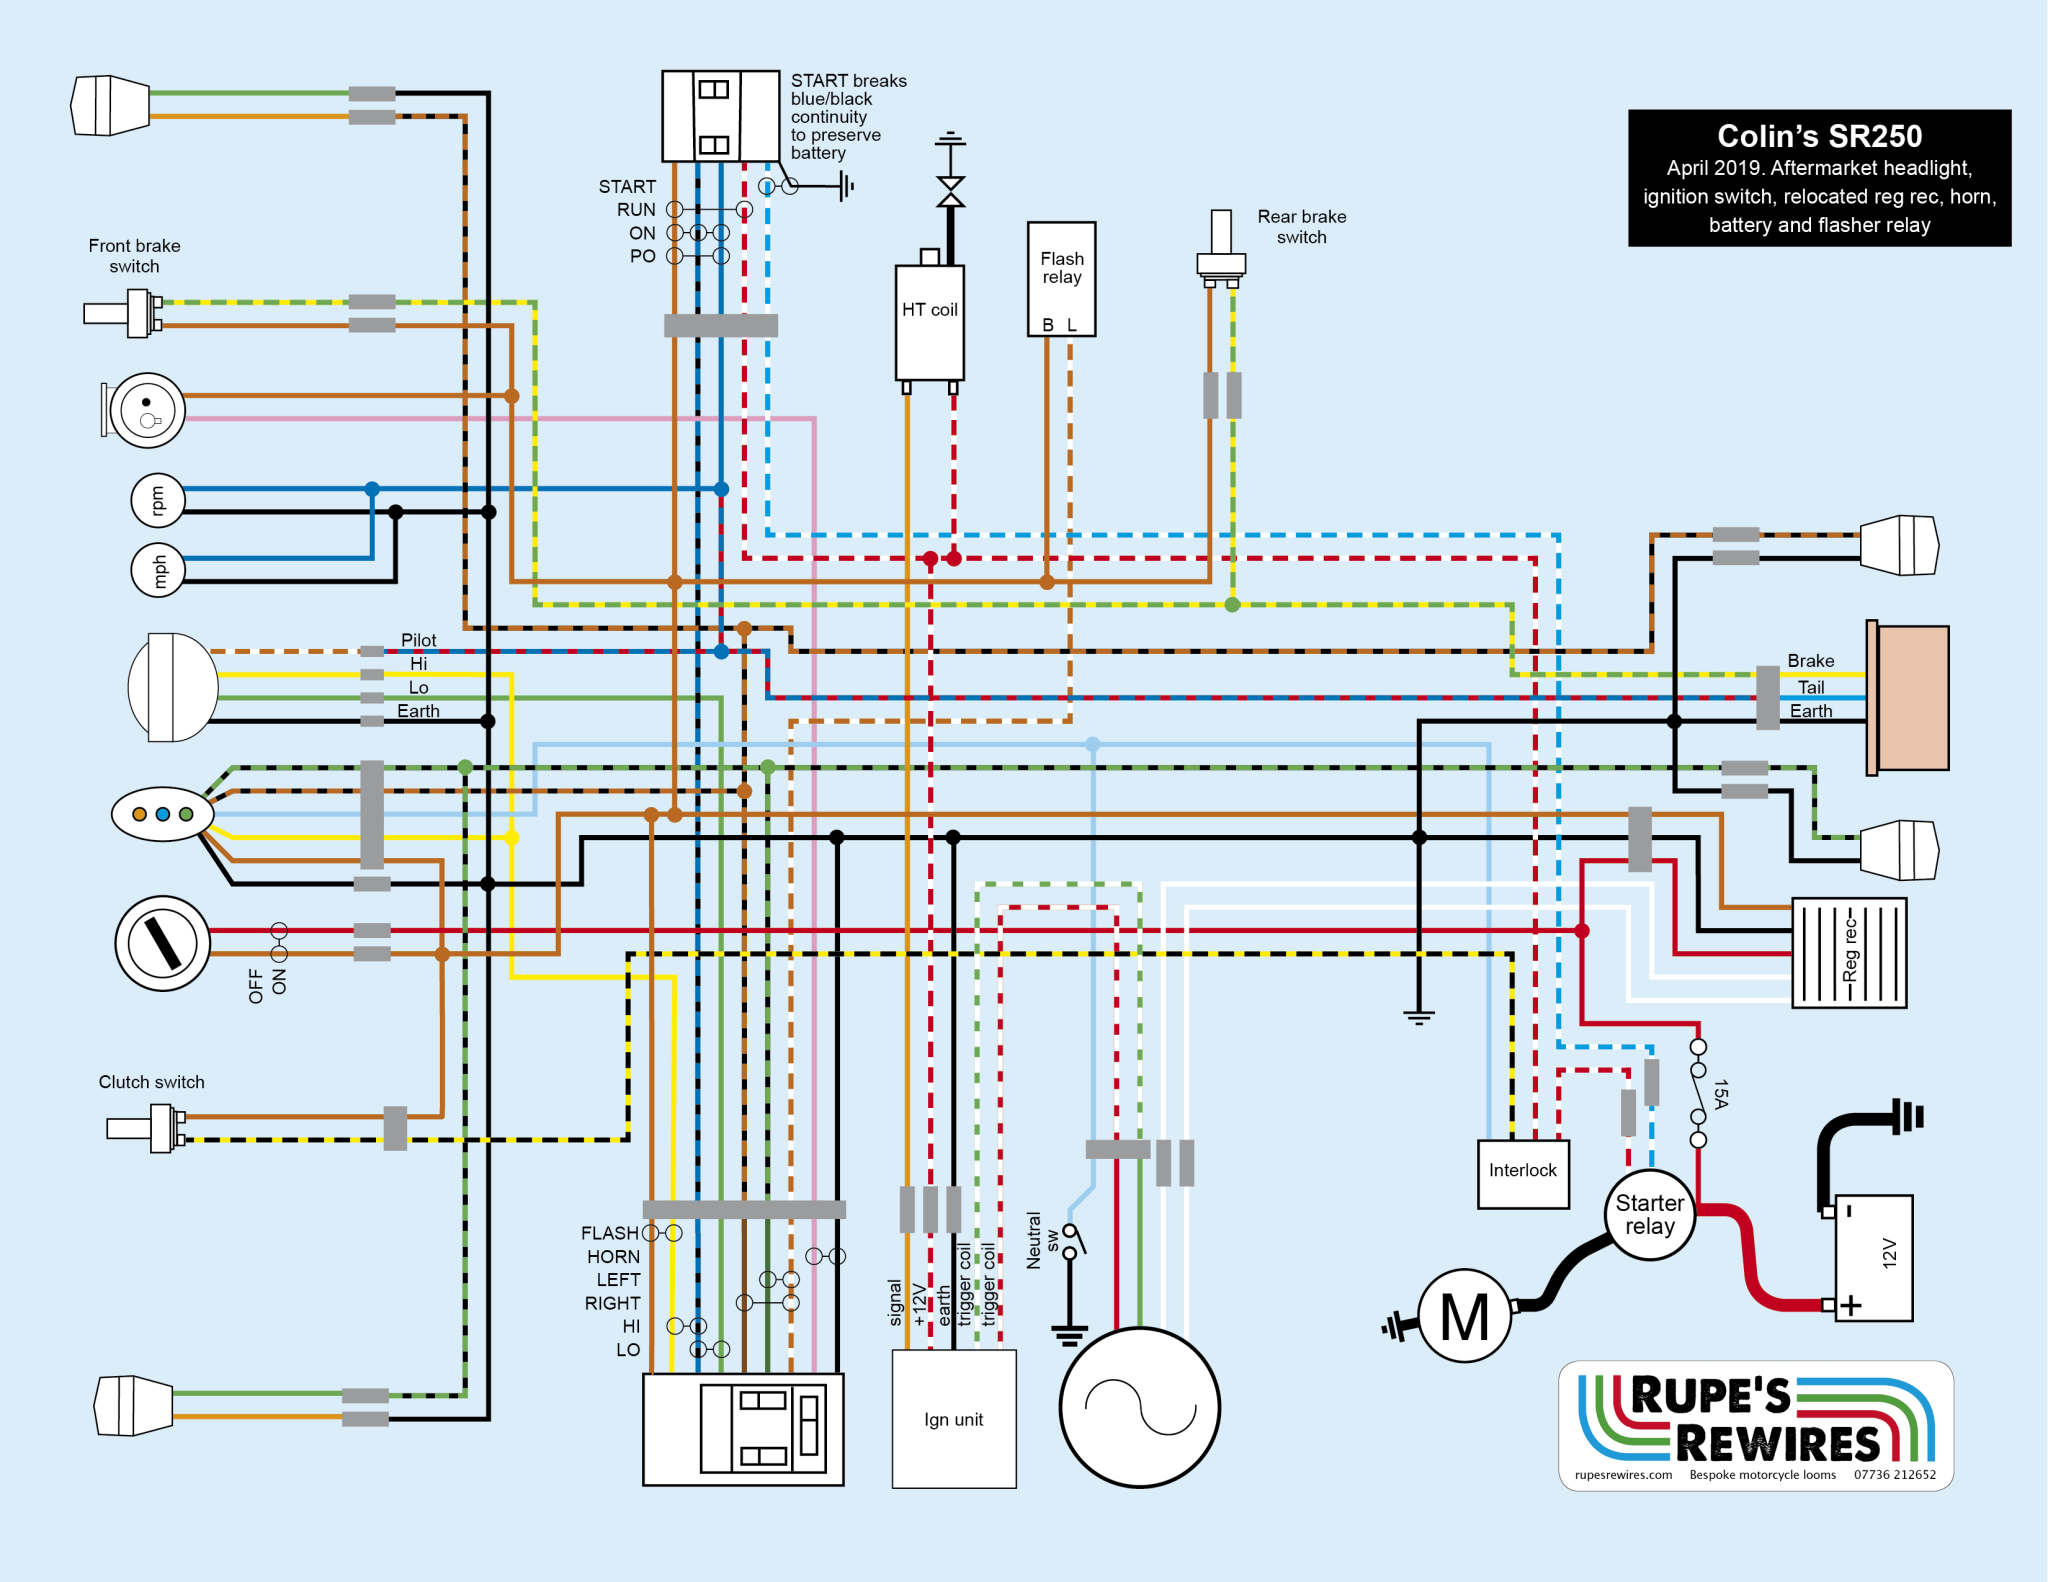
Colin’s Yamaha SR250
There’s an old saying: when you’re up to your arse in alligators it’s hard to remember your first objective was to drain the swamp. It holds true for messing around with motorcycles, because when you customise an old bike you can find yourself sidetracked for months or years by the equally pressing need to restore the damn thing to some kind of working order.
Colin was about half way through his SR250 project when he brought it along for a new loom. He rightly suspected the old loom was trouble, and he’d moved stuff. The battery was under the swing arm in an aftermarket battery box, and the area under the seat needed to stay empty. This meant finding a new home for the flasher unit, horn, solenoid and regulator rectifier – most of which Colin had provided new. This in turn meant spending several hours designing, making and painting custom brackets, often with custom spacers made on the lathe. Obviously it’s best to hide everything out of sight but it’s not always possible, so we made a virtue of the frame cross-bracket and mounted the solenoid on it just under the carb.
Then there are the electrical components themselves. The indicator and horn switches didn’t work, and both switch clusters felt decidedly crunchy. Opening them up showed why: bone dry and corroded. Fortunately these Yamaha switches are great to clean and rebuild (with silicone grease, of course). The tail light wires had been damaged, and needed replacing, and the non-standard rear indicators needed extension spacers making to stop the cables from fouling the edge of the rear mudguard. We used Acetal, a black nylon-type plastic which matched the indicators’ rubber stalks.
As with many bikes, there is no decent wiring diagram online, so the diagram here is largely based on mapping the loom on Colin’s bike.
To keep the cost reasonable after all that we re-used the good parts of the loom, and grafted on new wires where necessary. The diagram slightly modifies the standard wiring to suit the aftermarket ignition switch Colin provided. The electrics now work and, once the bike is finished, should keep working for a long time.
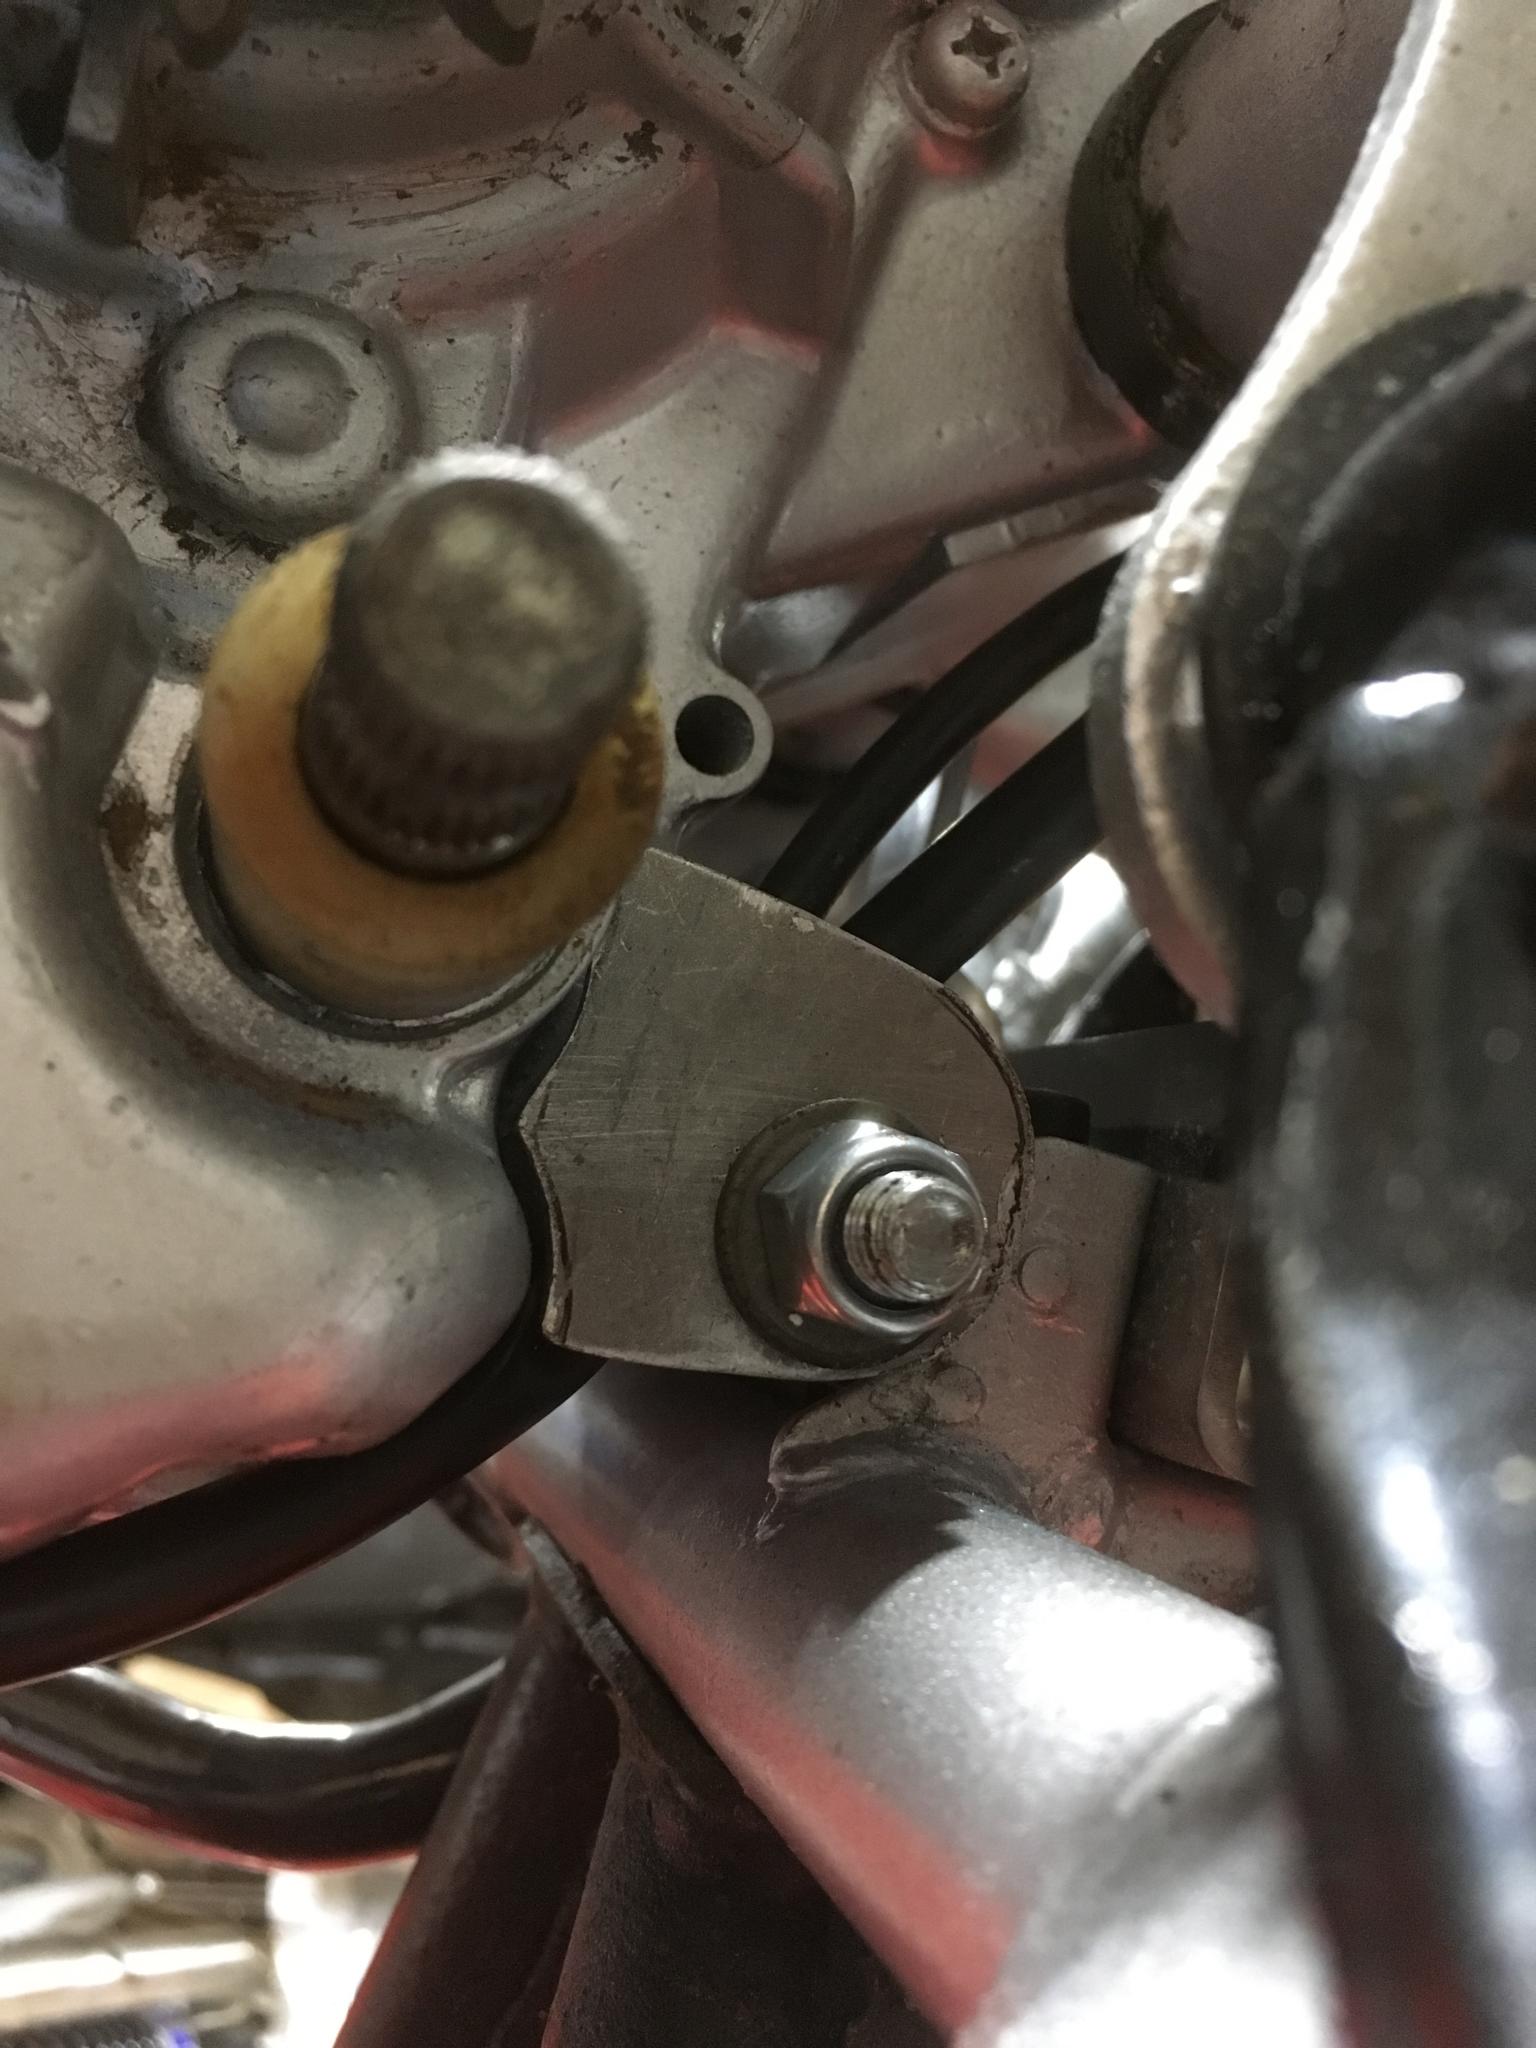
Its really important to protect re-routed charging and starter cables from getting chewed by the chain. This little retaining plate is one way to do that
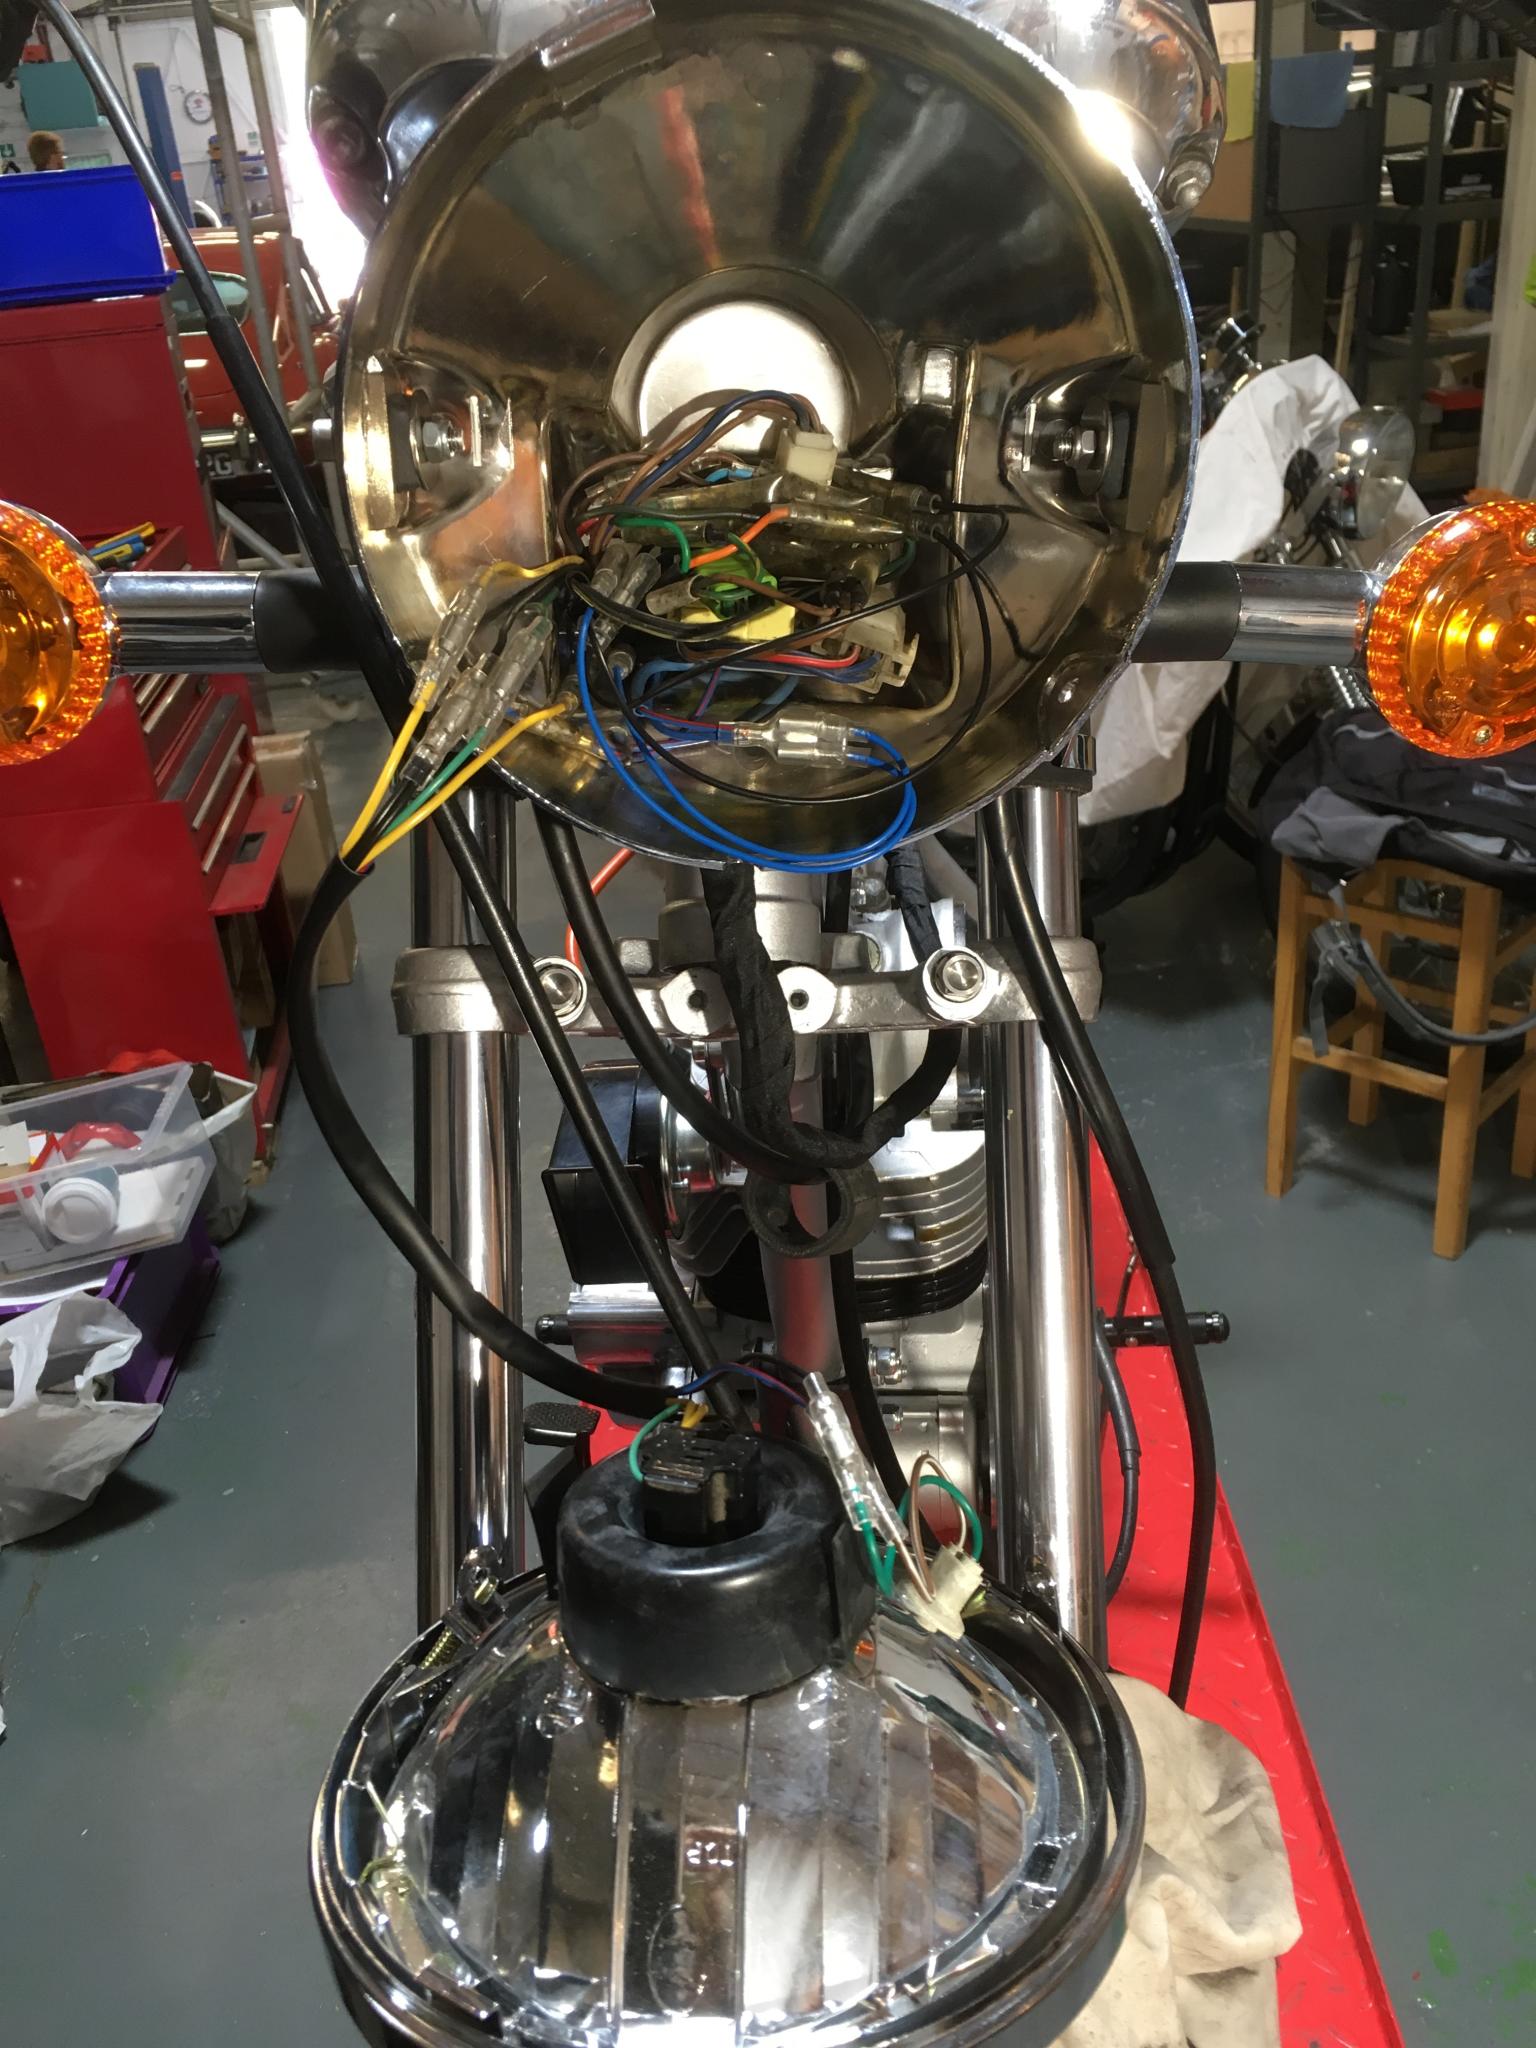
There wasn’t much room in the aftermarket headlight, but careful packing and sorting of the various cables and connectors (both old and new) meant it all fitted in the end