Tail light, ignition switch and left switch cluster rewired, indicators rebuilt with individual ring terminal earths
I tidied up the spare bits of loom with new cable and connectors. It looks better than the original Electrex sub-loom which is too long
Kevin’s Yamaha XT500
You can get pattern looms for quite a few 1970s Yamahas. I think most are made in Taiwan and they are usually a close replica of the original.
So when Kevin fitted one to his XT500 project, alongside an ElectrexWorld 12V conversion, he was surprised to discover it didn’t quite work.
There are two basic issues with fitting a pattern loom:
1) Is it actually the correct loom for your specific model, and has it been made accurately?
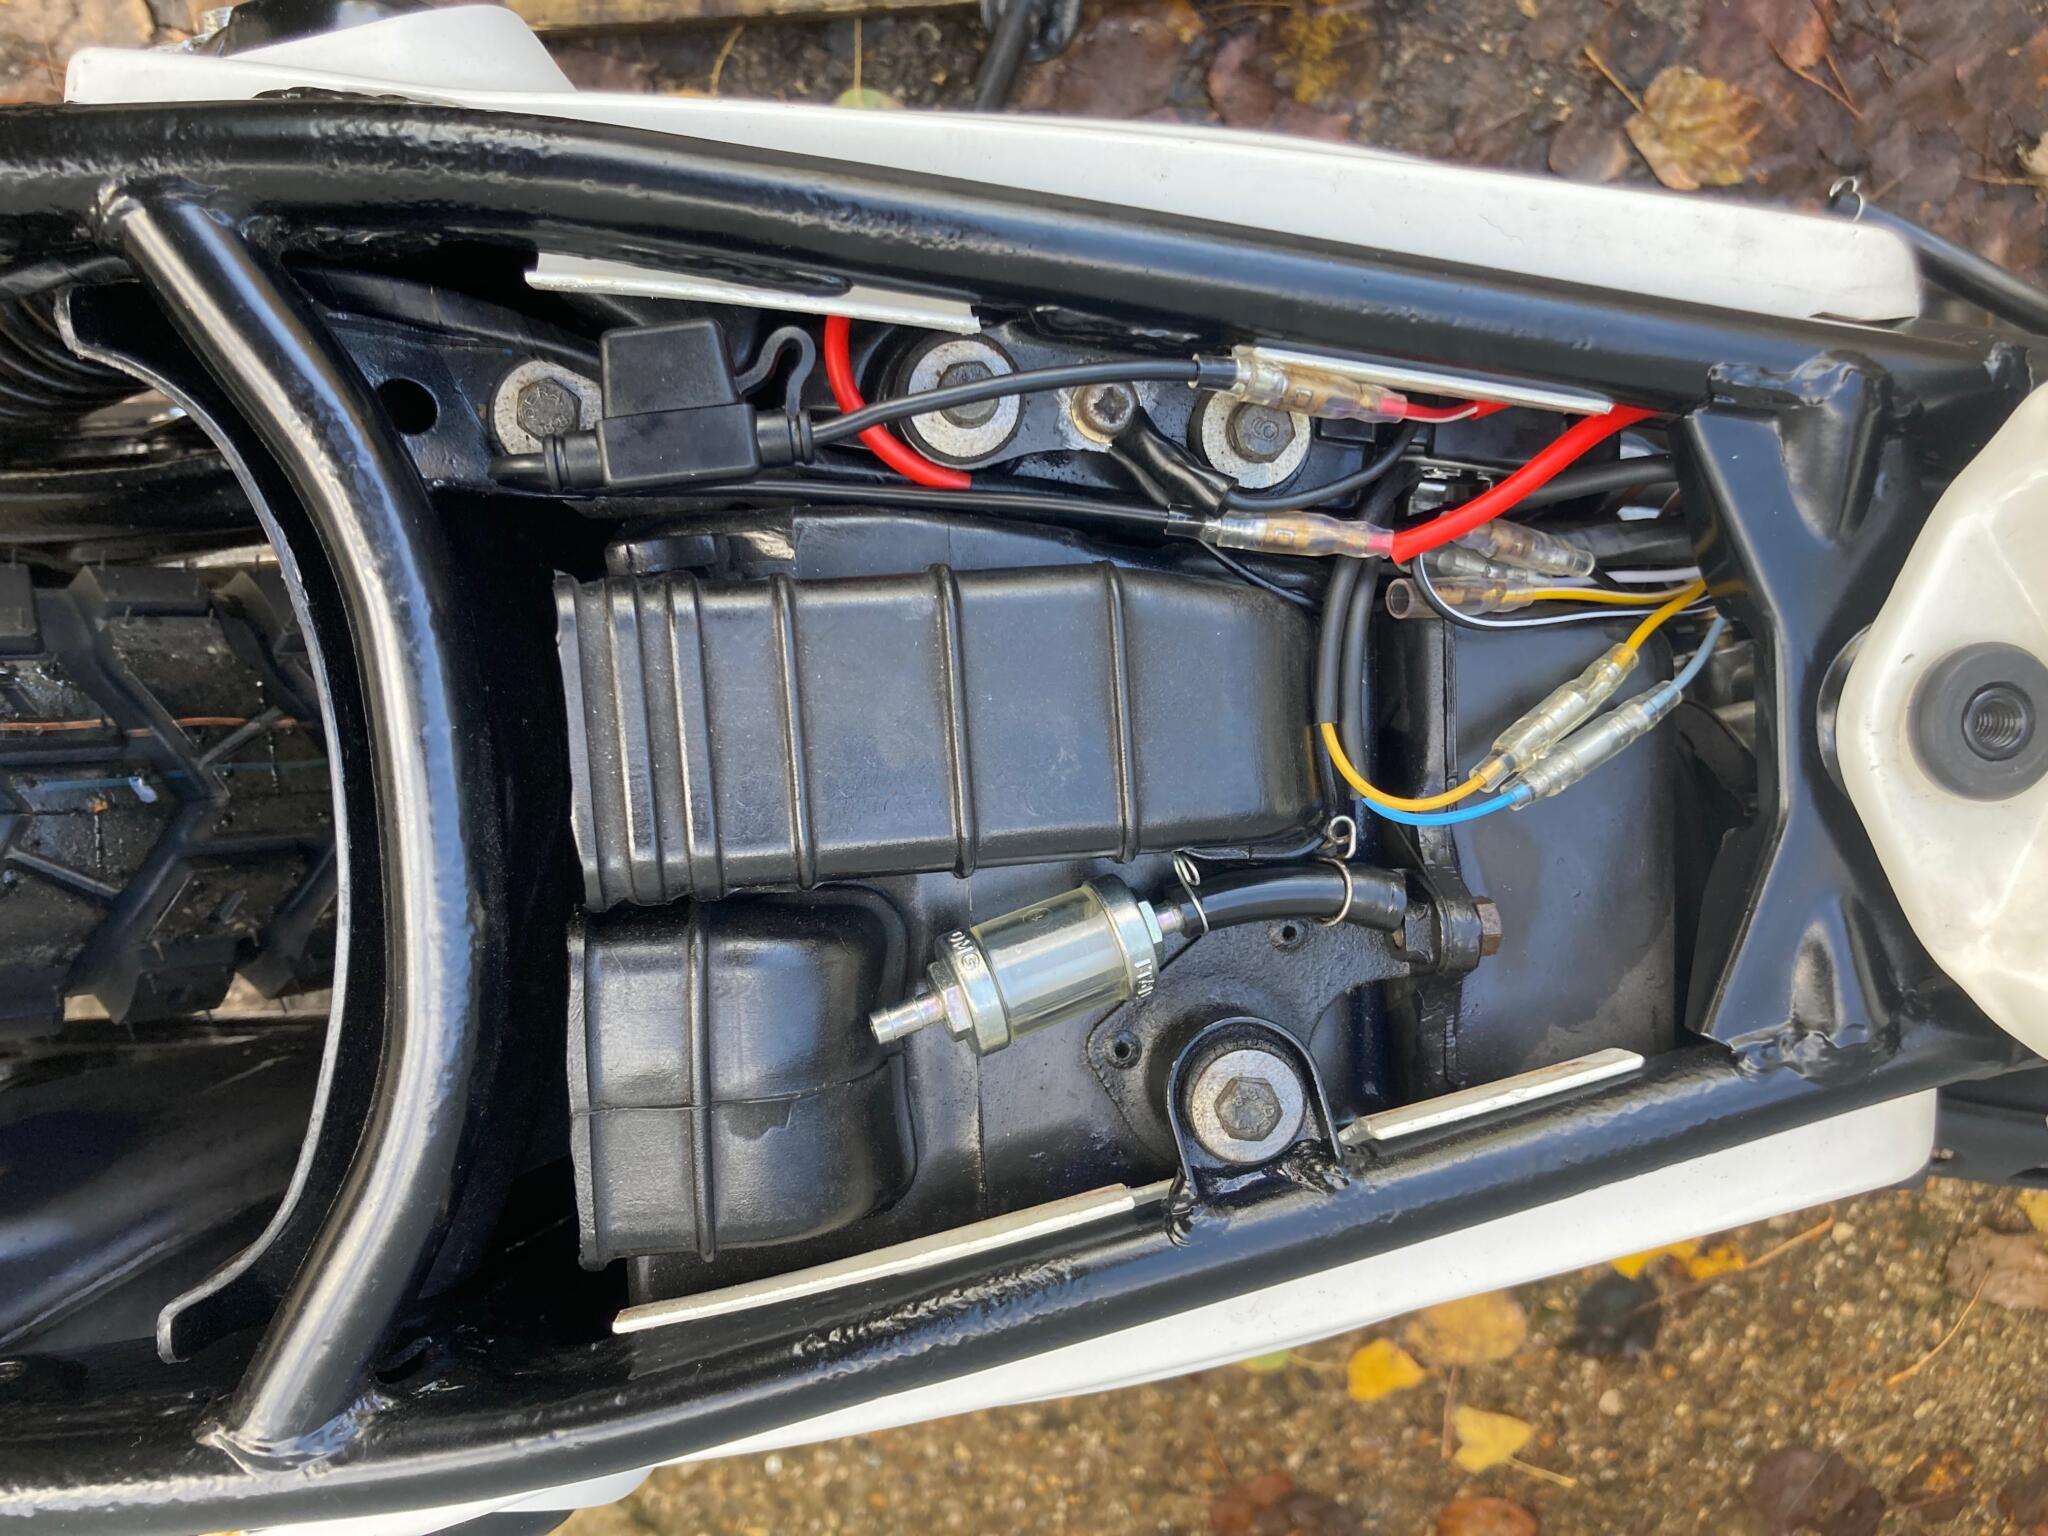
2) What state is the rest of the bike’s electrical gubbins in? Because if you need a new loom, you are quite likely to need a new tail light, stator, switch cluster and the rest.
In the XT500’s case, both of these points matter a lot. Yamaha made many different versions of the bike for different markets. In Kevin’s case the loom was more or less good enough, but the ignition switch and left handlebar switch were from another XT500 variant, with different ways of working the lights. To make all three components work together meant figuring out how they each worked, and combining them in a useful way.
On top of this, we had a 12V conversion kit. It can be a bit puzzling if you’ve never fitted one before, but it actually simplifies things. In its original 6V guise the XT uses switched charging coils which is fairly hard to understand, especially on a black and white diagram. The ElectrexWorld kit does away with that by virtue of having one of them new-fangled regulator rectifiers.
As for point 2, Kevin’s peripheral electrics had lots of old repairs which introduced new issues of their own. Figuring all this out takes a while. You just have to follow the problems wherever they lead.
Kevin is selling this XT, asking £8600. He says it’s completely original apart from the helmet lock and seat strap. It’s got a rebuilt engine, and new tyres, chain and sprockets. And the electrics are really good. If you’re interested, email or phone me (details on my contacts page) and I’ll pass your details on.
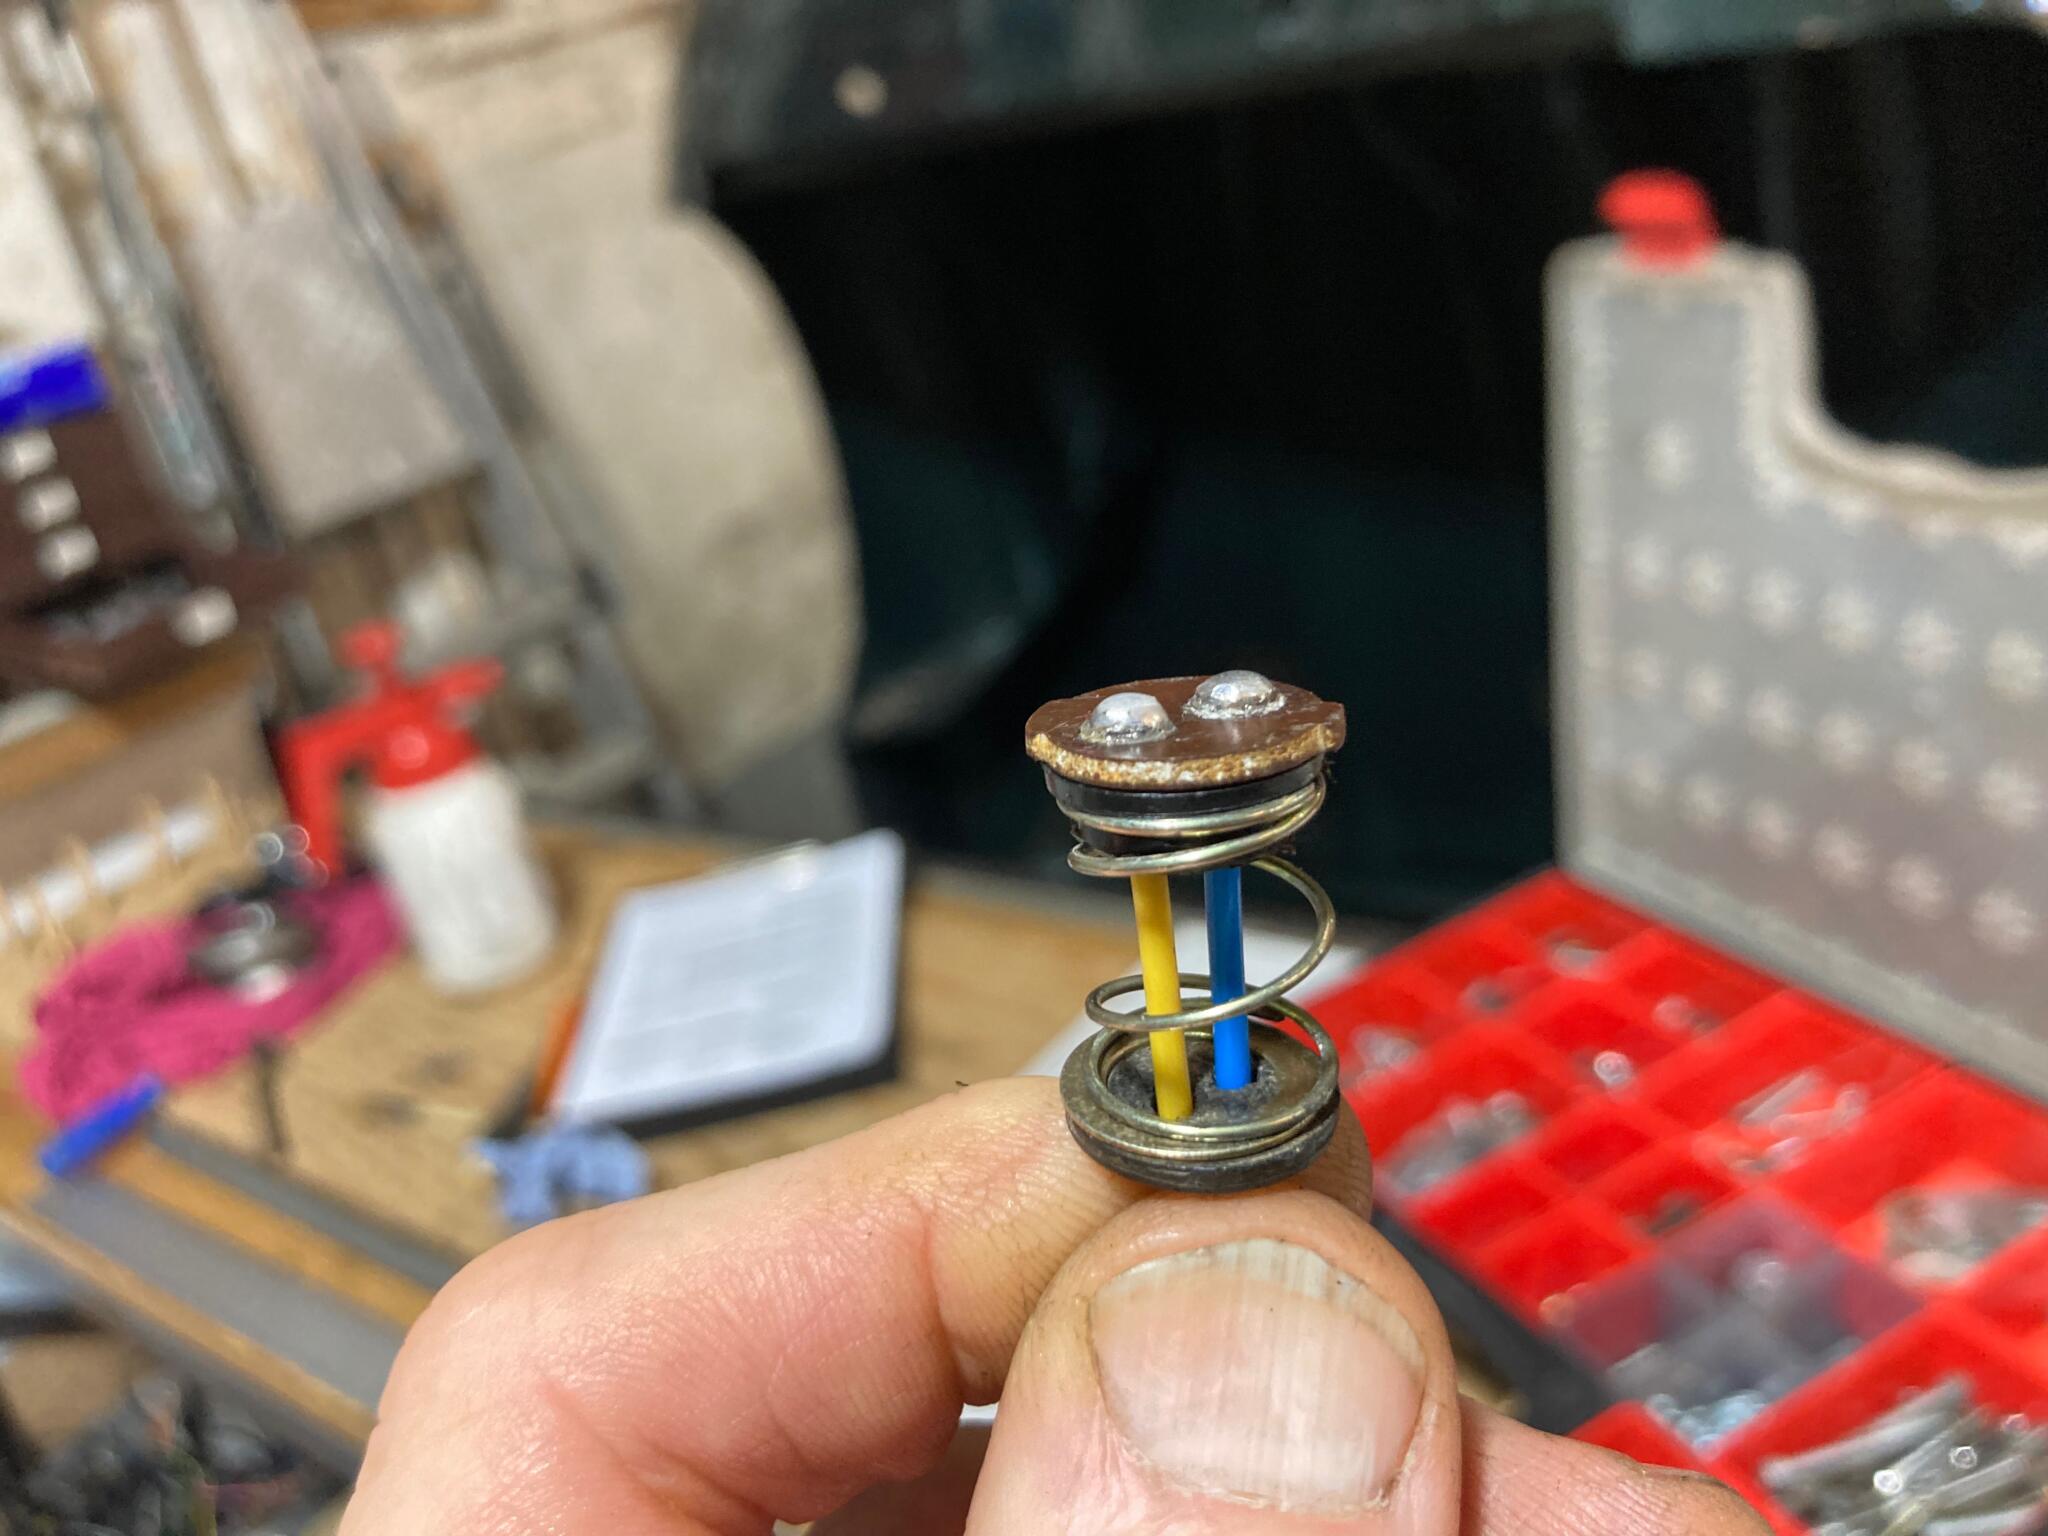
The tail light was really knackered. This is my repaired version. The black bit under the contacts is a shouldered spacer I made to make sure the feed wires can’t short to earth via the spring
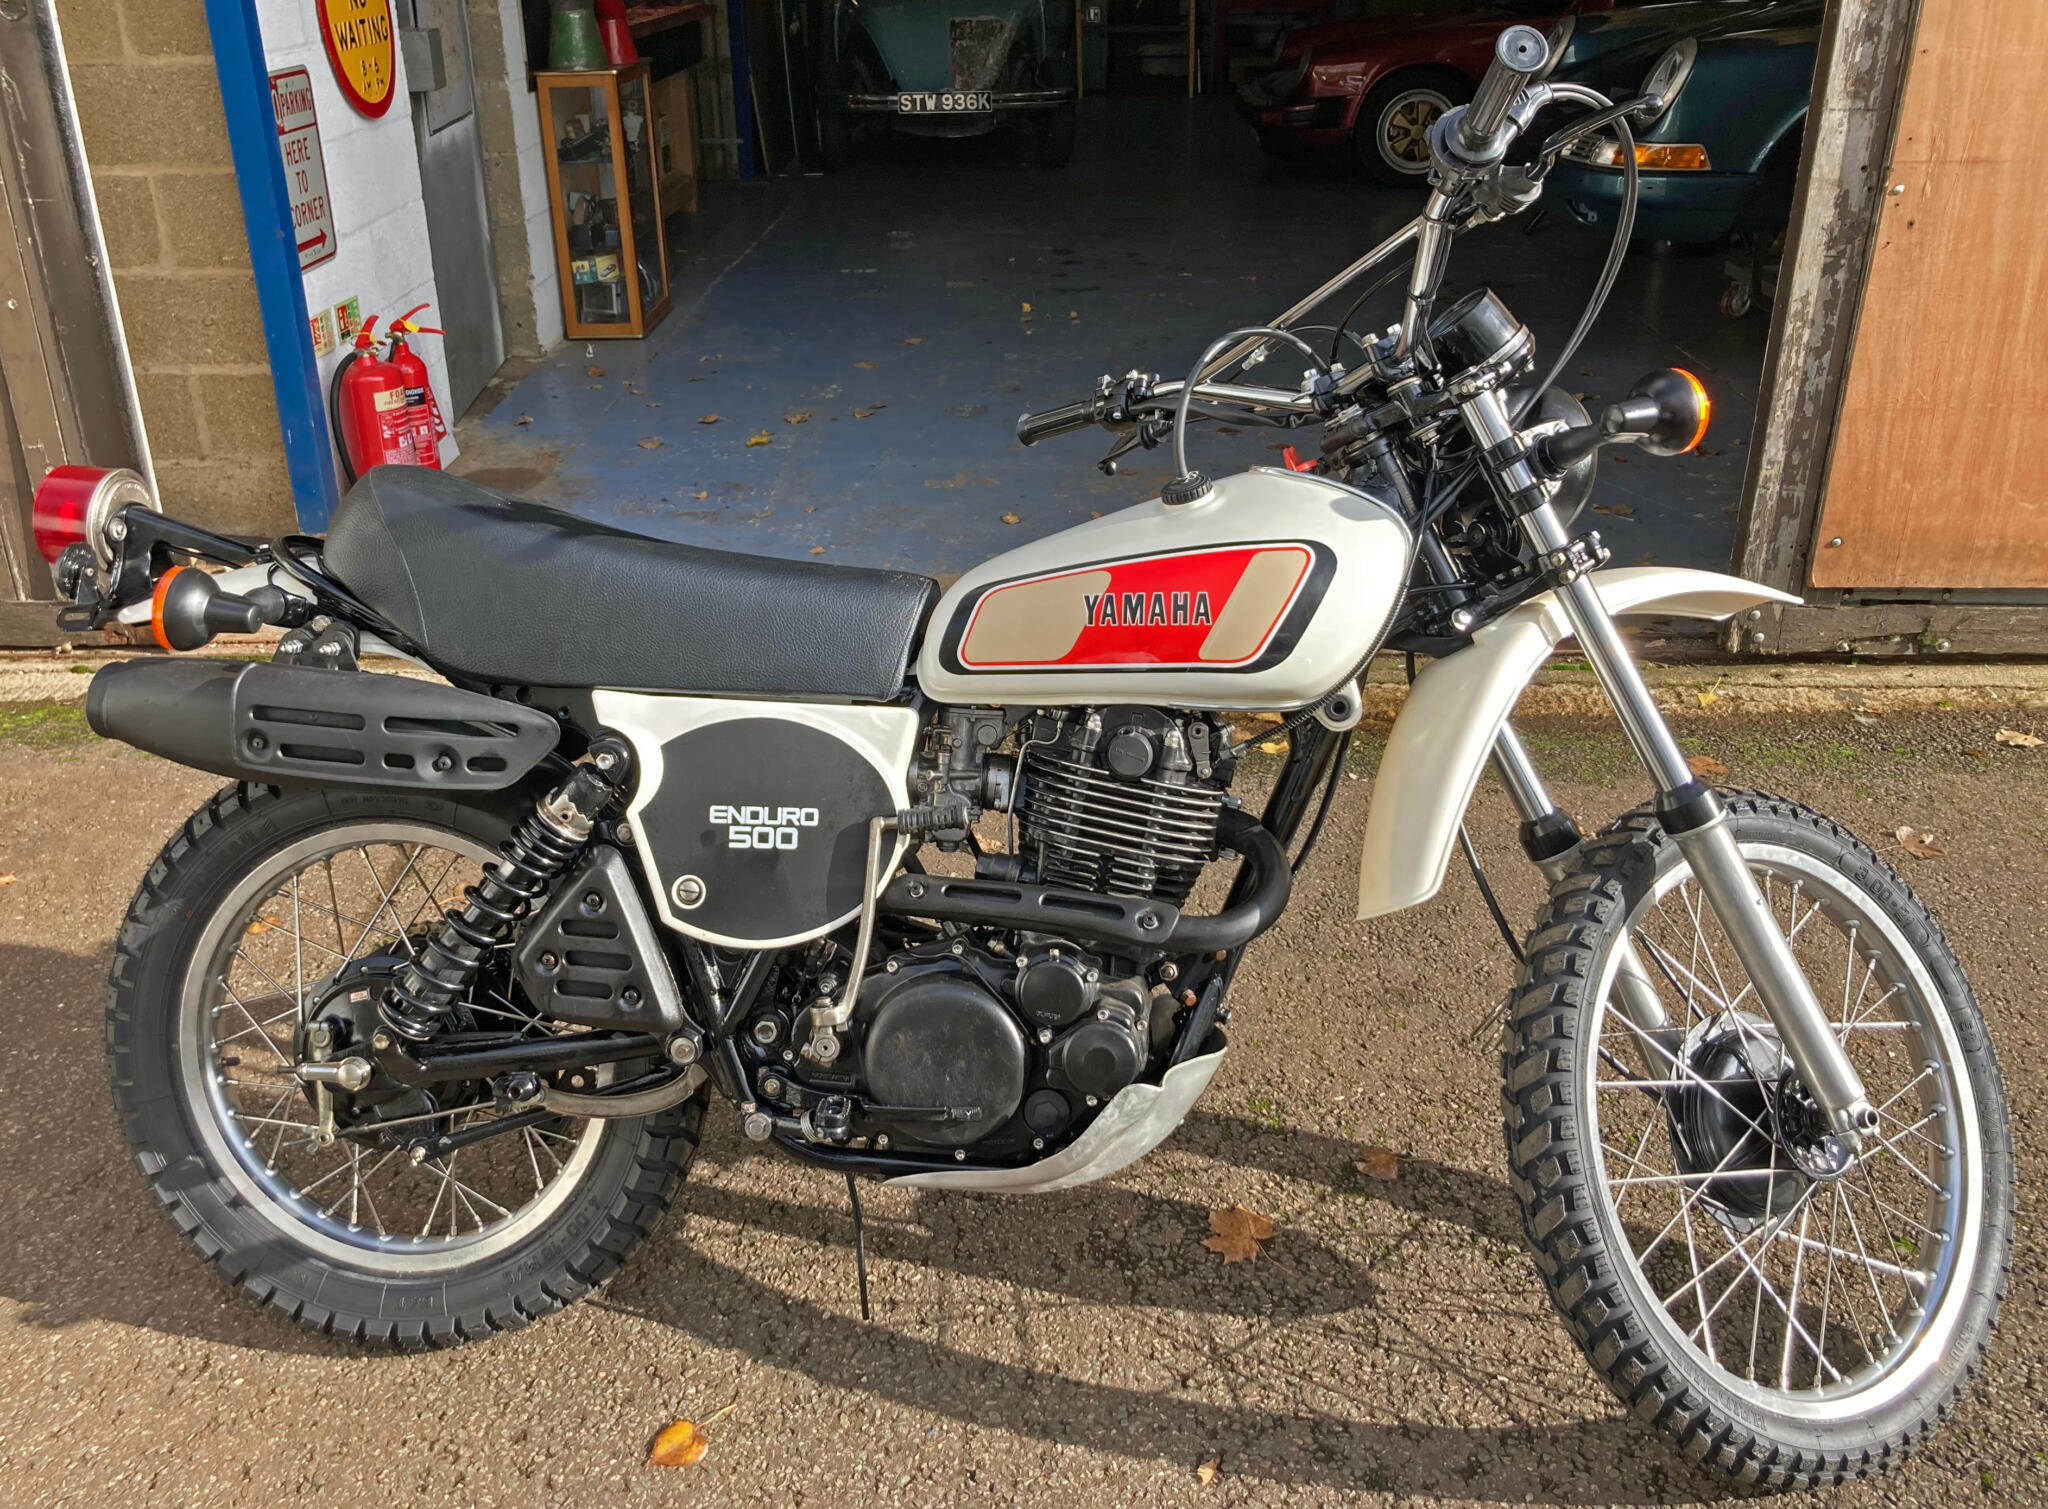
Almost completely original – apart from a 12V conversion, which is a no-brainer improvement