
A classy and much loved 1990s sports bike
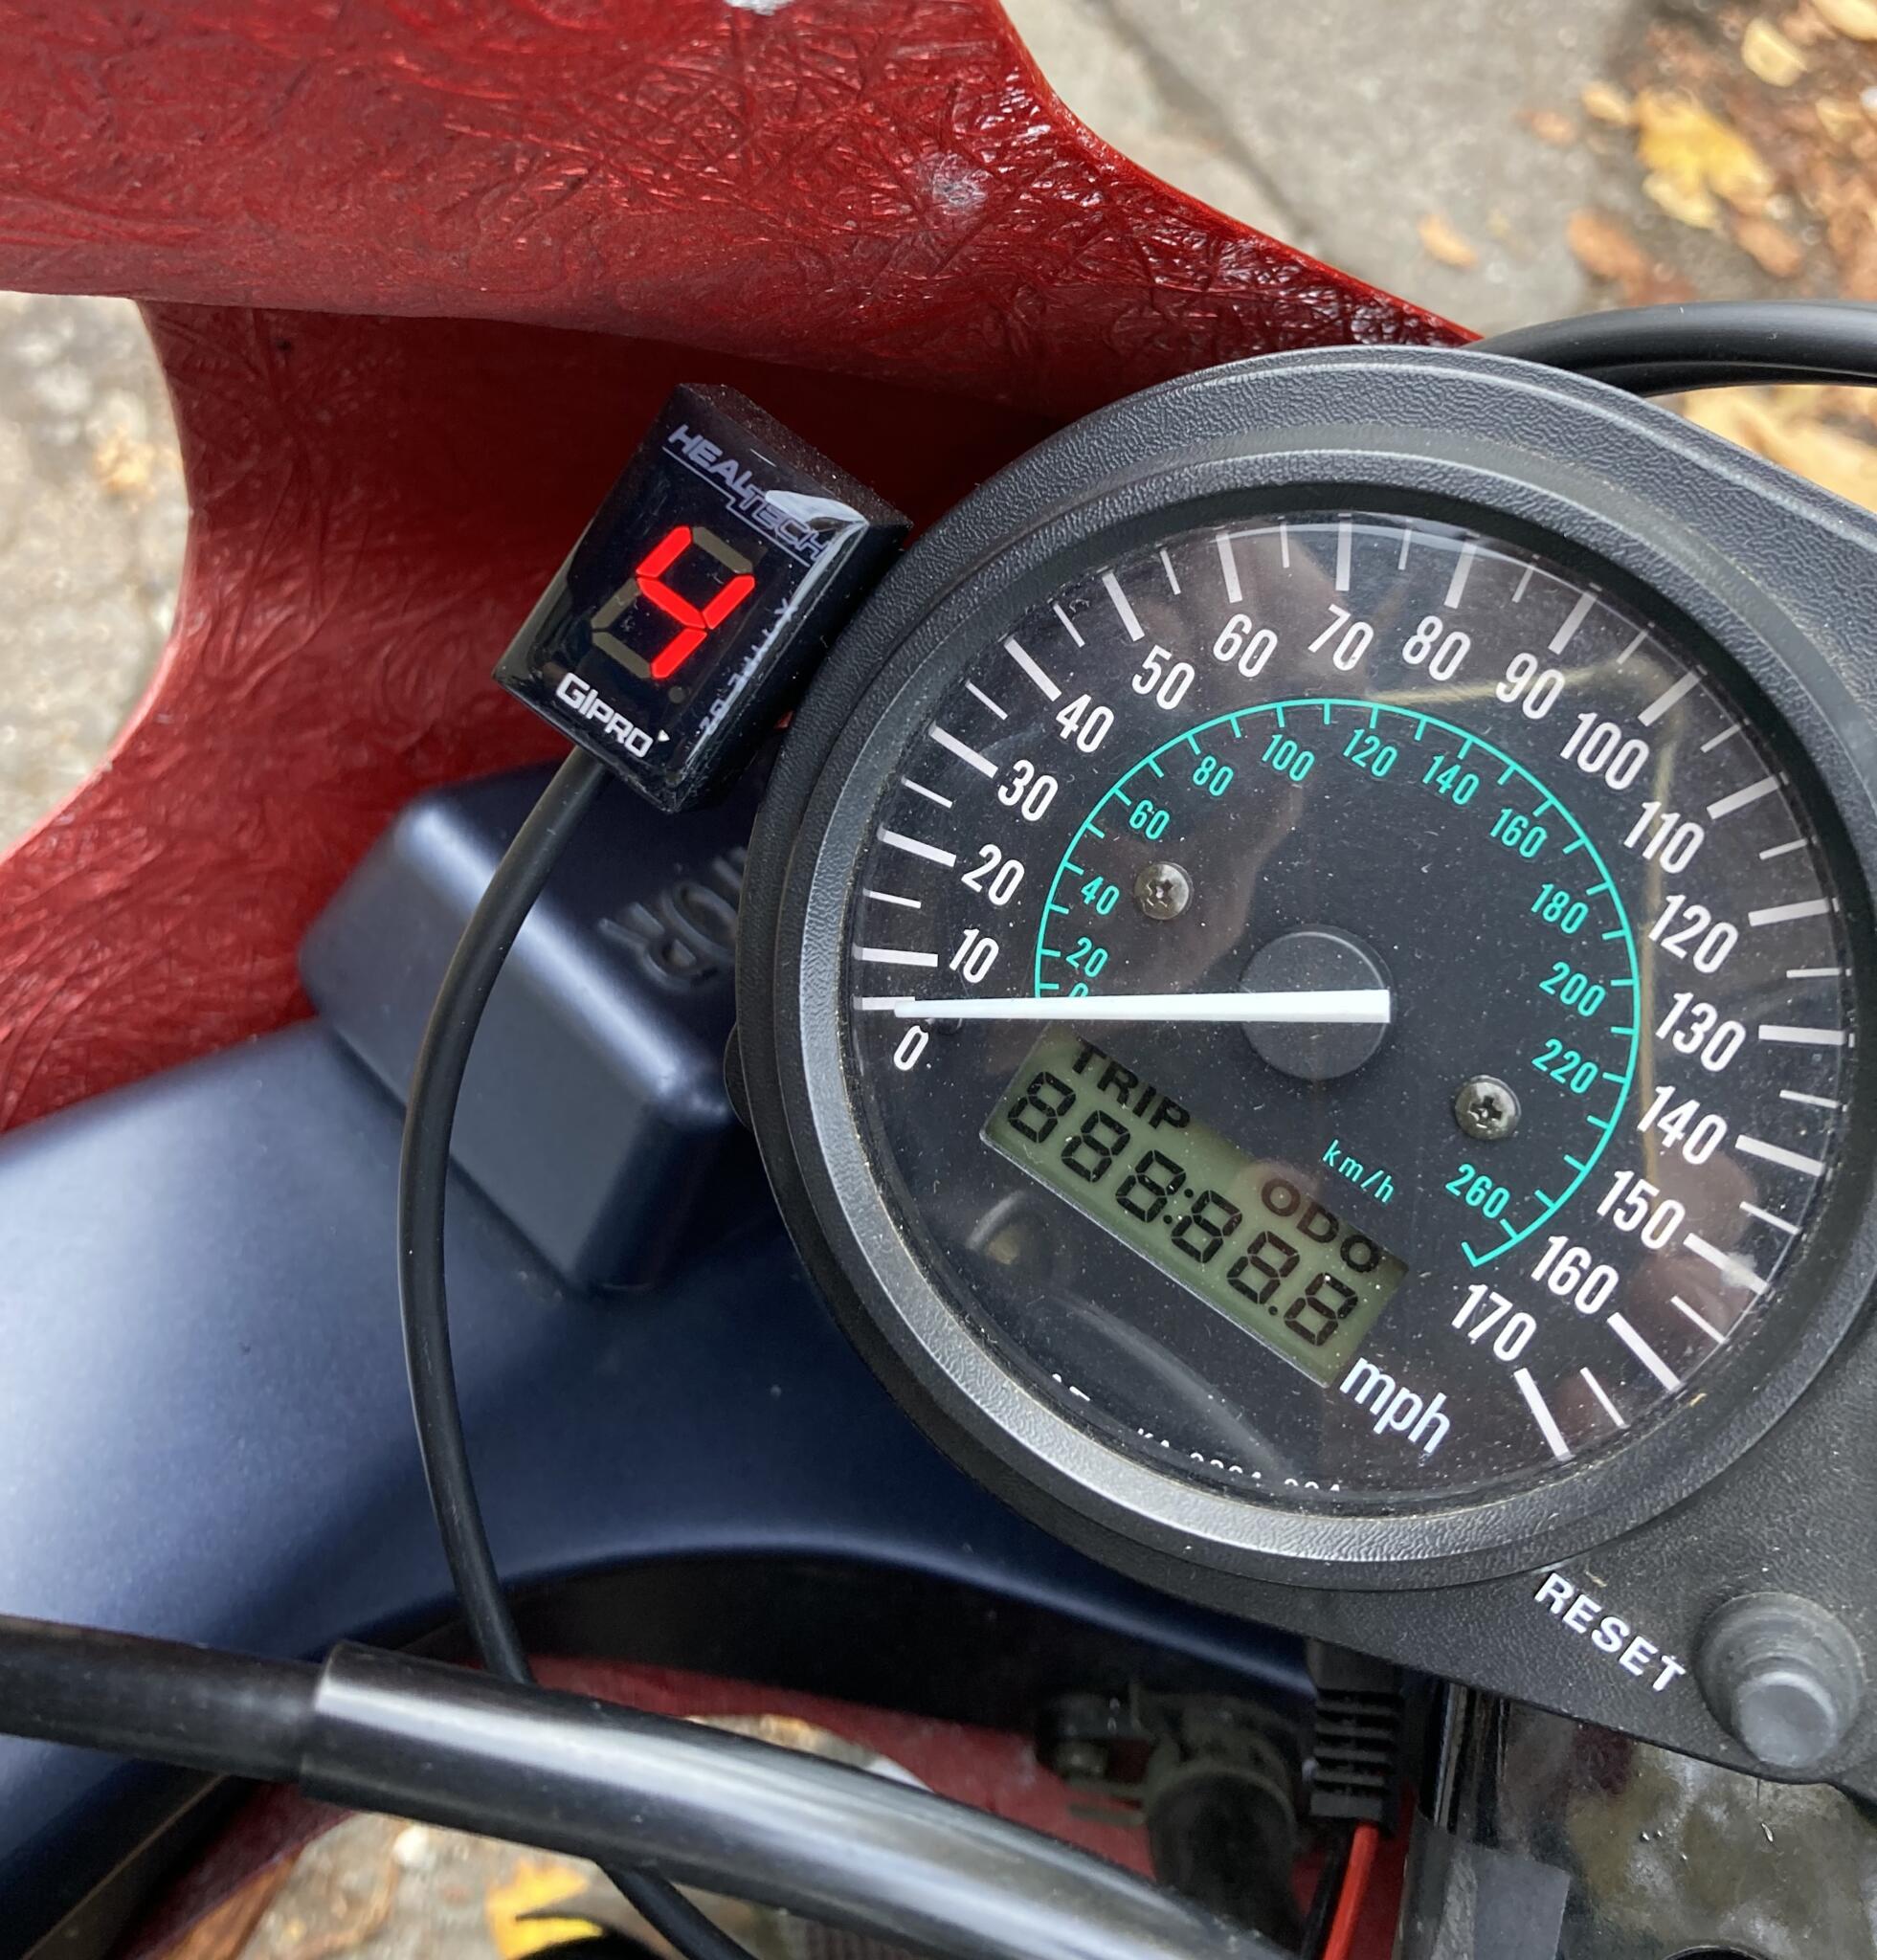
After dropping the gearing for track days, Paul wanted a gear position indicator
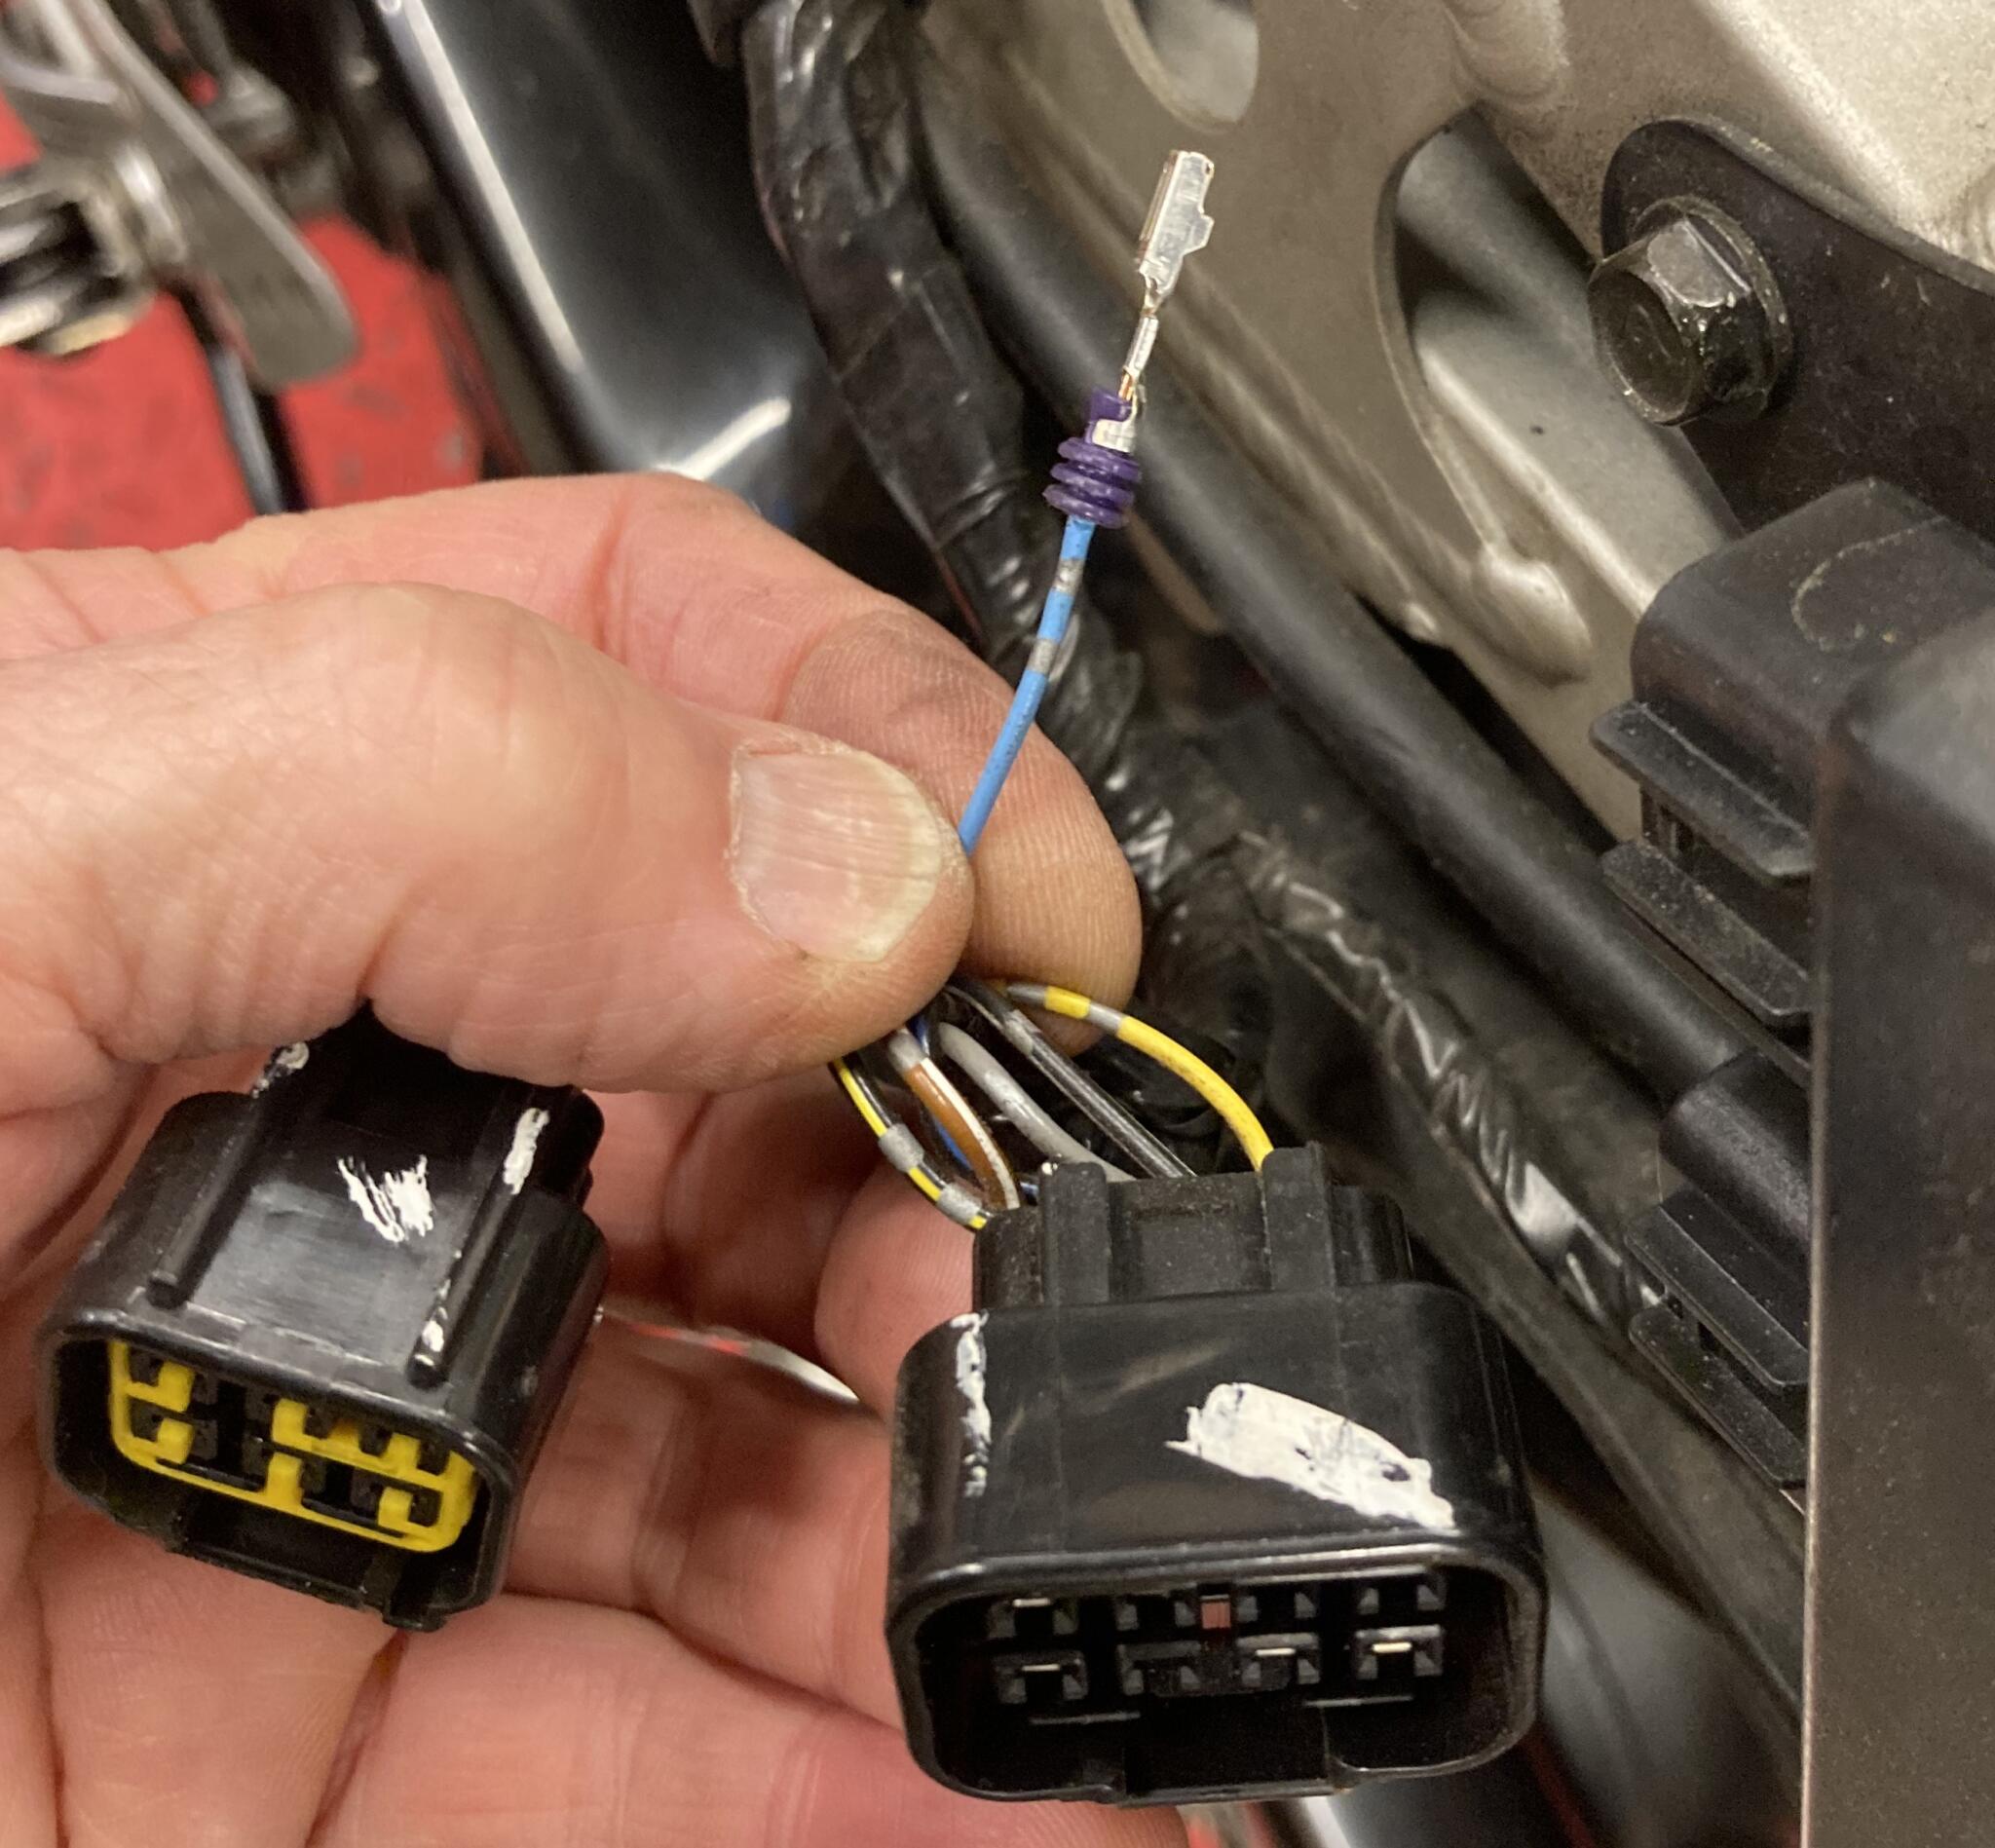
It’s a high tech device, but the kit provides you with a tap connector to tap into this rpm signal wire. Tap connectors are barbaric…
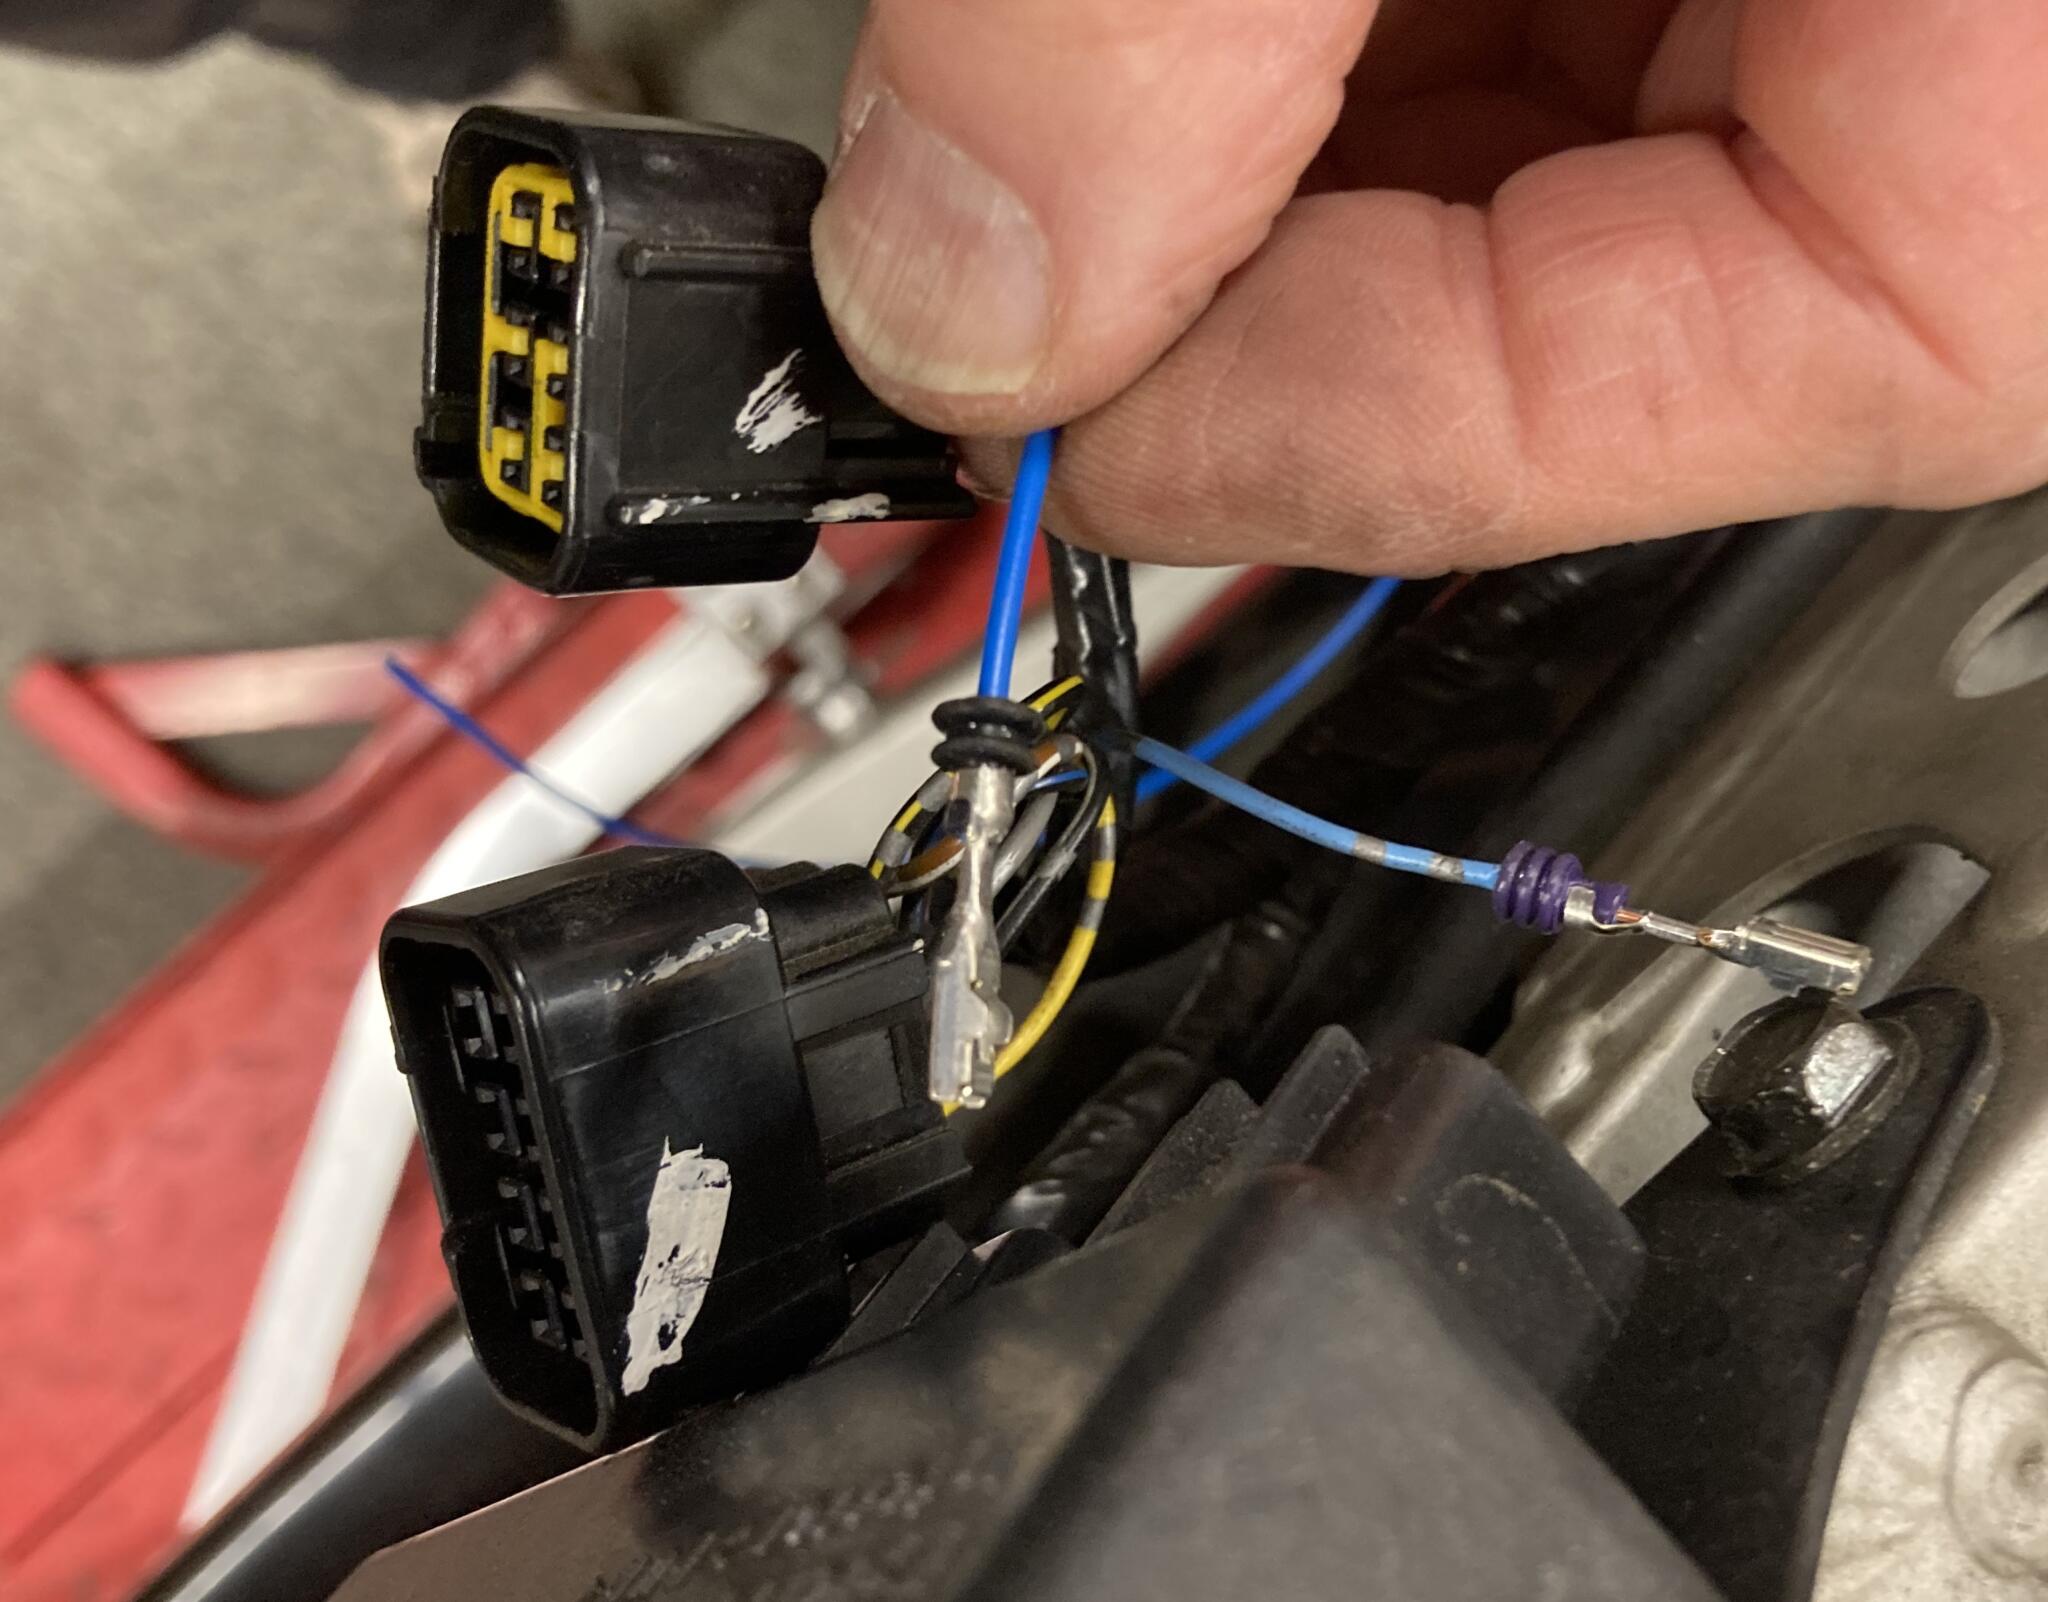
…so here is a better way. First, make a new cable with a suitable terminal into the ignition unit
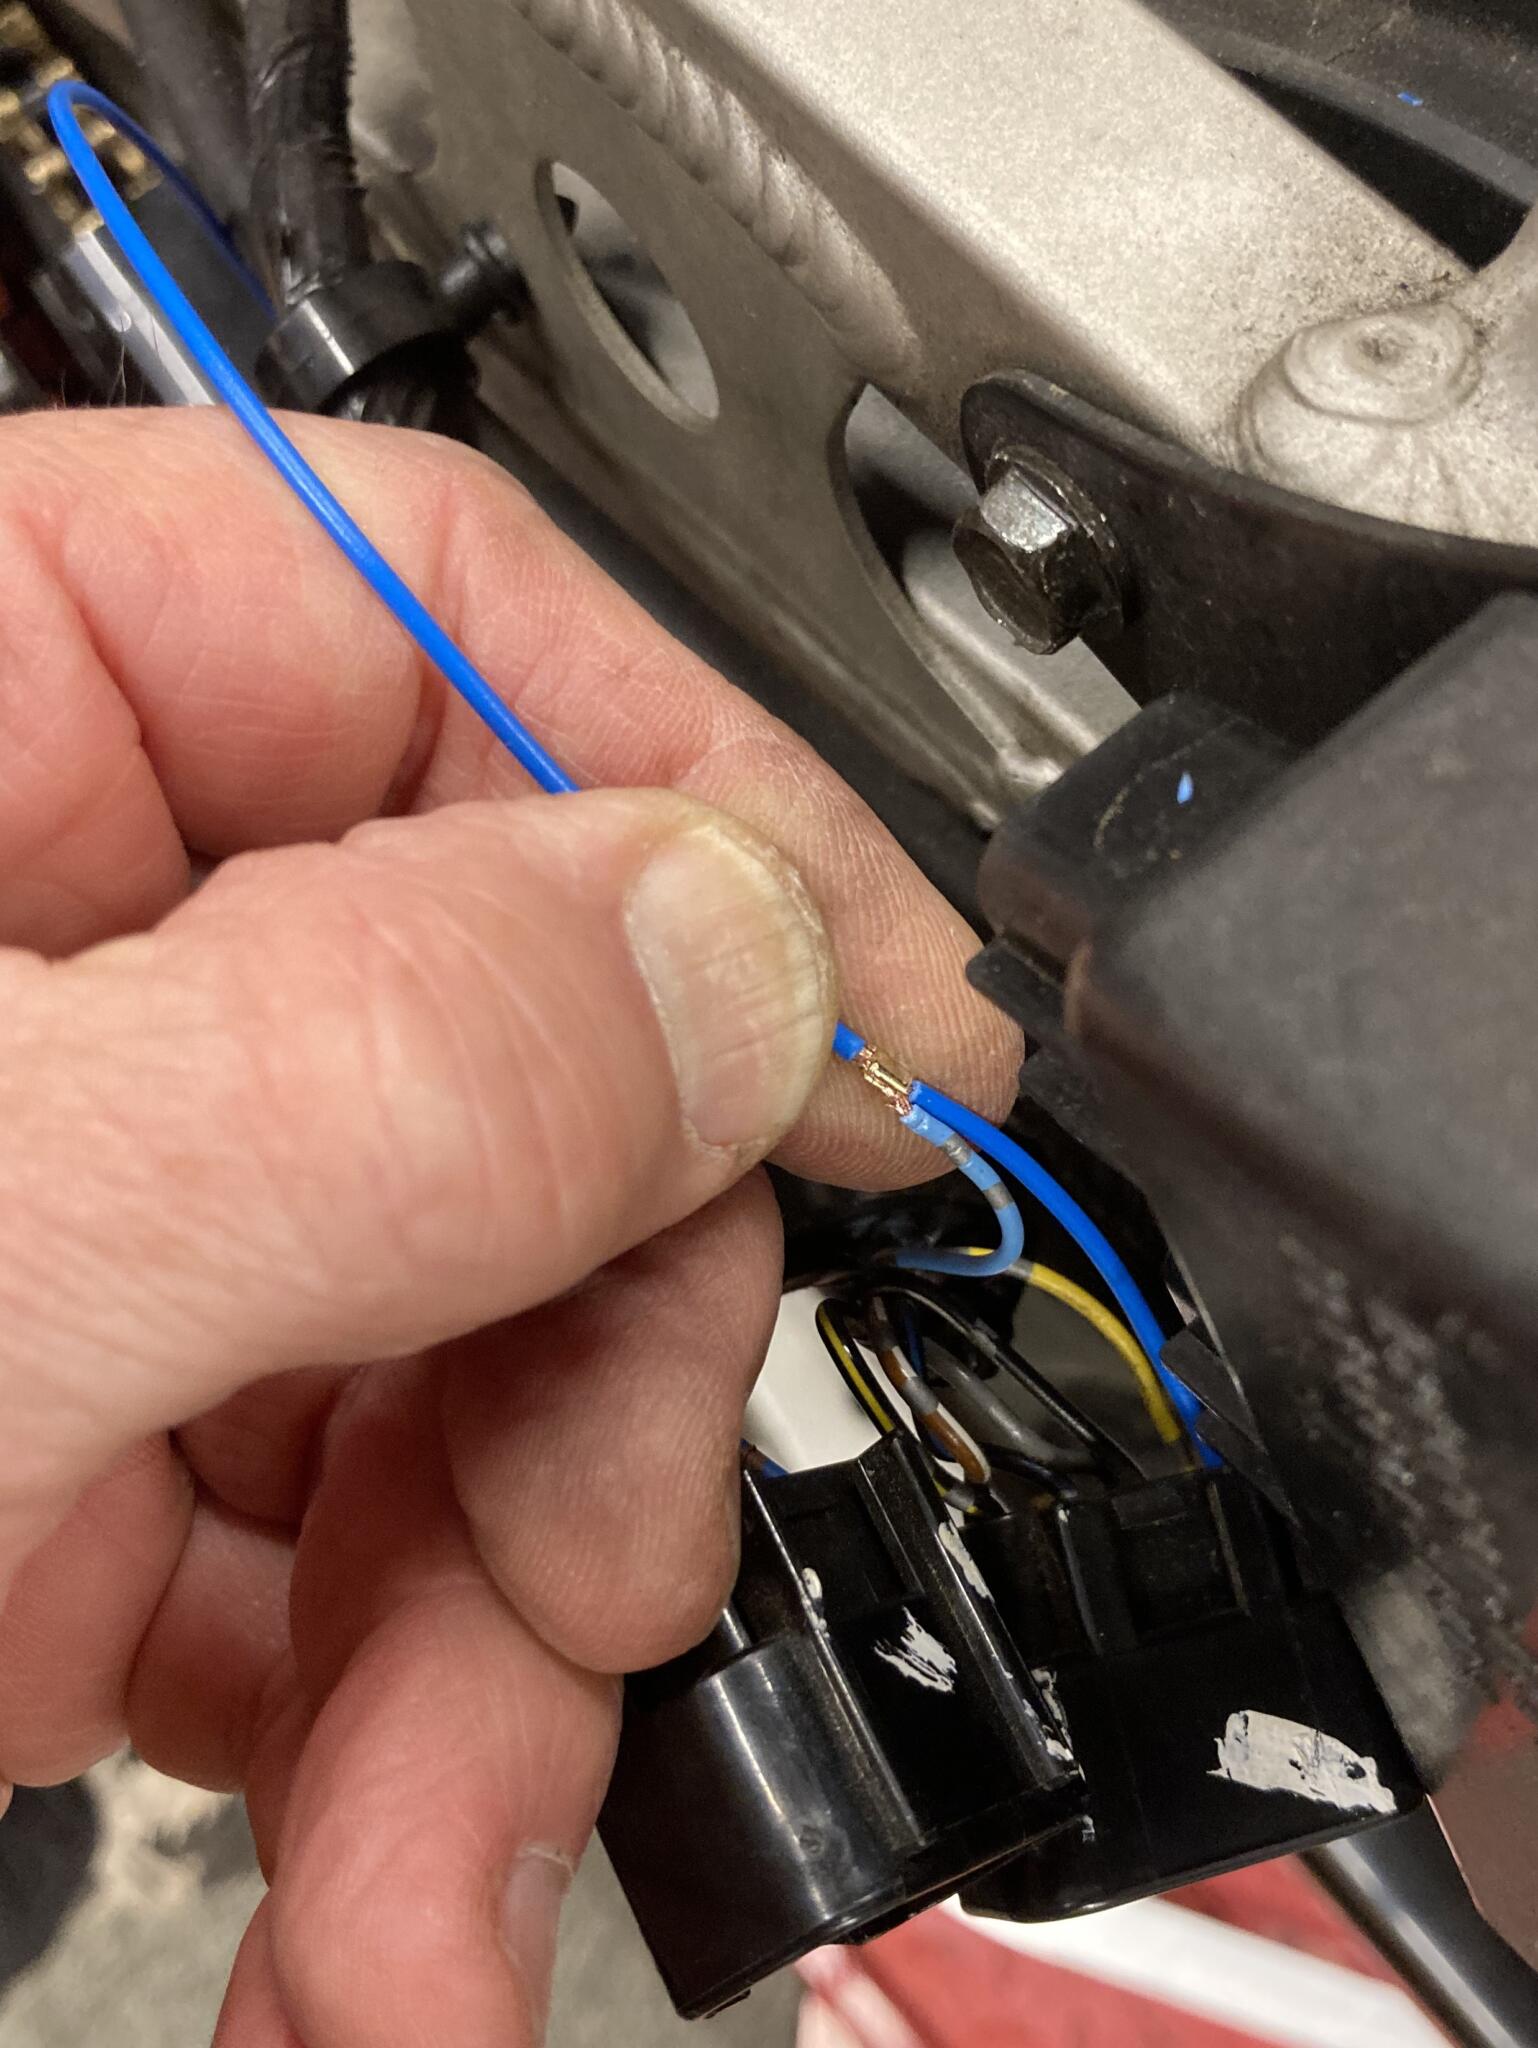
Next, splice the two cables together using a small brass crimp
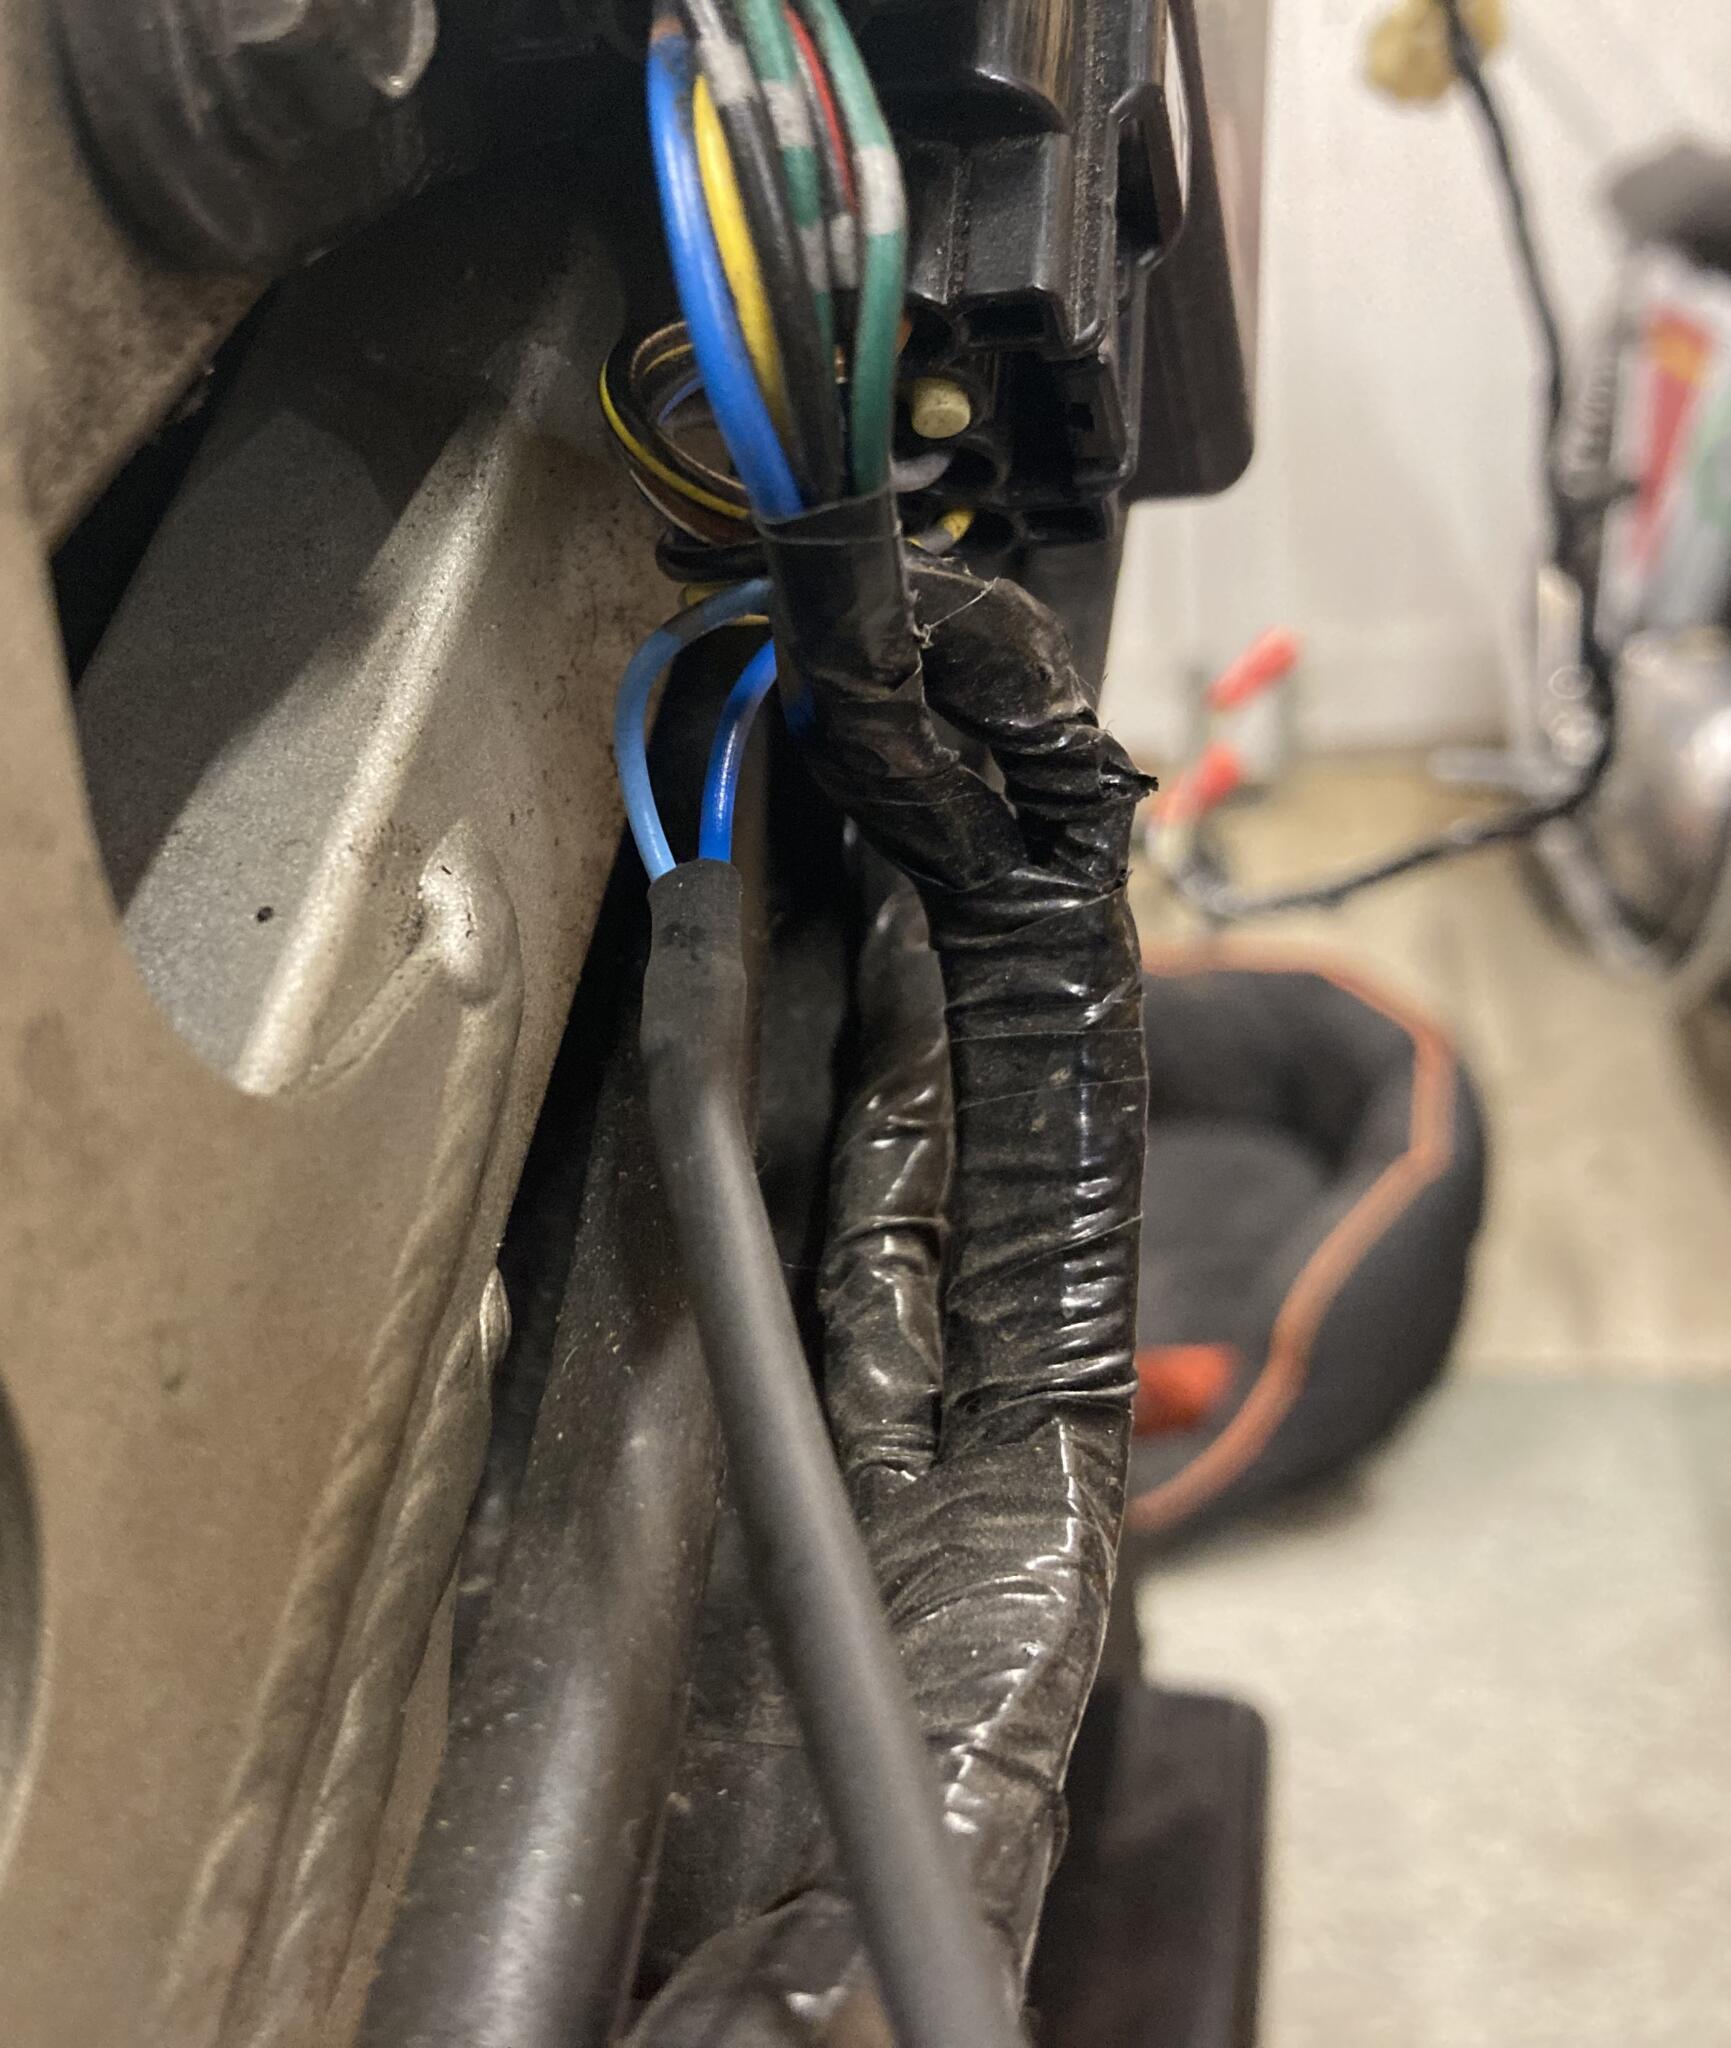
Finally, adhesive heat shrink the crimp, and sleeve the whole thing. You can now provide the gear position indicator with its rpm trace – and your throttle response won’t go squiffy five years from now
Paul’s Kawasaki ZX-6R road/track bike
As you can see from its beautiful condition, Paul loves his 1999 ZX-6R. He uses it on the road but mainly for track days, so it has lowered gearing, sticky tyres and Maxton suspension.
The gearing change improved acceleration, but left Paul wondering which gear he is in, as the new combinations of revs and speed were were scrambling his brain. So he bought a Healtech gear position indicator and fitted it into the dash. My job was to plumb it in, and also to sort out a USB socket, a charging plug, and the somewhat elderly LED indicators.
Paul had fitted these indicators years ago, when LEDs were dim, and came with bulky resistors to control their flash rate when used with conventional flasher units. These days you can get LED-specific flasher units, and dazzlingly bright LEDs.
Electrically, all this work is very straightforward. But it’s remarkably complicated to organise around the bike. The number plate and rear indicators needed to be detachable for the track, so we needed titchy, easily-separated connectors that would fit through holes in the undertray. SM connectors are the obvious choice here. You can buy them on eBay, but they need a pretty swanky crimp tool called a PA-09.
We decided the front LEDs could stay for the moment. They are a bit brighter than the old rear ones, and if he changes his mind it will be easy to plumb in new ones.
Paul also wanted the stacked projector headlight bulbs changing for LEDs, and their wiring tidying up. It’s really a case of looking at the space, and running the neatest route from the supply plug to the lights. Once you’ve decided that, you can knock up a sub-loom to take the electrons where they need to go.
It’s a fantastic bike, in wonderful nick. I’d love to thrash it round Cadwell.
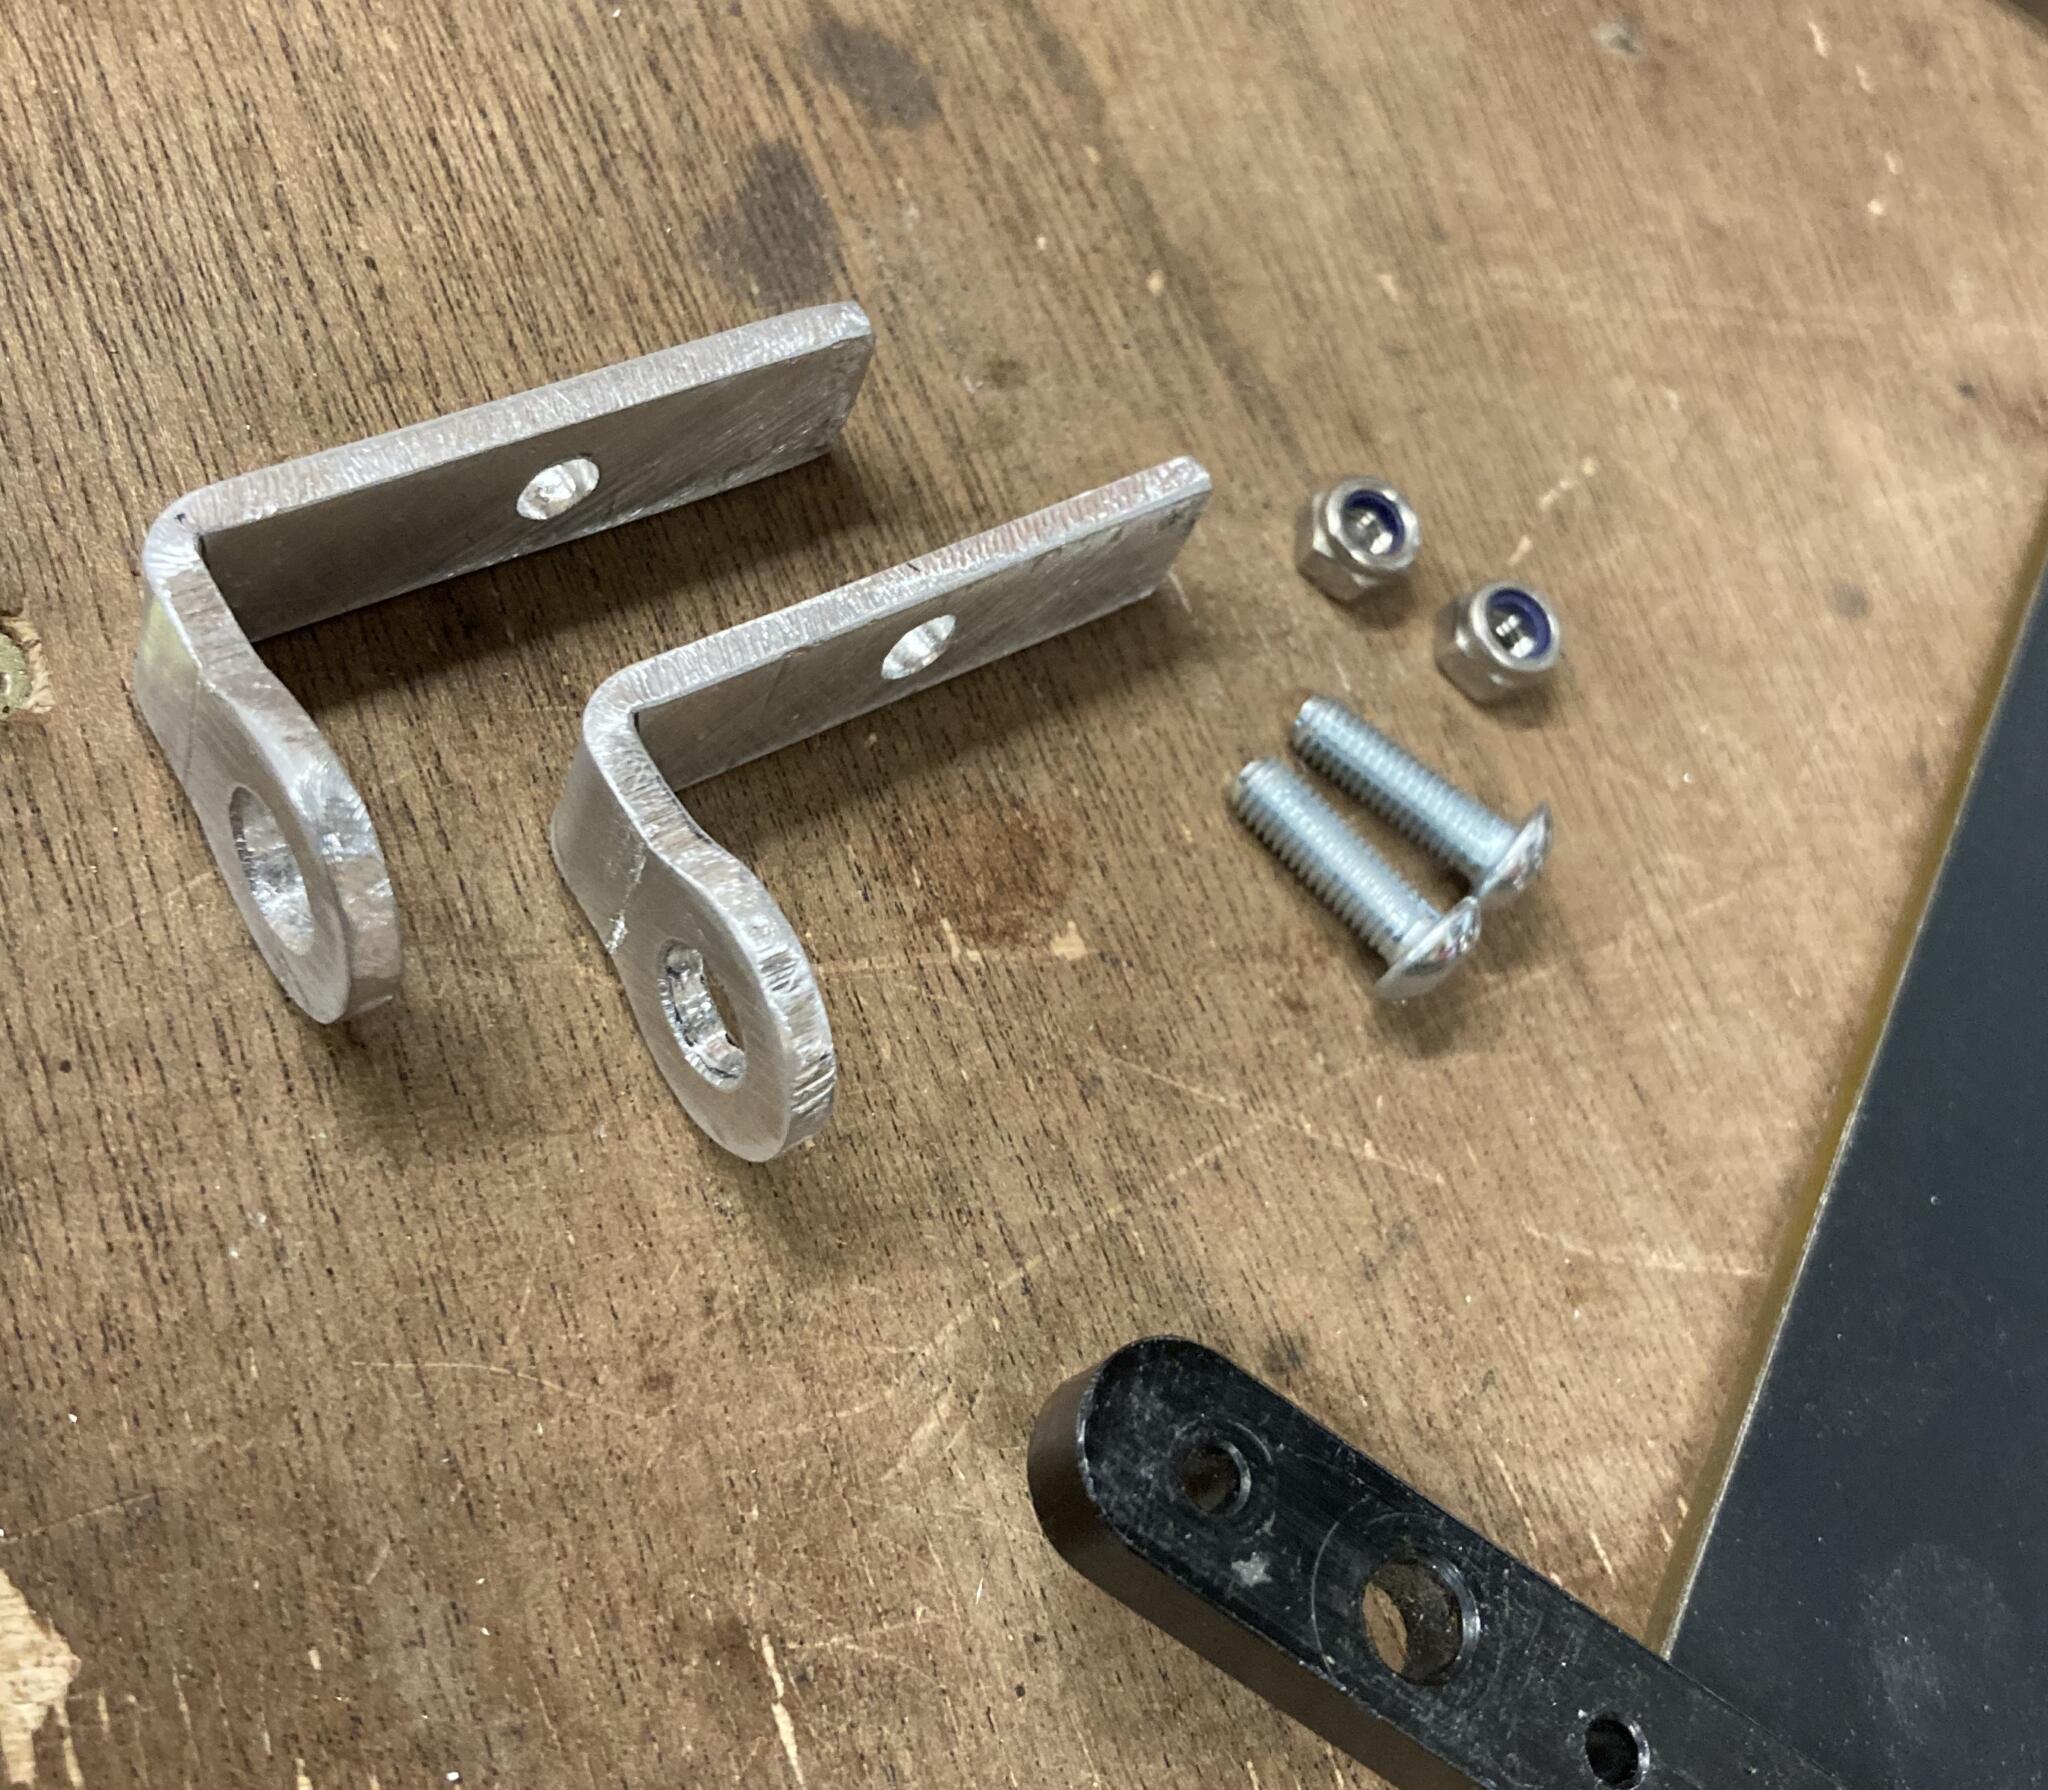
Now to replace the ancient (and dim) LED rear indicators. Paul sourced some super-bright Motogadget ones, so I made some brackets to suit
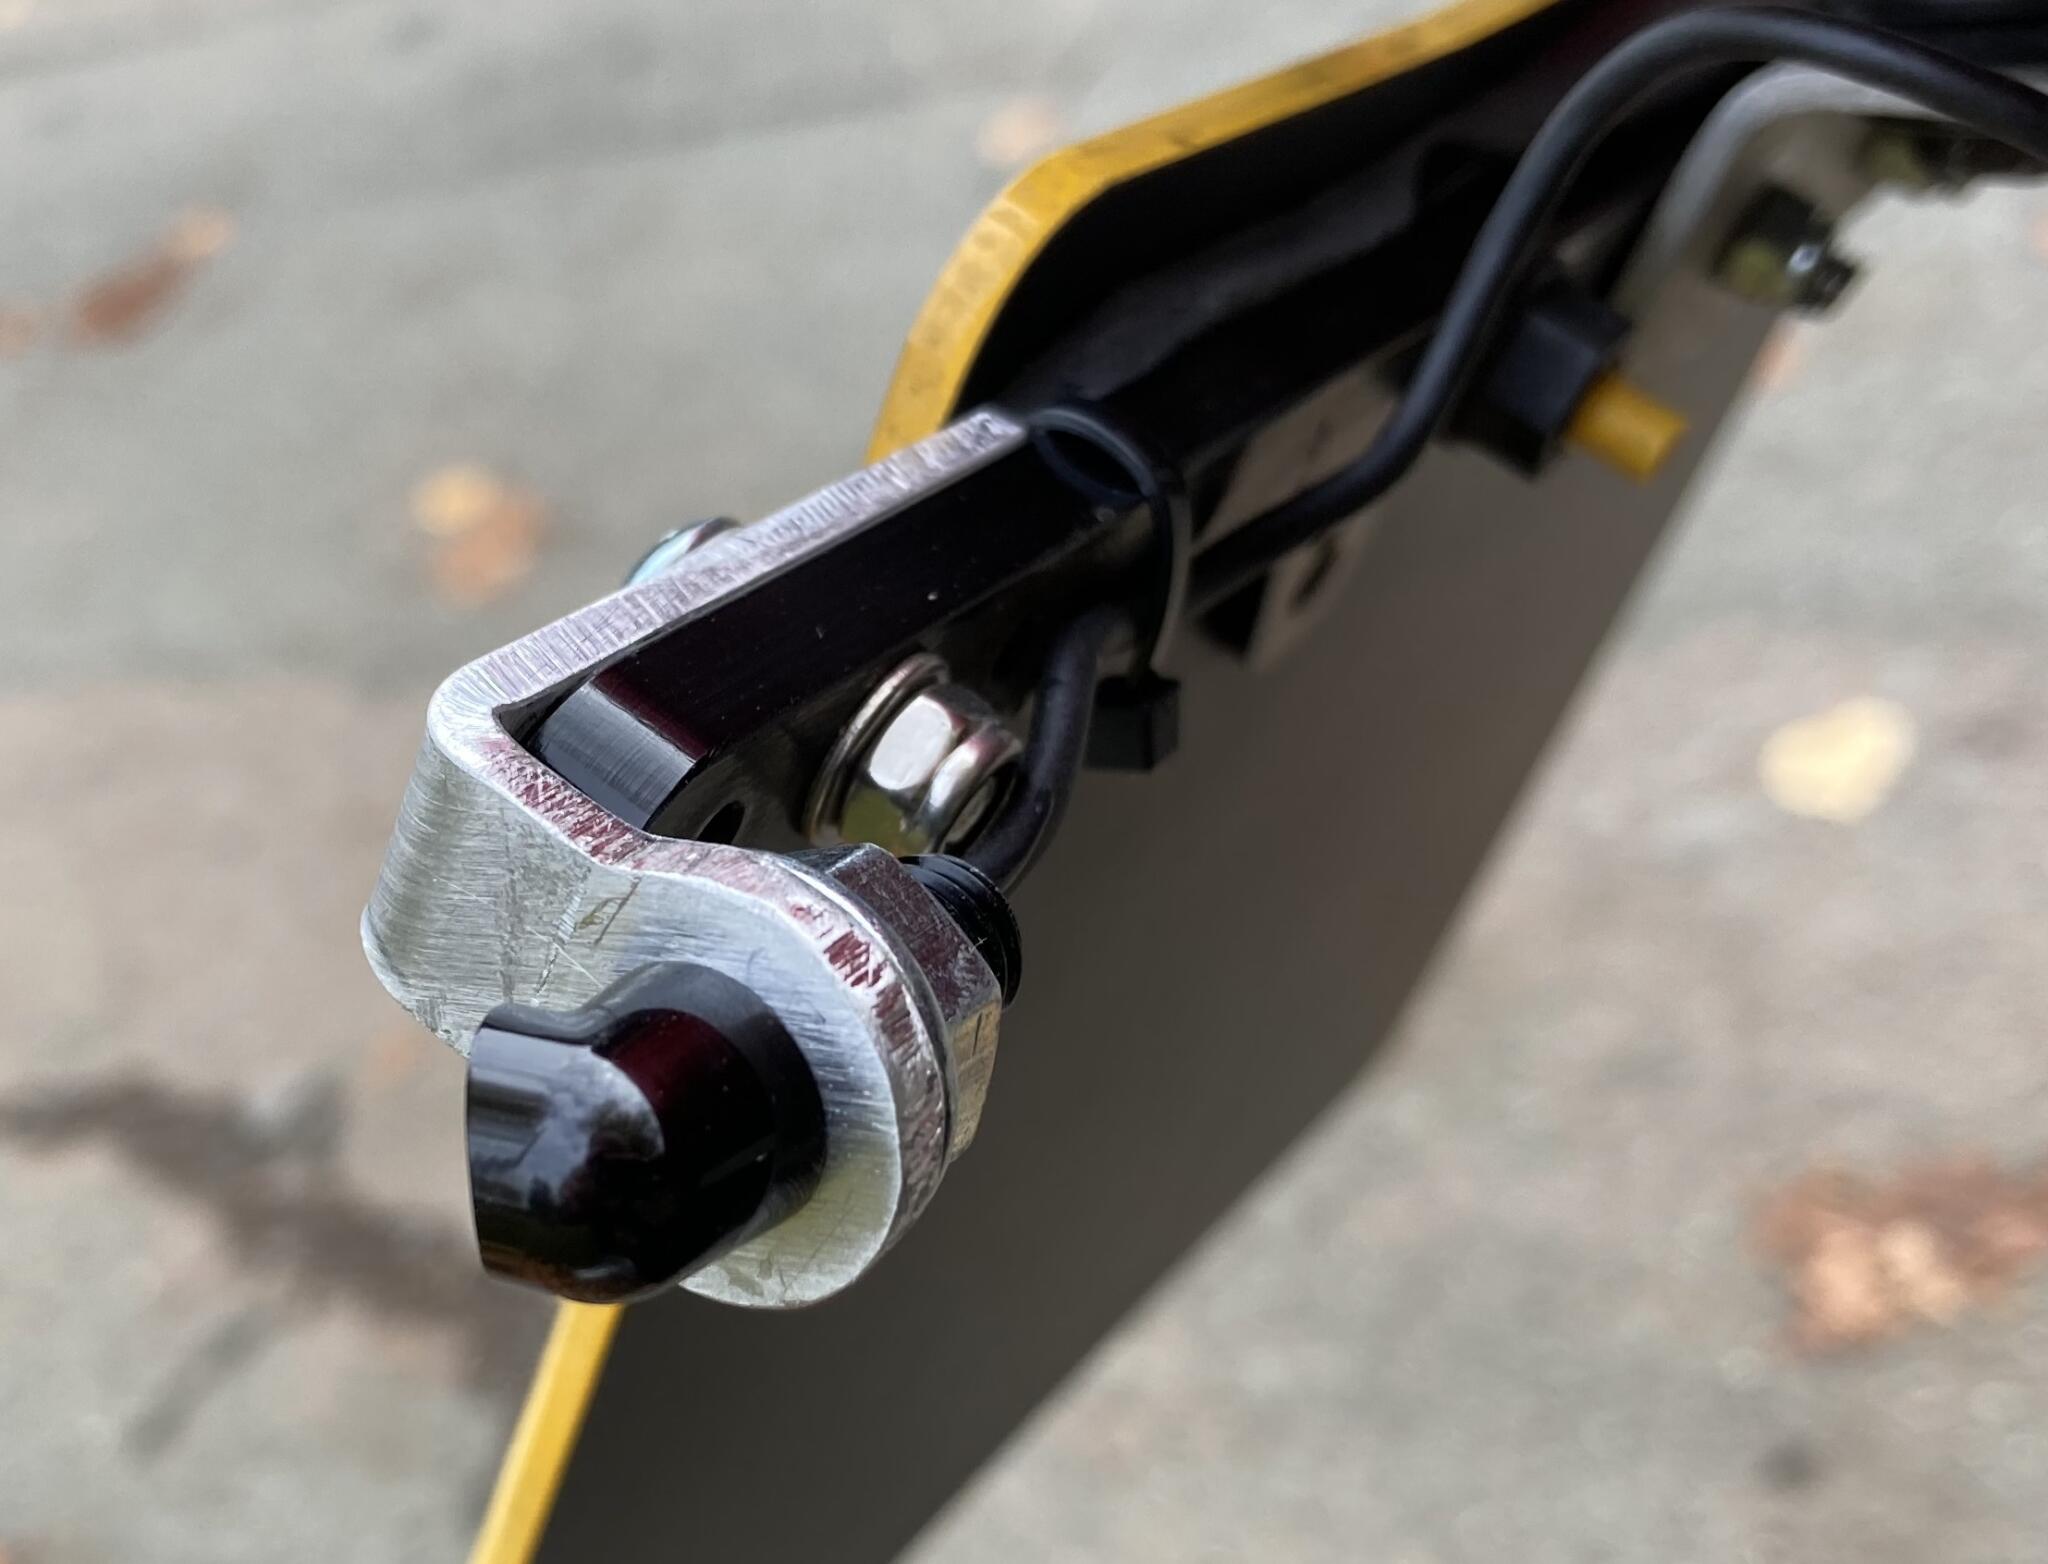
The indicators are very small, but use a chunky 8mm thread for mounting. Paul is going to paint the brackets, because it takes ages
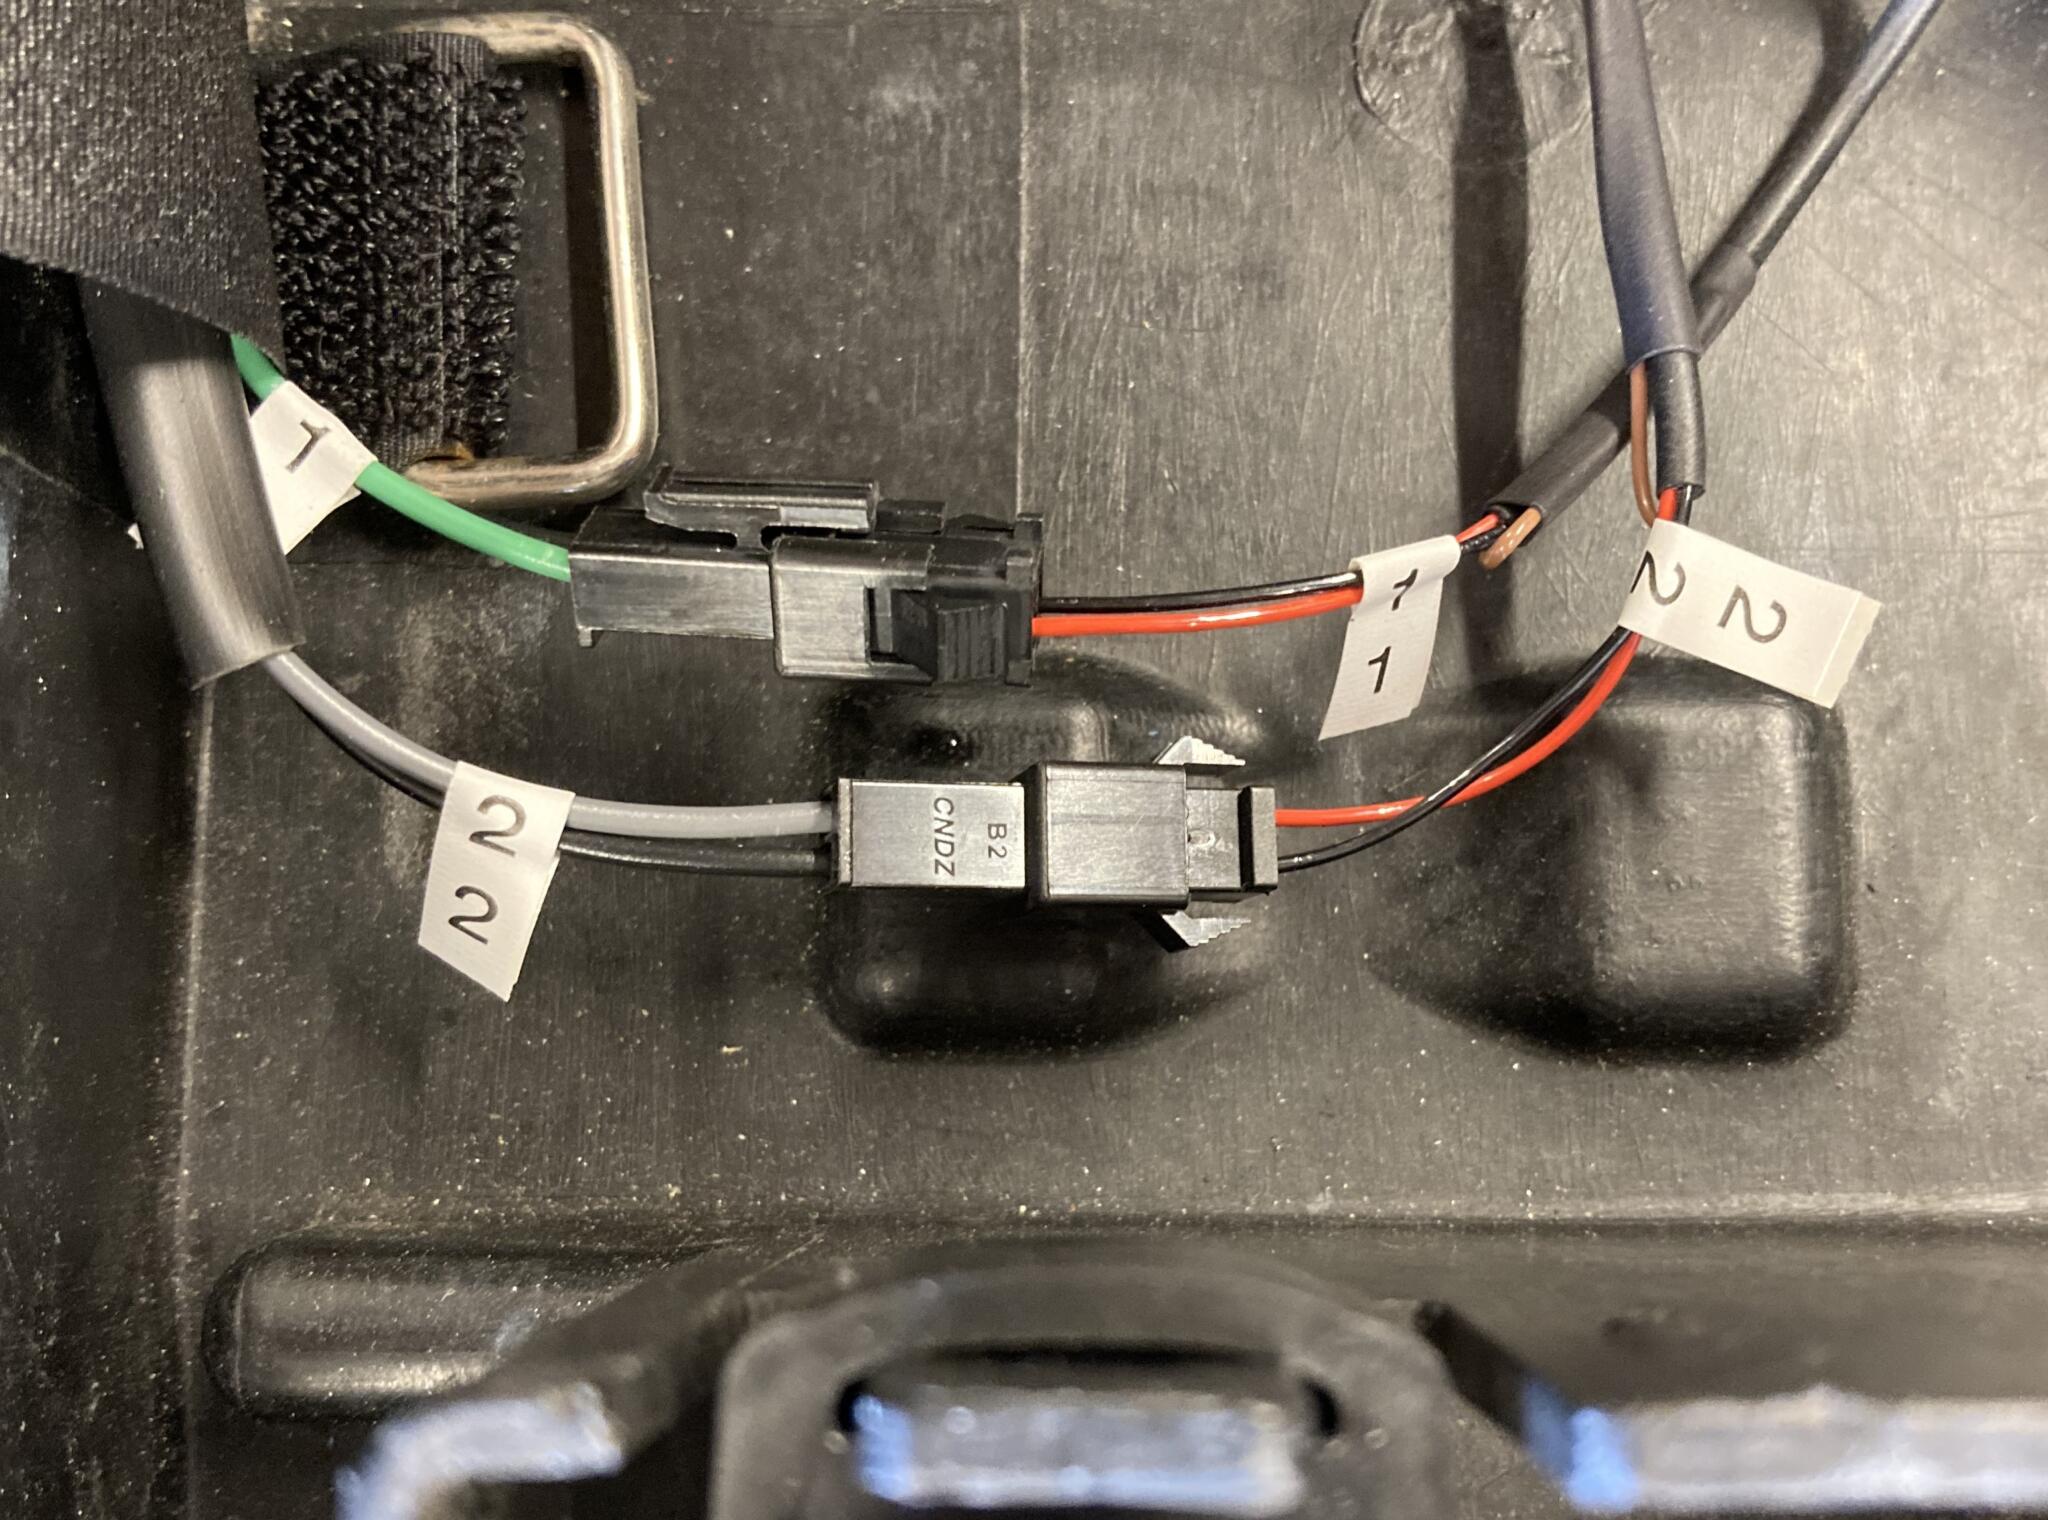
As the number plate and indicators need to be detachable for track days, I used SM connector plugs for the indicators, tagged for left and right
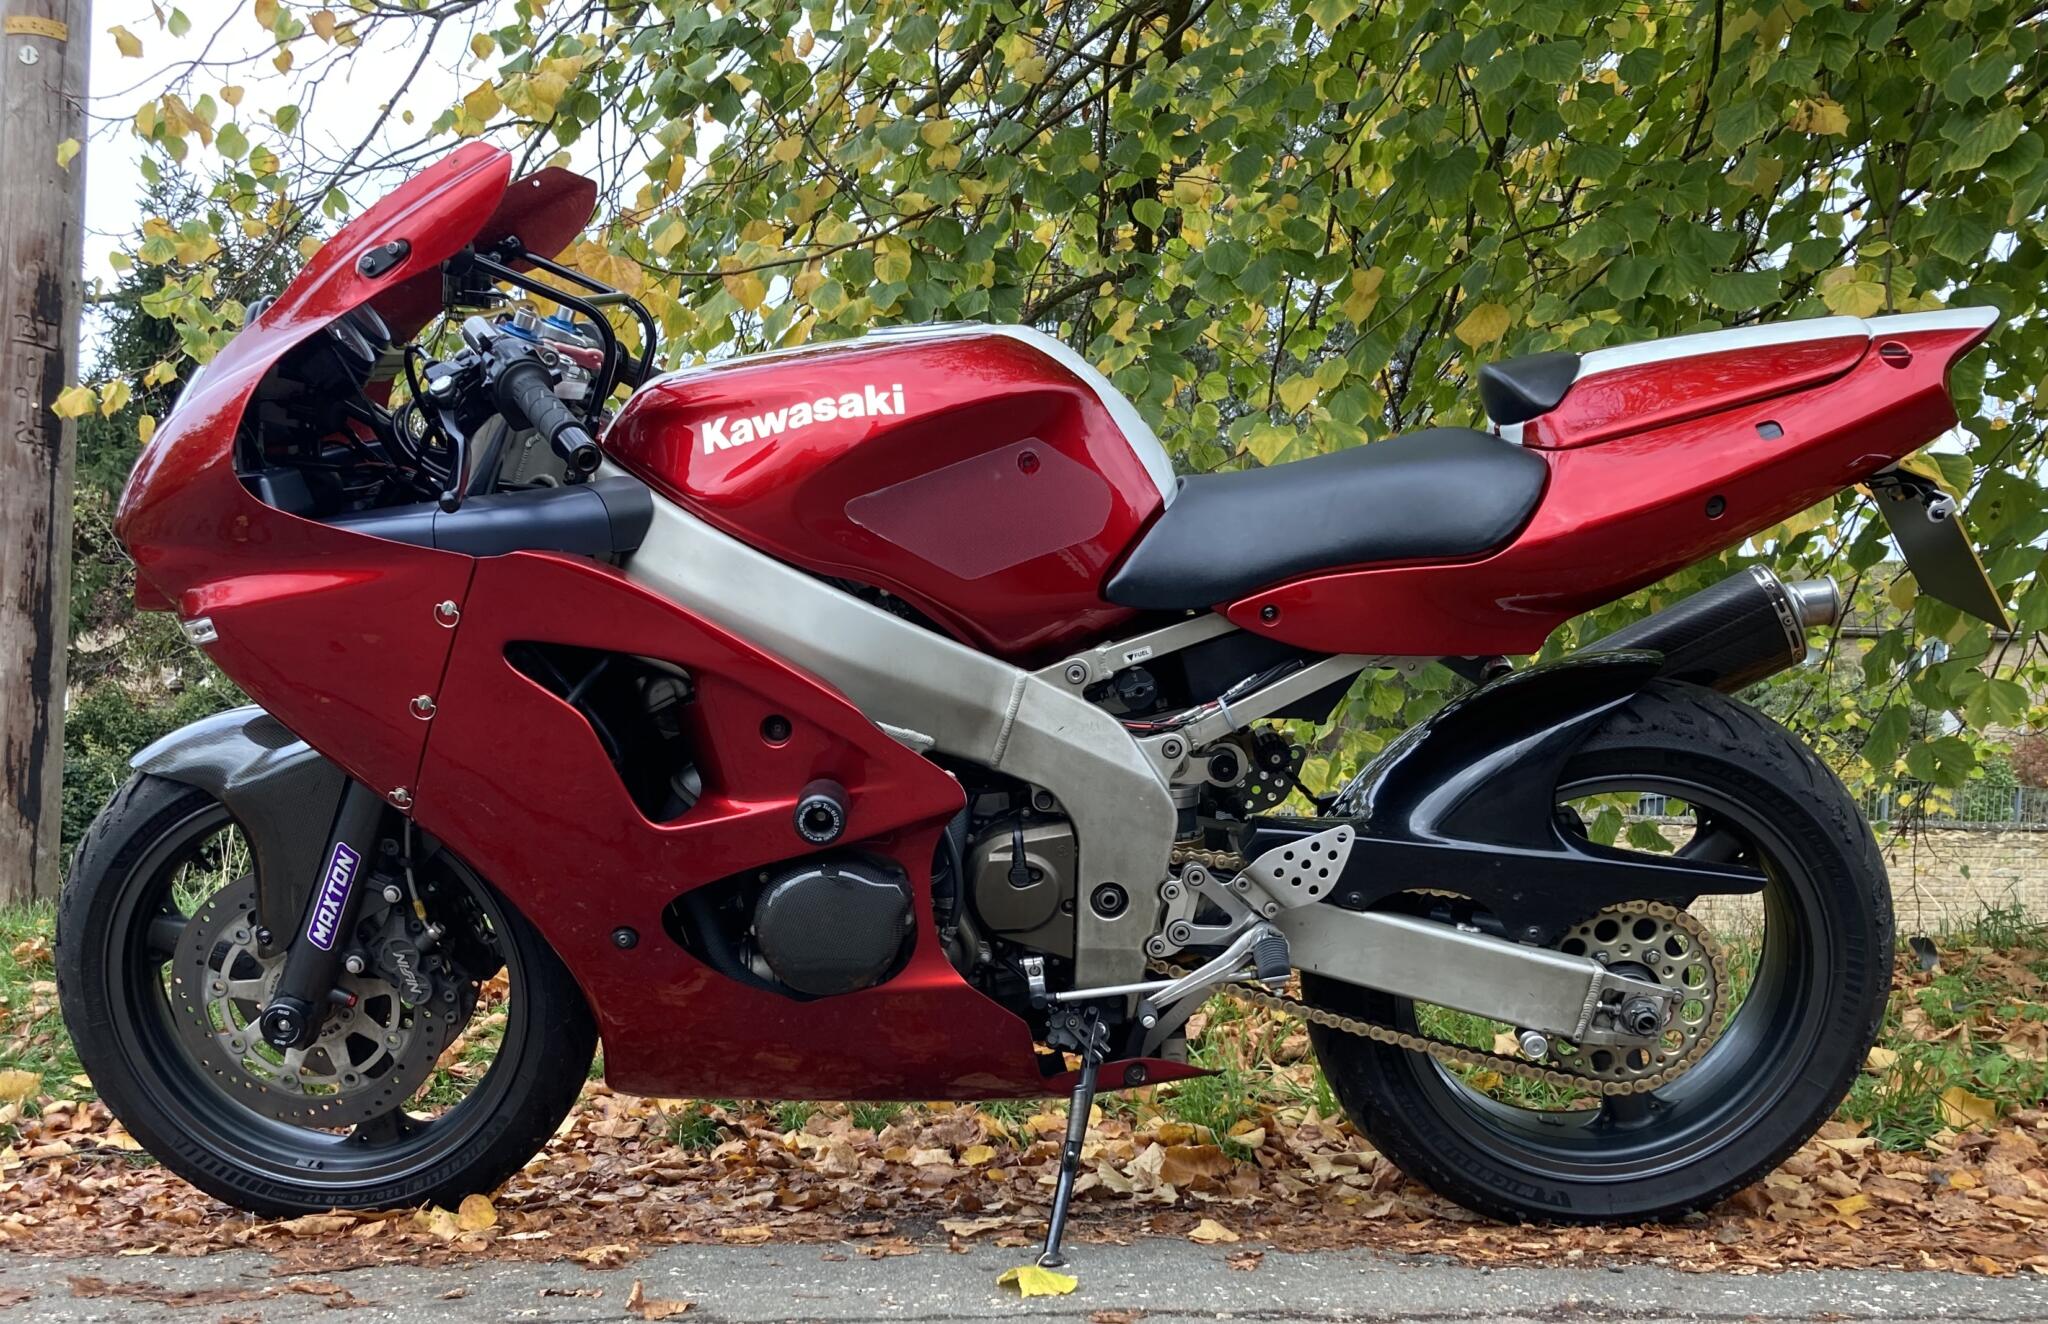
Paul’s looked after his ZX-6 beautifully, and made some very canny improvements: Maxton suspension, Yoshi exhaust, dropped gearing and gorgeous paint
