All this, and a 277 degree crankshaft

The Newtronic ignition pickups had a very long wire containing skinny cables. A JST connector allowed me to cut the wire to size, and make a water resistant connection
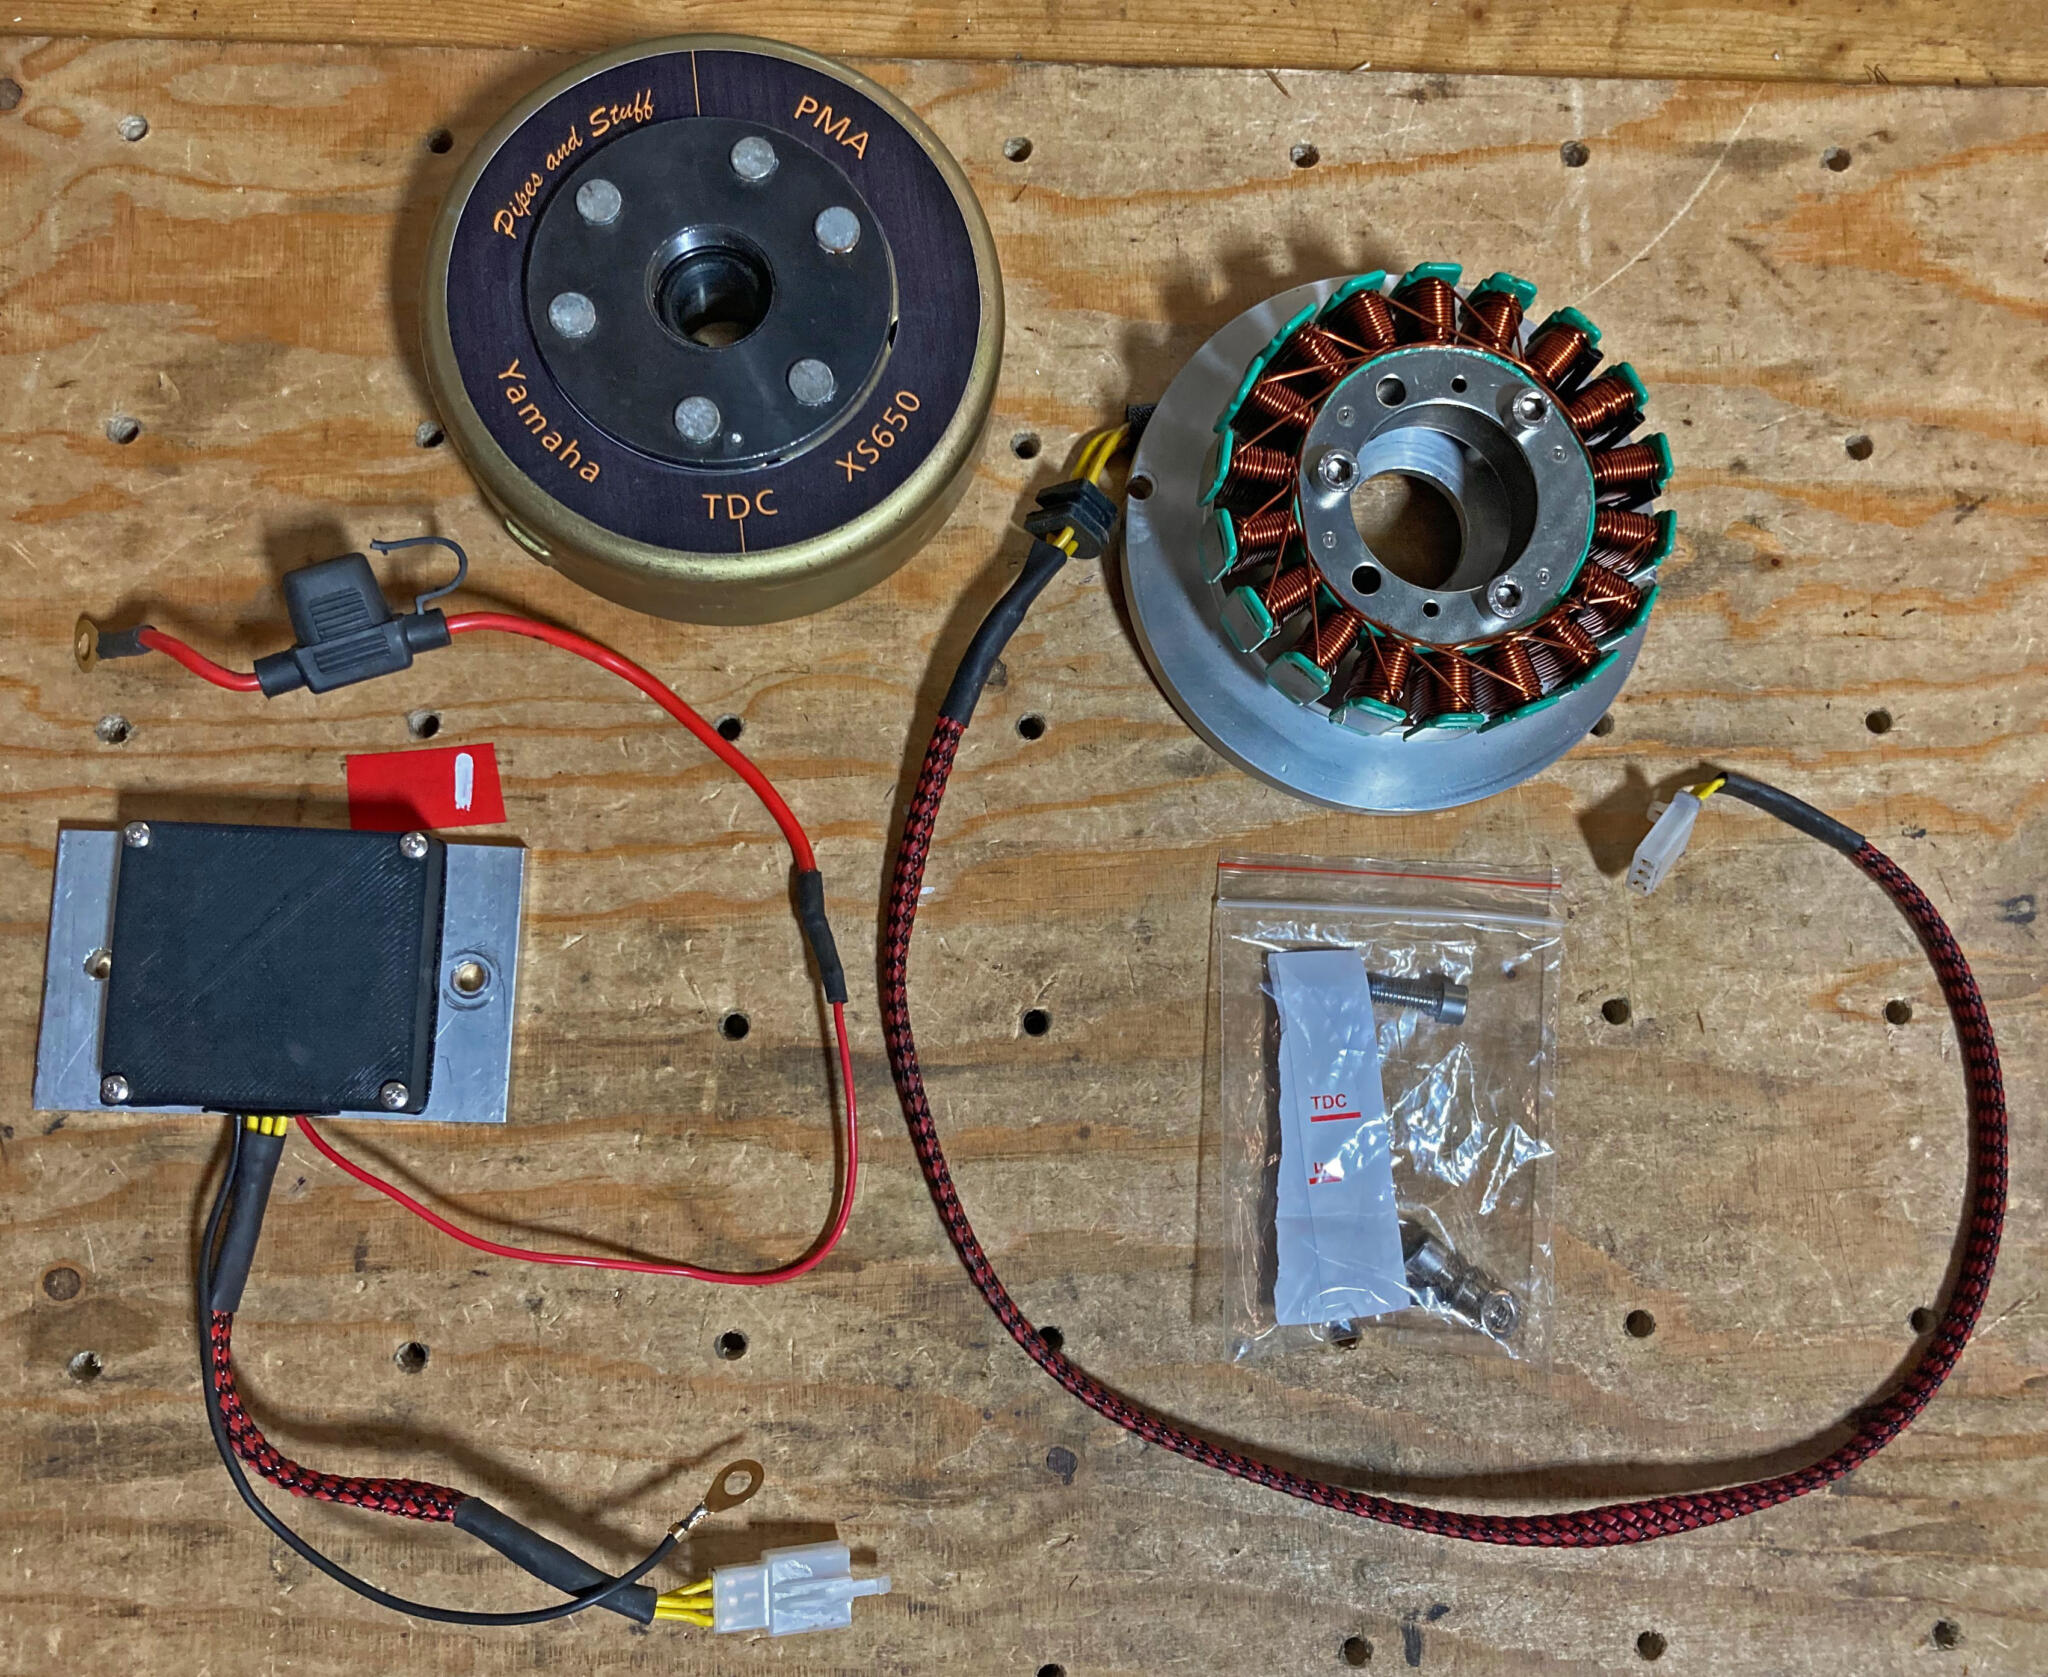
The PMA alternator kit: from top left we have the flywheel, stator, mounting screws and regulator rectifier

The new stator goes on
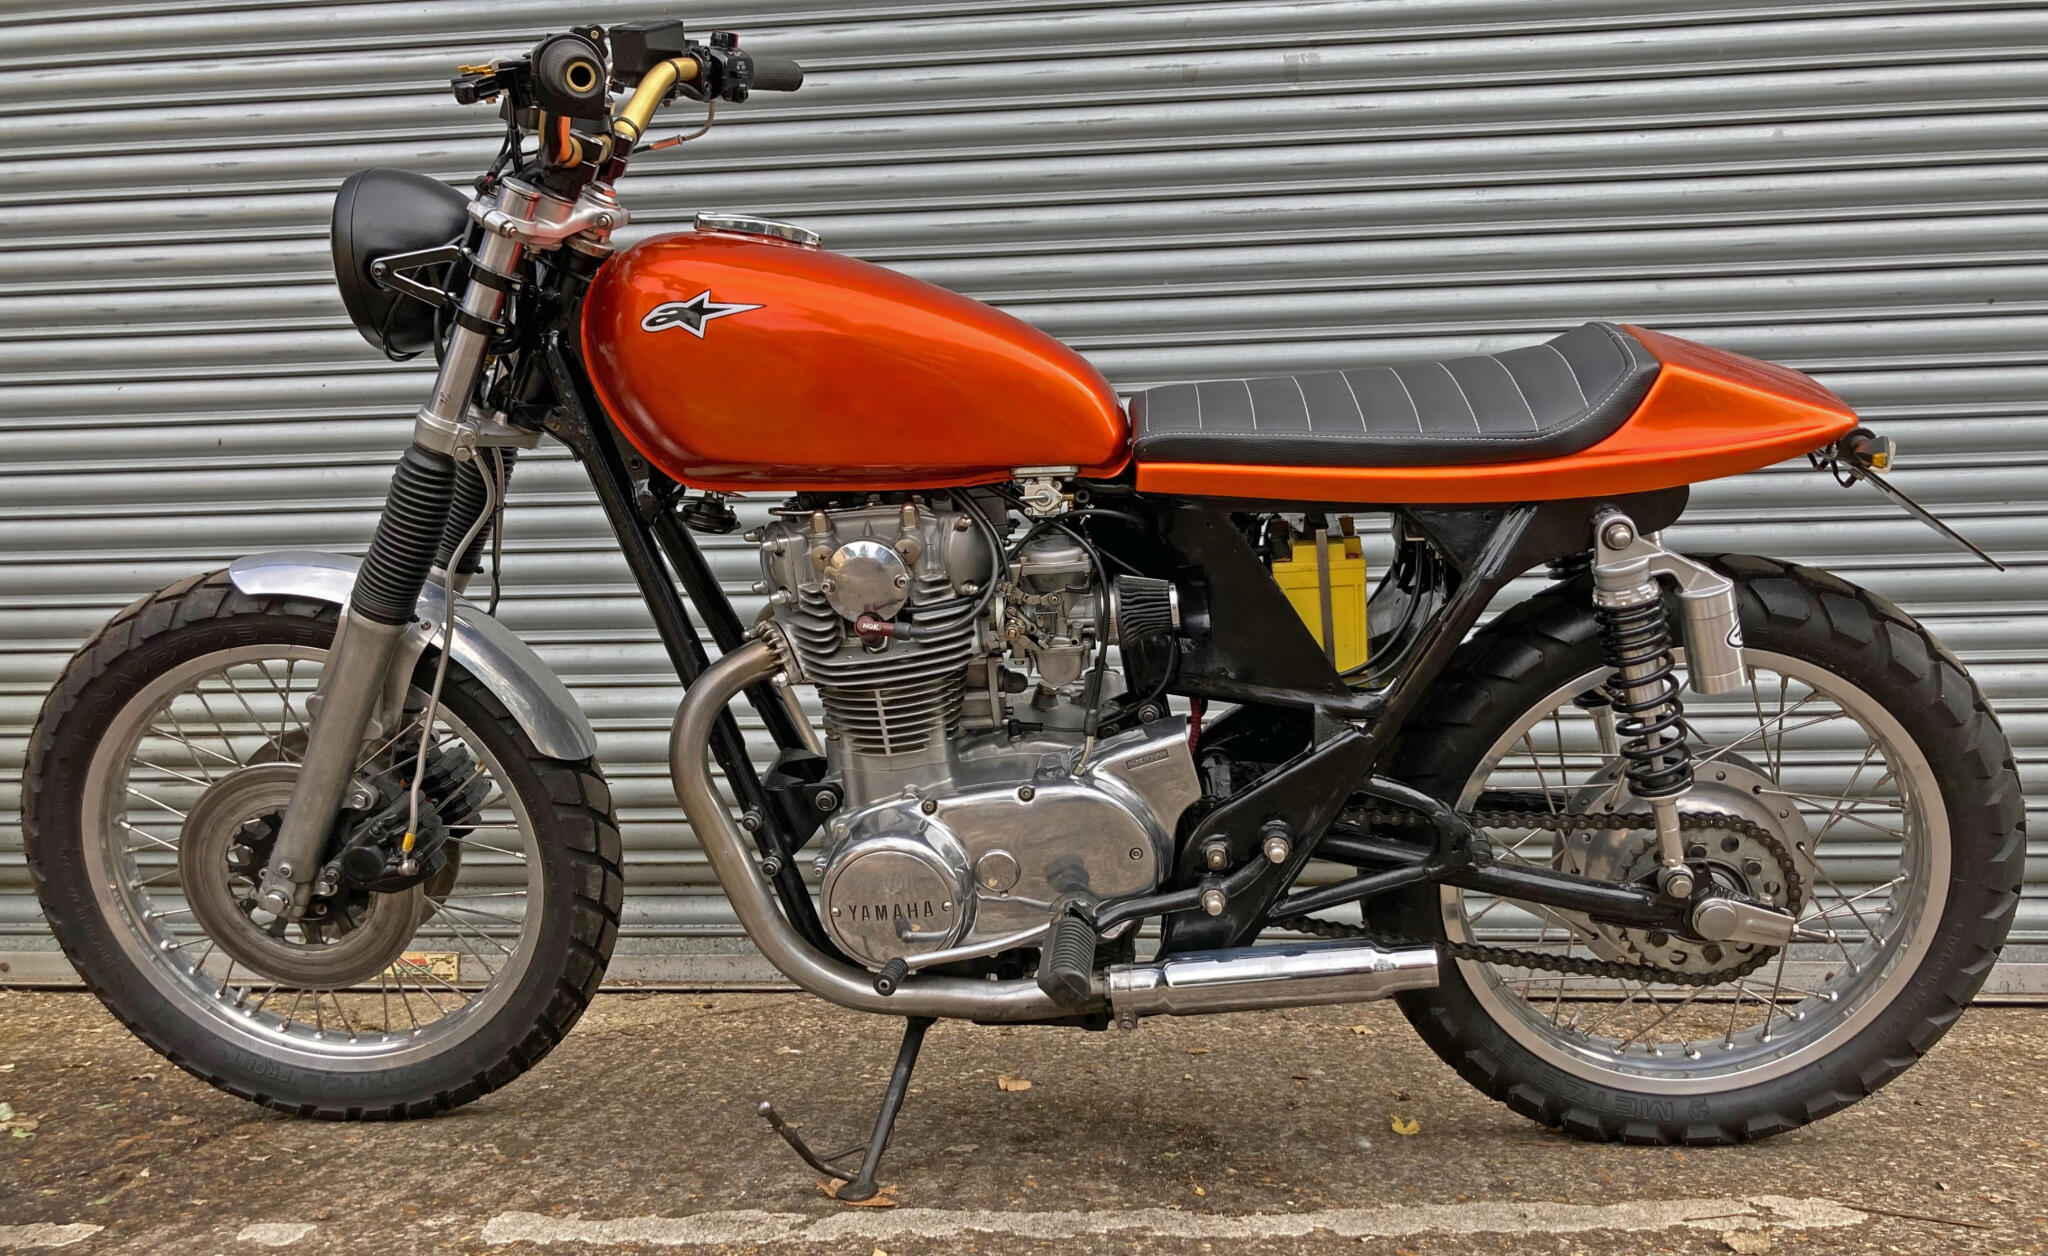
Leslie’s Yamaha XS650/750 special
There are plenty of neat XS650 customs around, but this one has a couple of very special attributes. First, it’s bored out to 750cc. Second, the crank, which is usually 180 degrees, has been rephased to 277 degrees. That means it fires almost like a modern parallel twin, such as a Yamaha MT-07, KTM790 or a Hinckley Bonnie. It should also vibrate a bit less than the original.
Most of the frame mods had been done by the previous owner, and Leslie has a list of things he is going to change. The silencers will get bigger and more upswept; the paint will be blue; and the sidepanels will be fitted (he left them off here to make working on the bike easier).
Rephasing a crank is a major job. Not only do you have to get the new crank made as accurately as the old one; you need a new camshaft and ignition too. In this case the ignition is a specially-built Newtronic system using two optical triggers on the left end of the camshaft.
As usual with modified 1970s bikes, the loom is dead simple (it took little more than a day to make). The time consuming bit was everything else. Mounting the components in the little box under the seat needed a lot of thought so that the fuses would be easy to get to, and the battery wasn’t difficult to change.
Then there’s figuring out what to do about the tail section electrics. It uses five different components: two indicators, two number plate lights and a tail light. Each of these needs to be individually replaceable, so I gathered them into a bundle and made a little sub loom to unite all their earths and feeds into a simple plug that connects to the rest of the loom.
The gold anodised bars showed up a problem I’ve seen a few times now. The anodising won’t conduct electricity. So if you are using switchgear where (say) the horn earths on the bar, it won’t work. You have to fit an earth and thread the extra cable down the sleeve.
The Vapor dash comes with an optional surround that allows four warning lights. You actually build the individual warning lights from parts, so that you can have oil, high beam, neutral, indicators or separate left and right indicators. Trouble is, the sub loom Vapor provide only suits one permutation of the above. I made one that suited what Leslie was after.
When the loom was built, I noticed the alternator wasn’t charging. Leslie had a poke around online, found that non-charging is a common problem on these bikes, and discovered a novel solution: a new alternator, of different design. The original is a field coil system, like a car’s. The coils vary the magnetic field according to the electrical load, which in turn varies how much power the alternator kicks out.
The replacement, by a firm called PMA, is a permanent magnet system. This is what you find on most bikes today. It’s just magnets in a flywheel whizzing round and generating current in a set of windings, so it should be more reliable. I found it was easy to fit, and it worked too.
My colleague Ben, who works in the same building as me but restores Jaguar E Types, reckons this is the nicest bike he’s seen on my bench in the last five years.

Sidepanels to arrive later

Leslie has access to CNC machining, so he is making the bracket for the Vapor dash

…and for the tail light
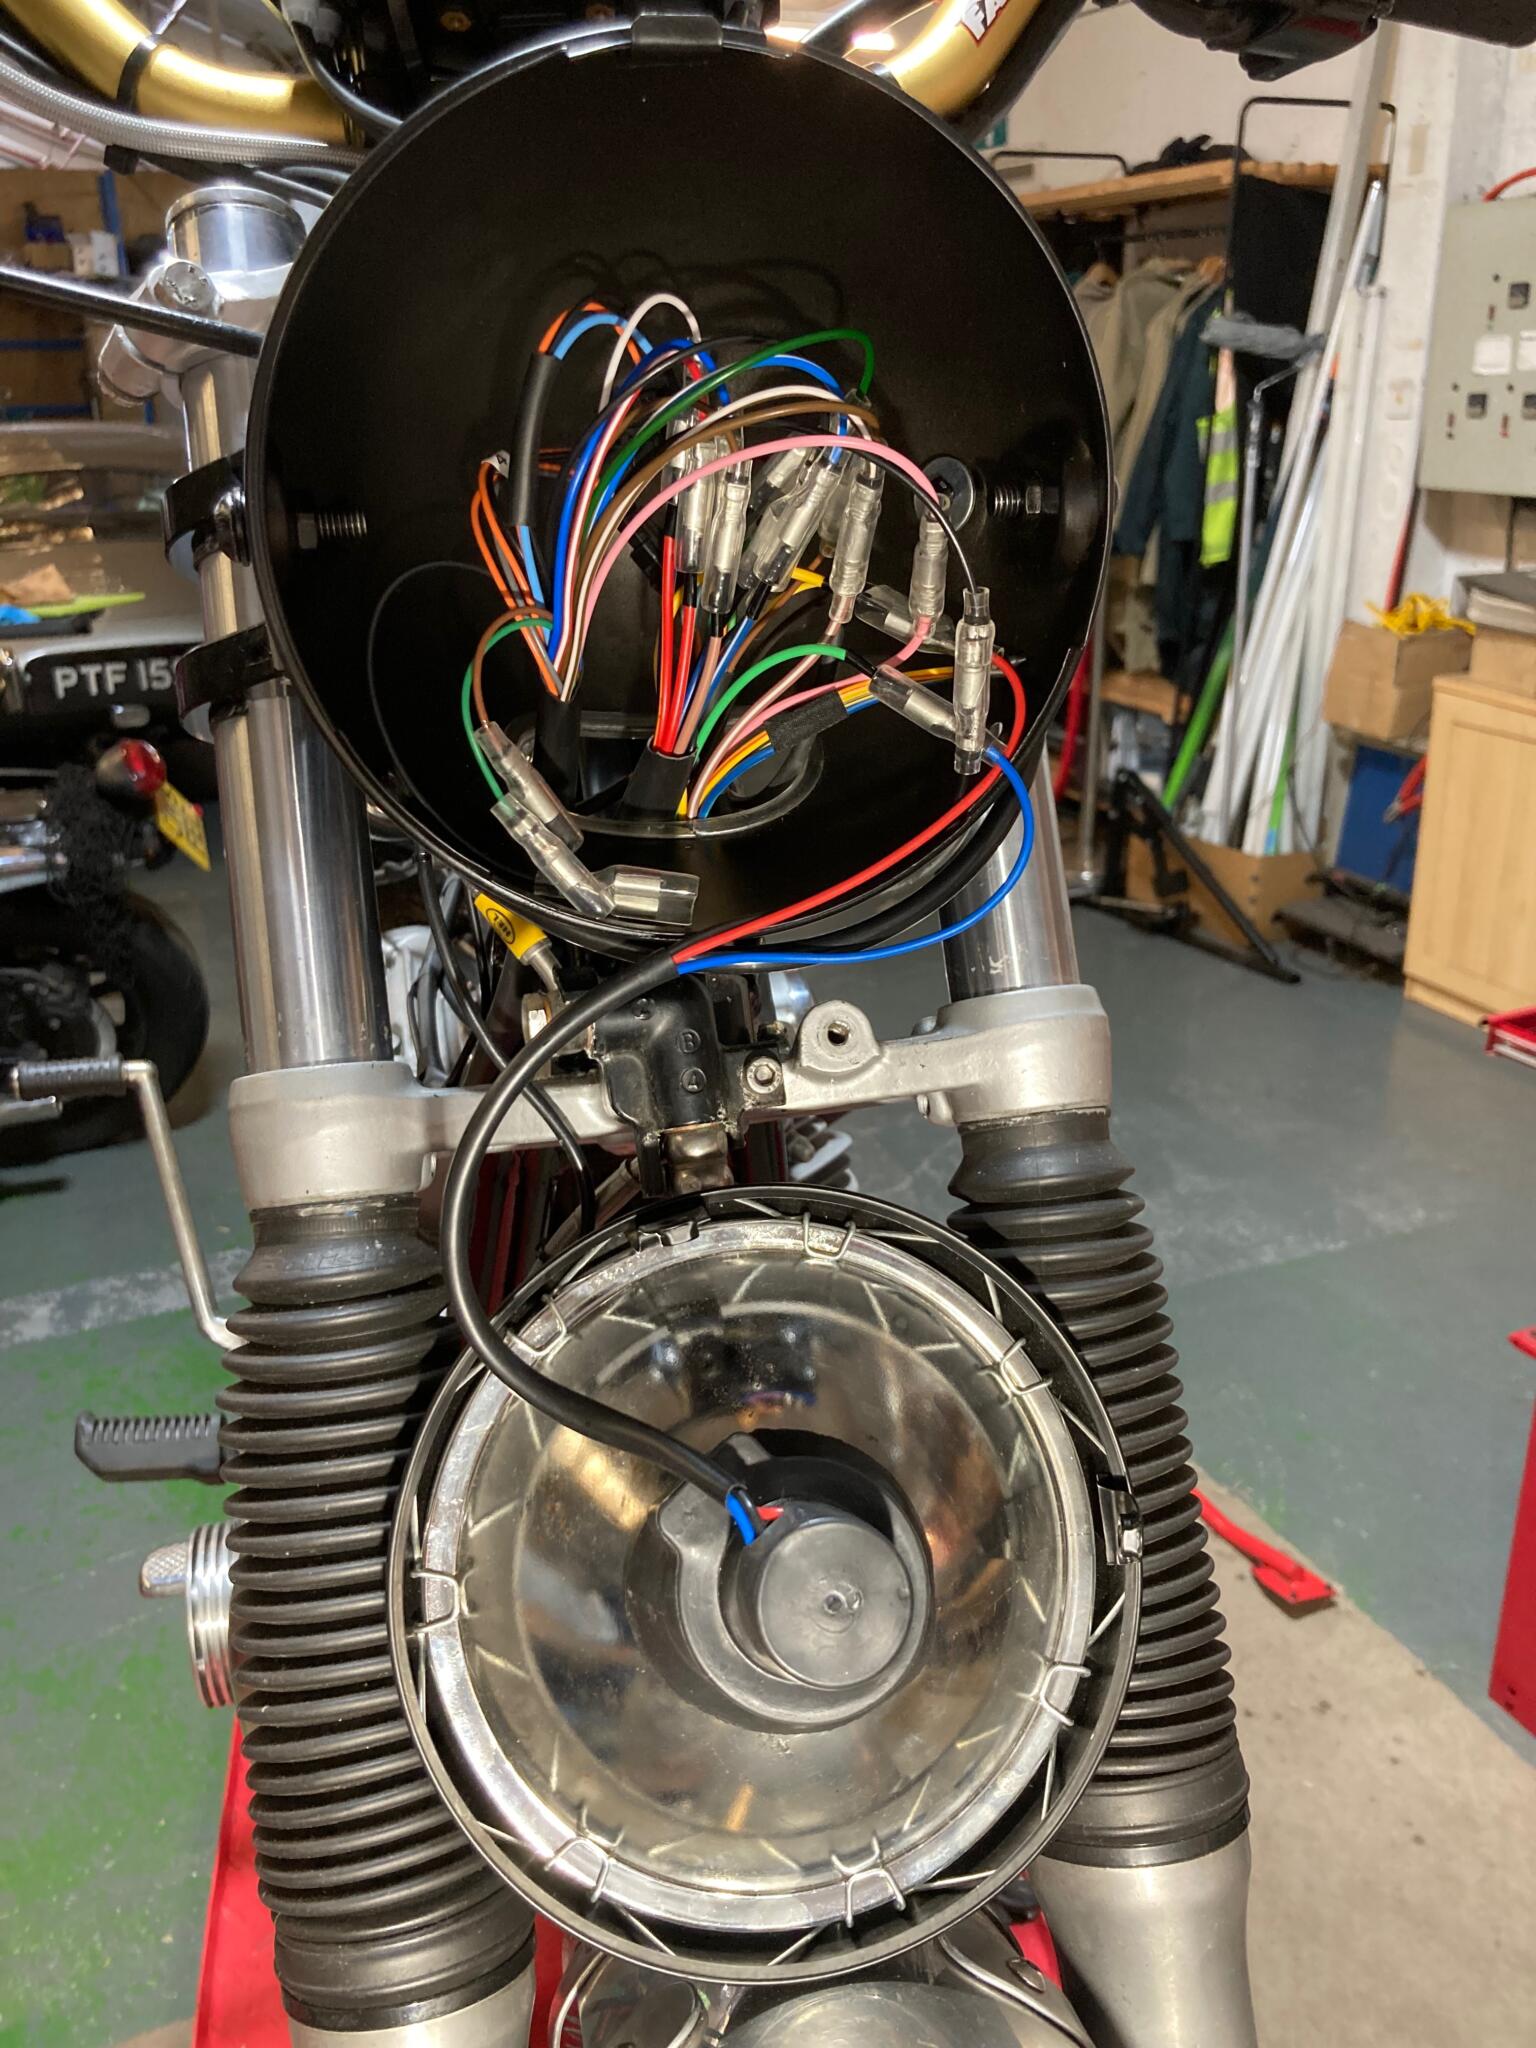
Headlight innards. Using bullets in here, 1970s Japanese style, is a cunning way to minimise wiring