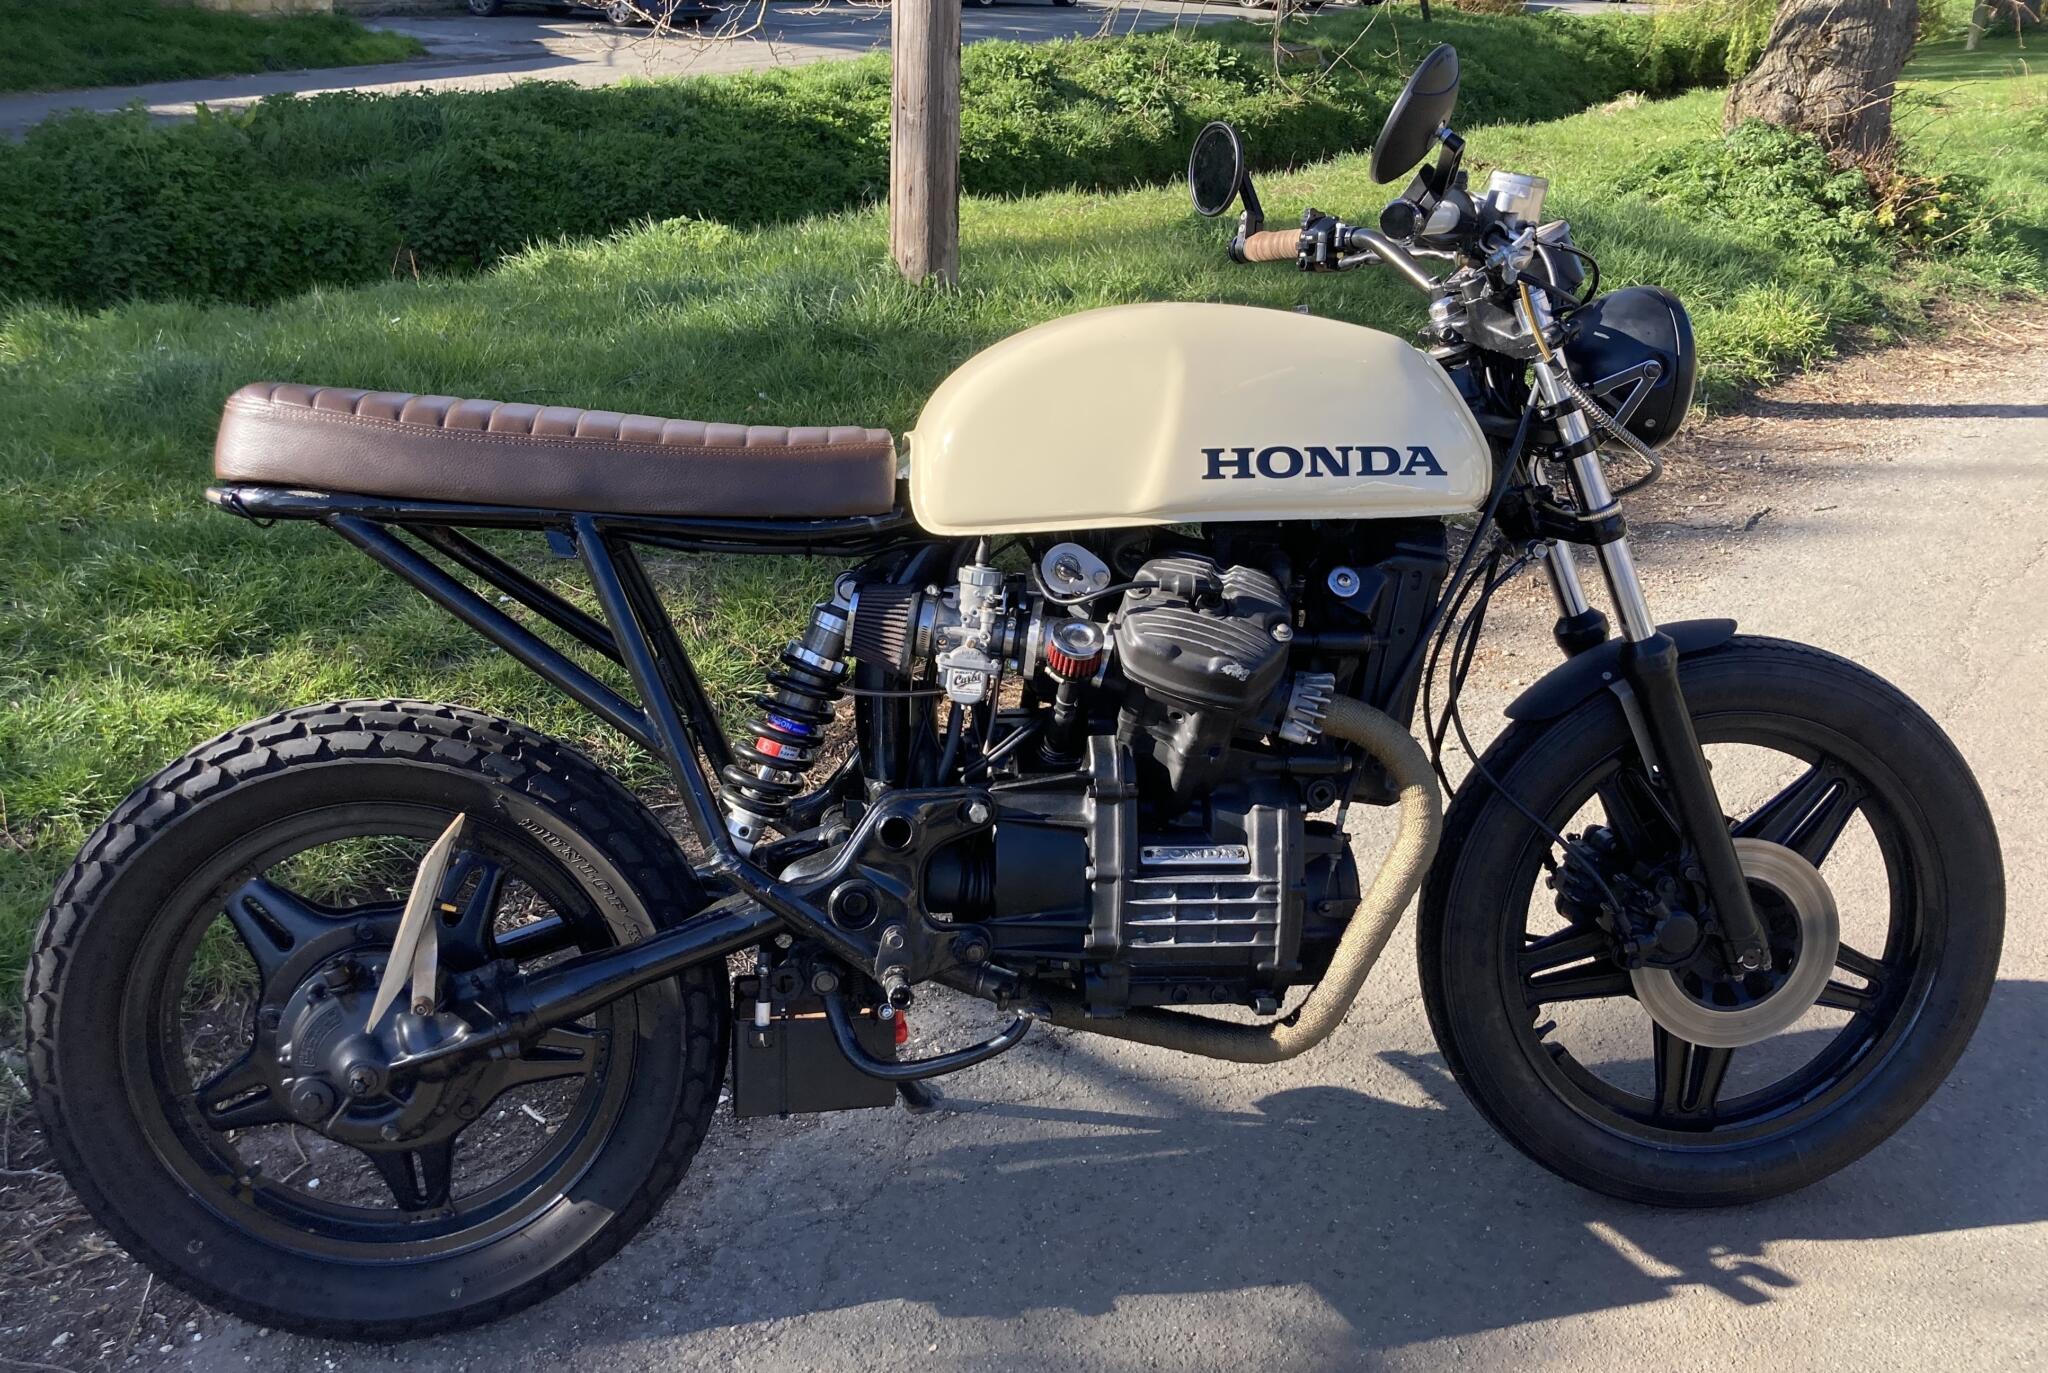
There used to be a CX500 on every street corner. But not many are left these days
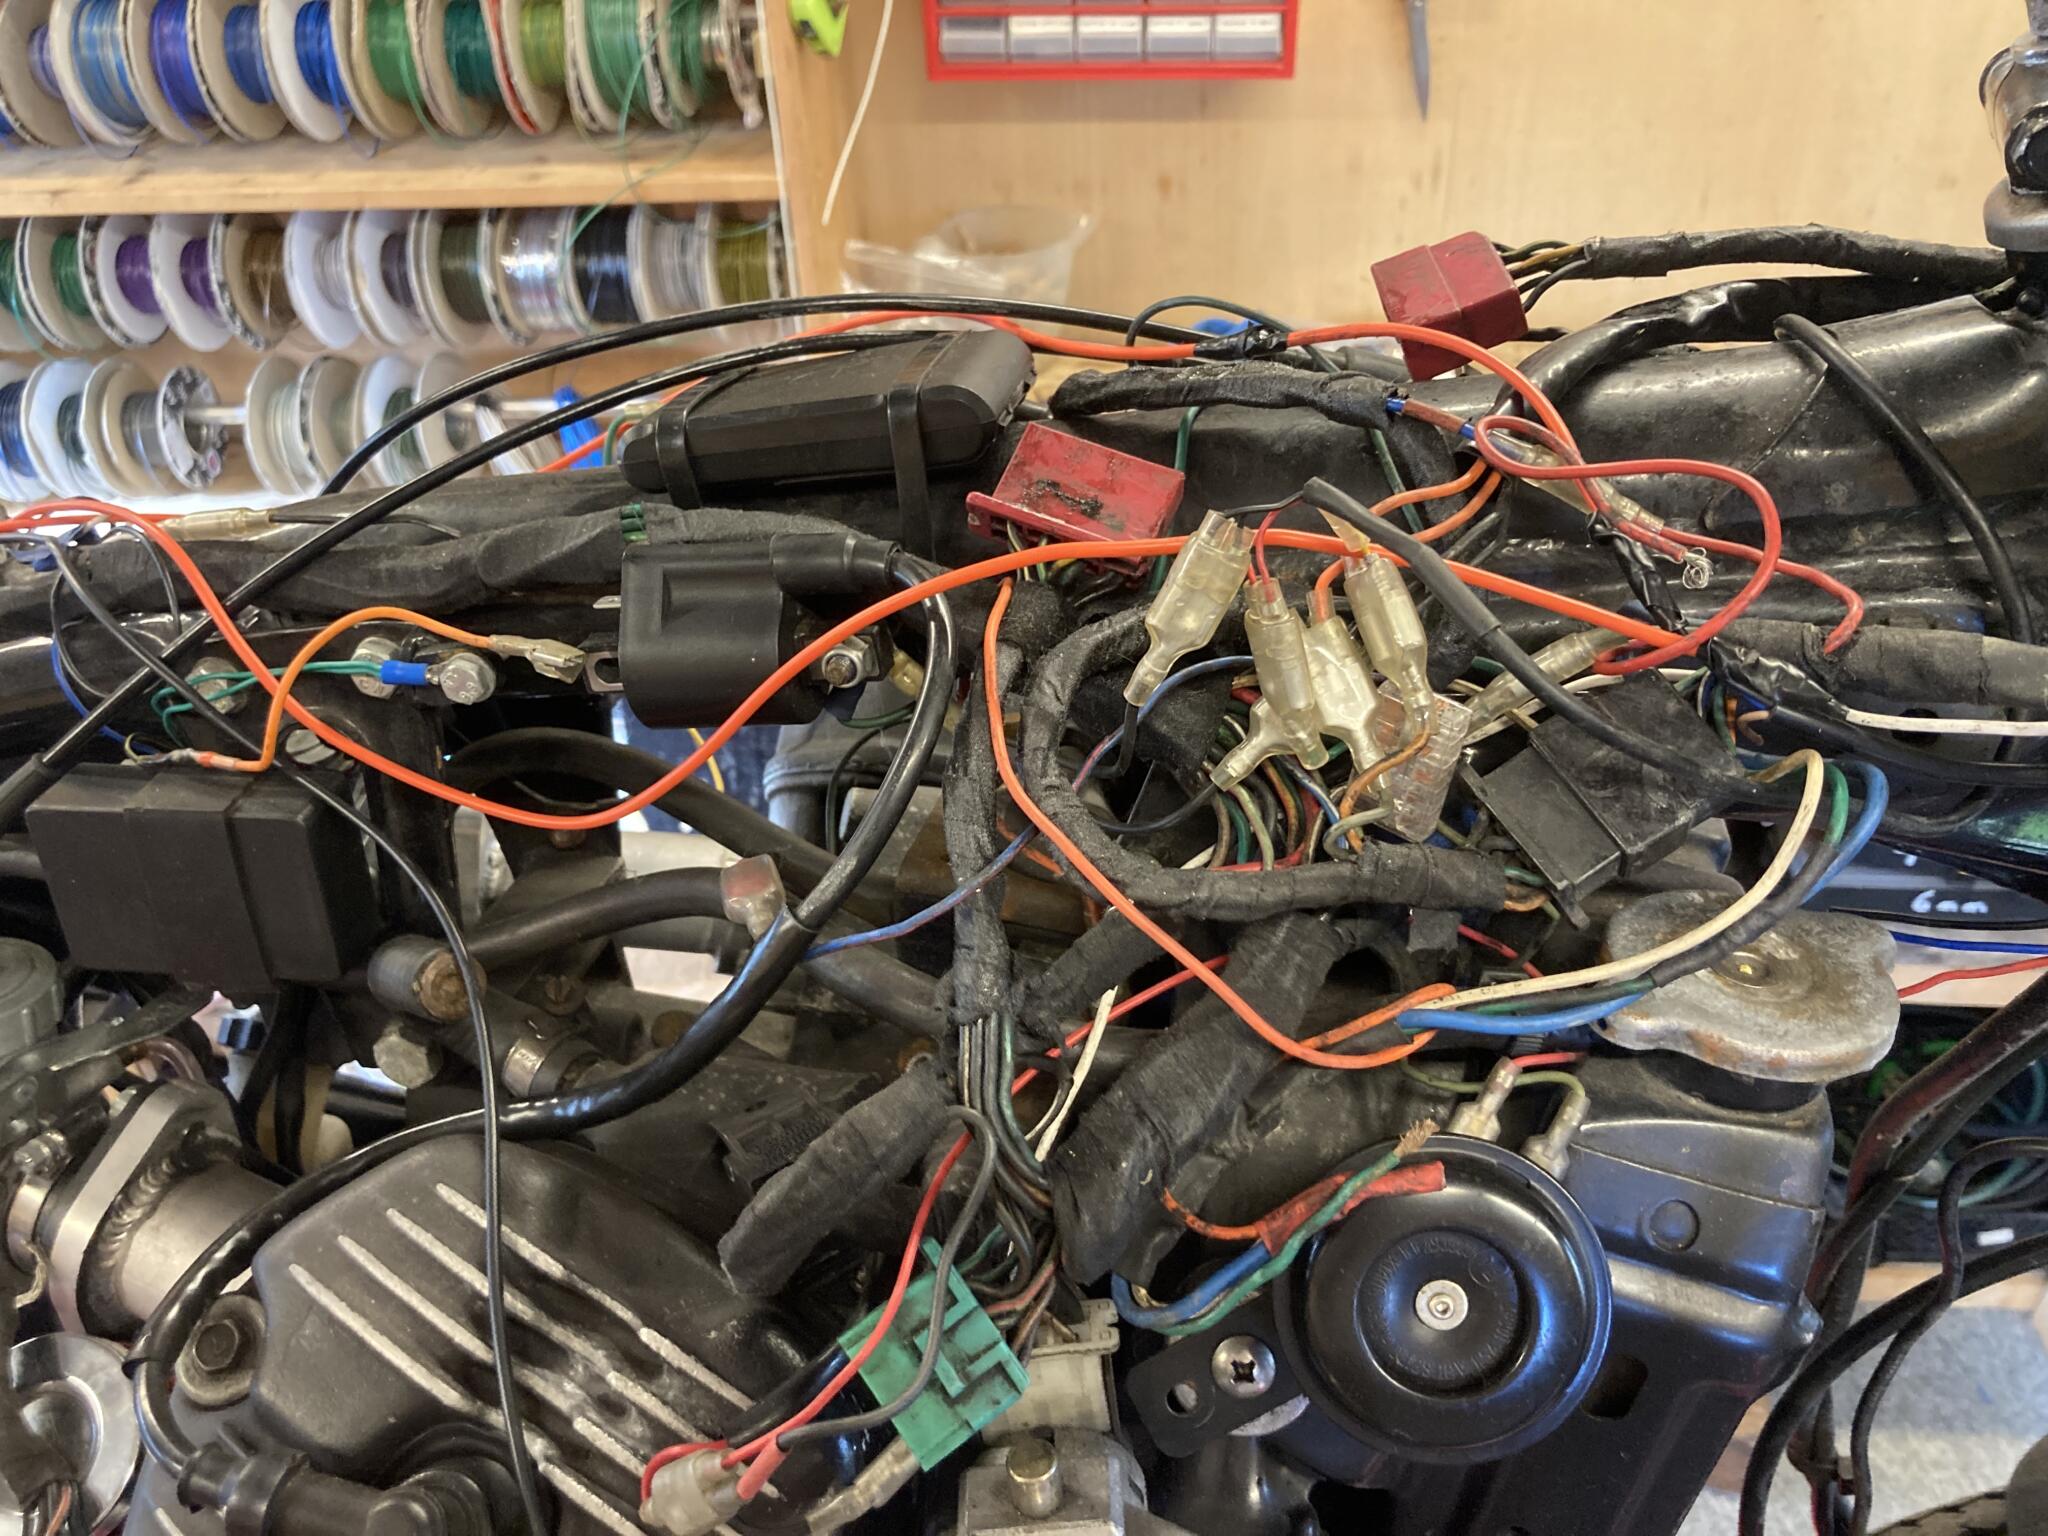
Here’s where we started. I just love stuff like this. It’s only going to get better
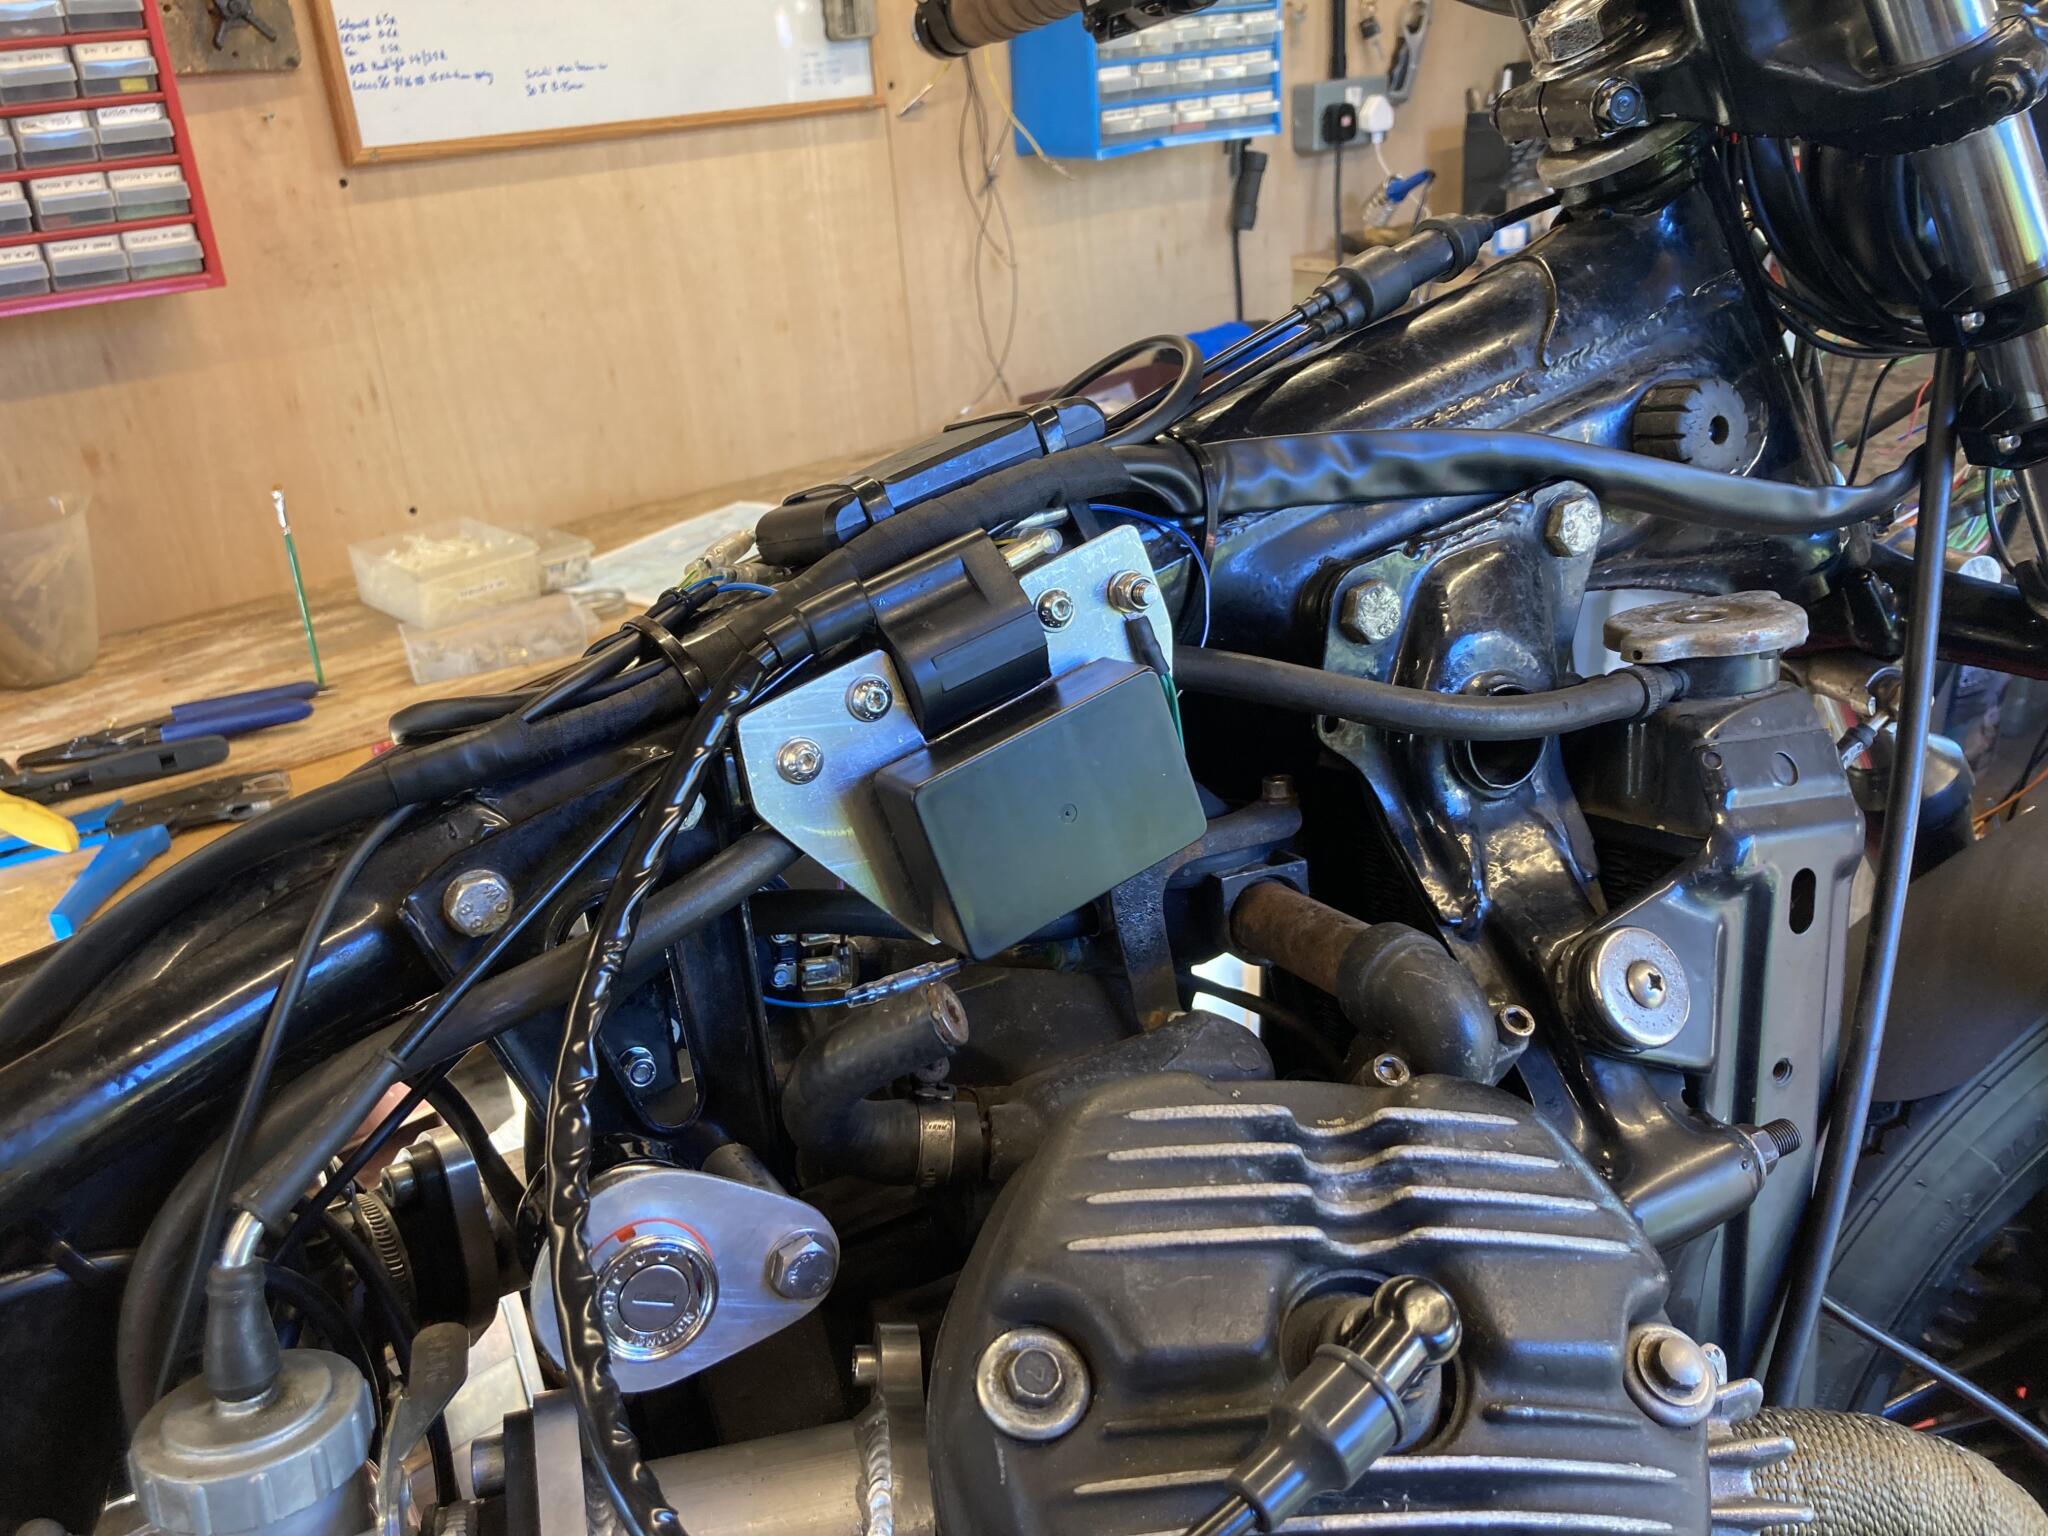
Here’s where it finished. I moved most of the connections to the headlamp shell. (But there are also a hell of a lot fewer connections)
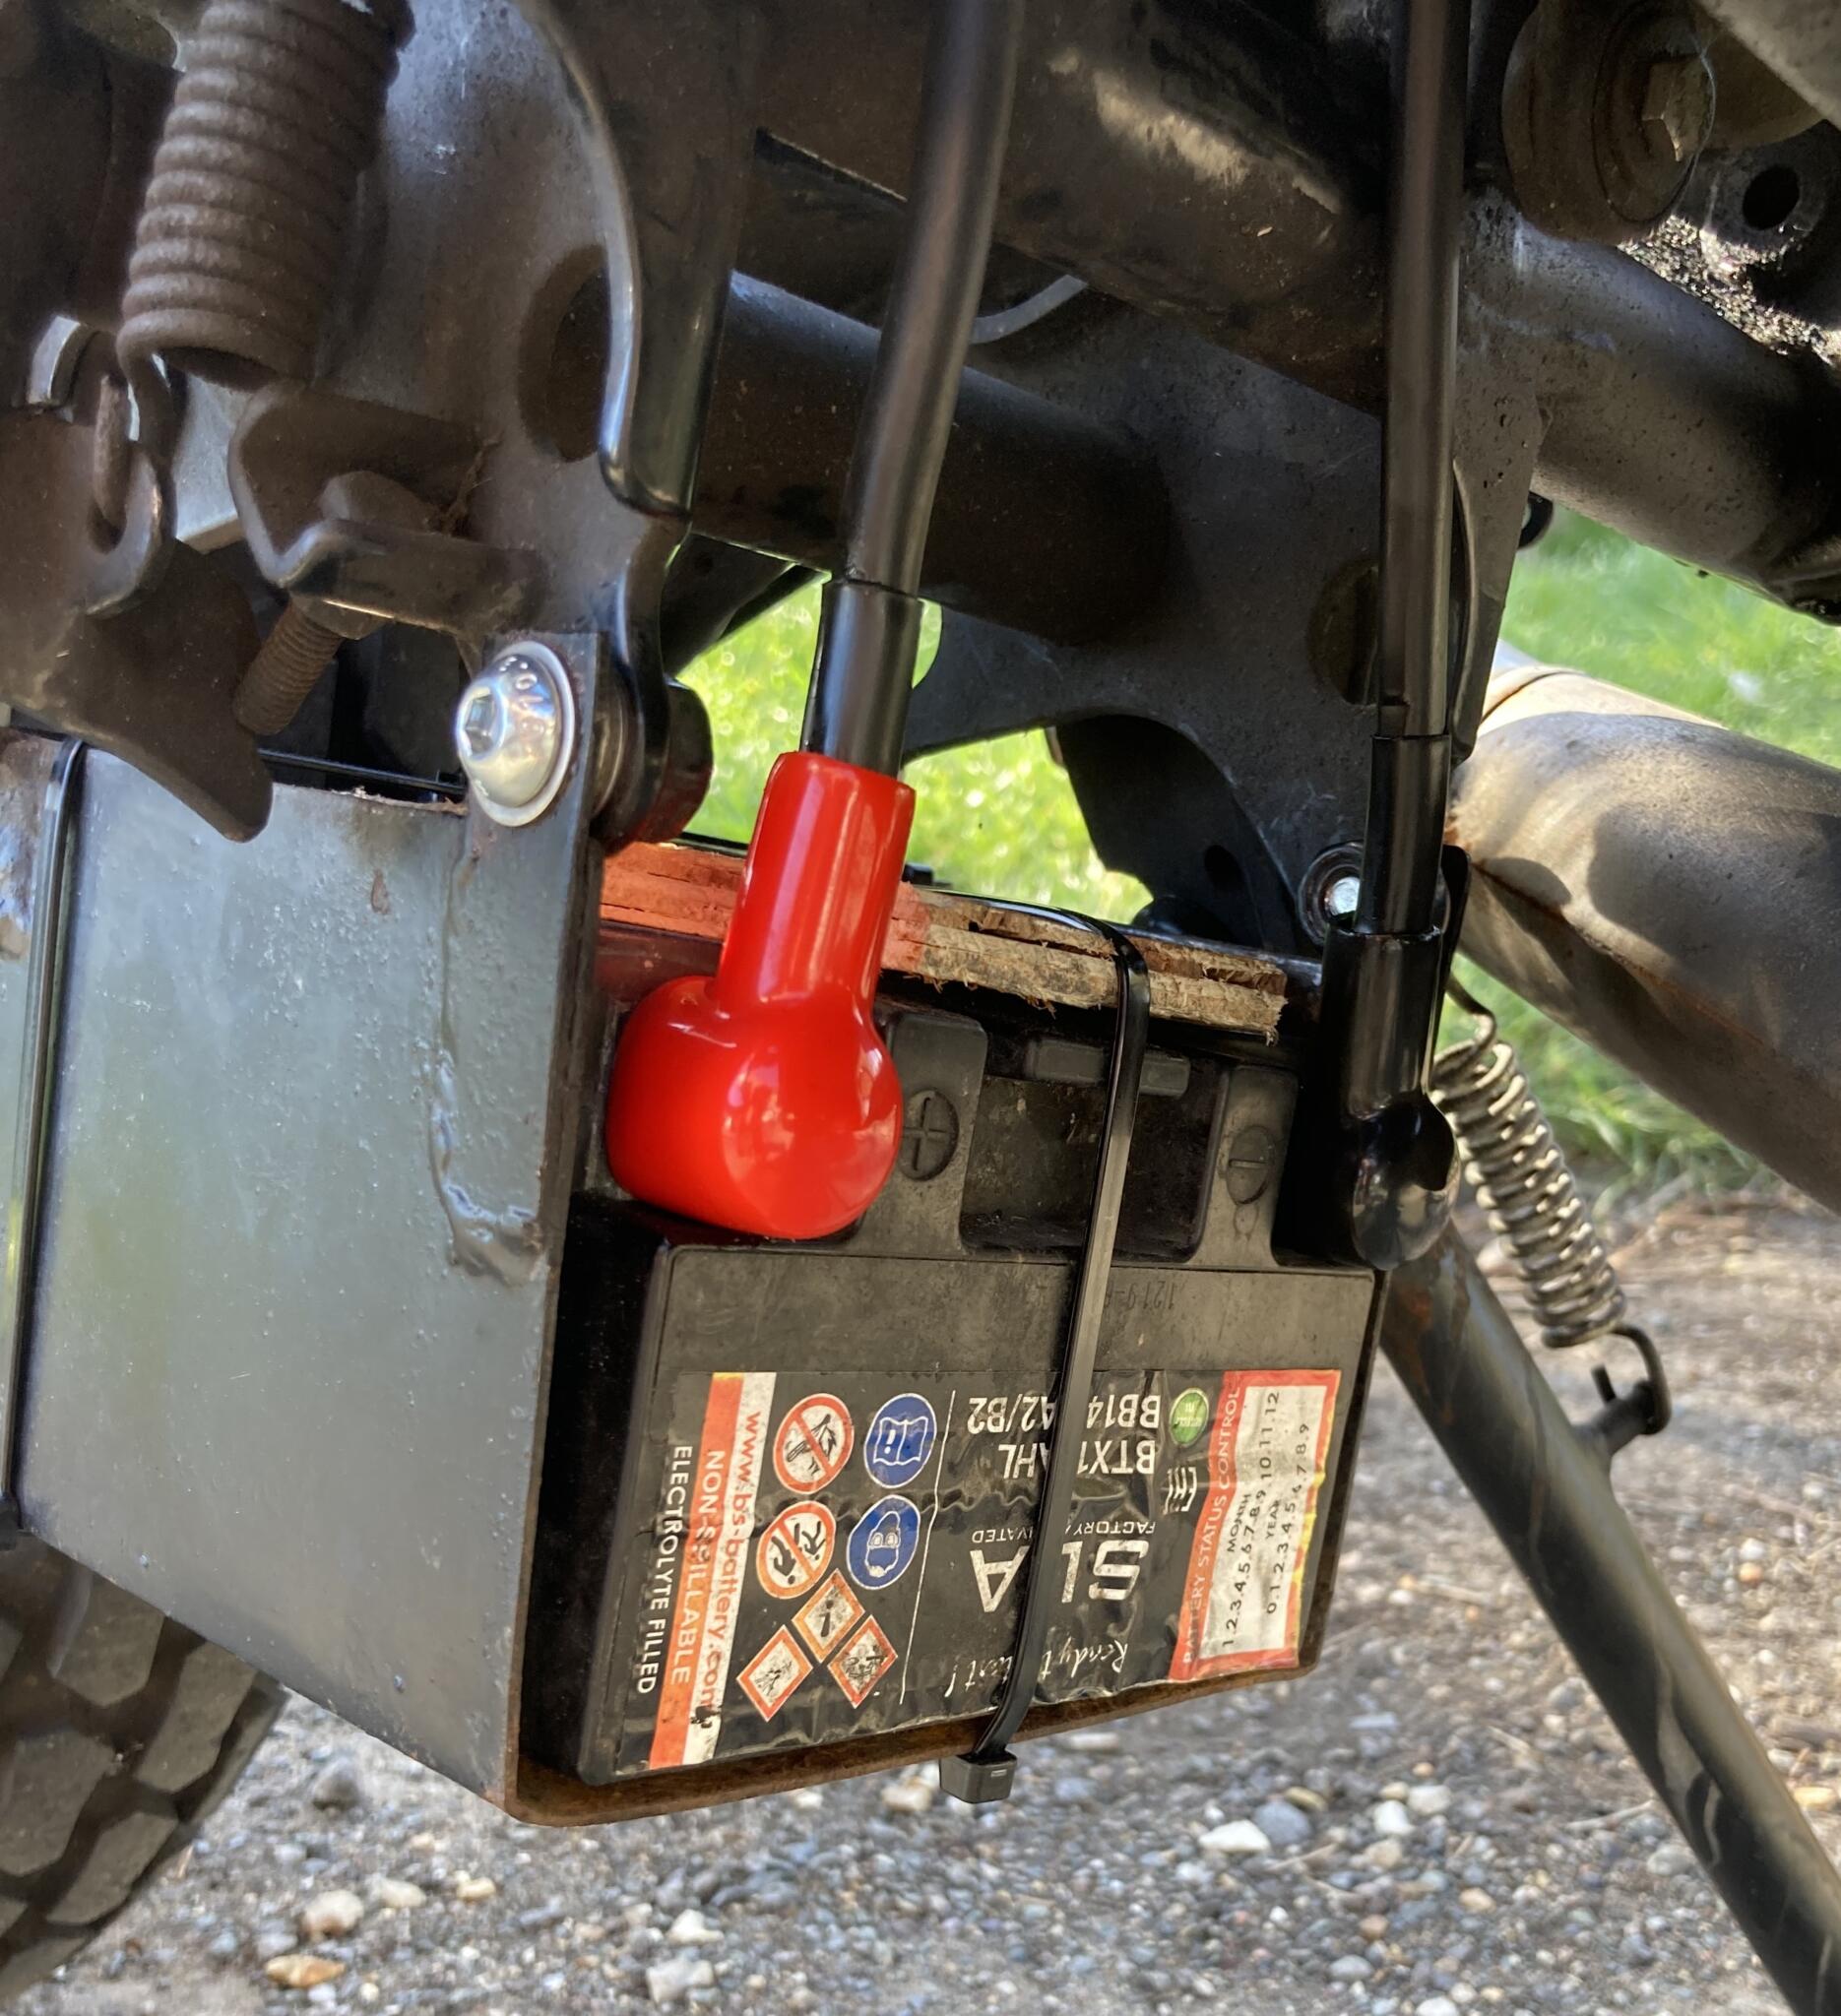
I reworked the existing underslung battery box to make it more secure. It just misses the rear tyre
The old Honda ignition switch was bulky and past its best so I got a new one and replaced all the wires. Those are 25 amp cable for the main feeds (red and brown)
These pins go on an SM connector. They can crimp onto skinny LED wires – in this case for the tail light
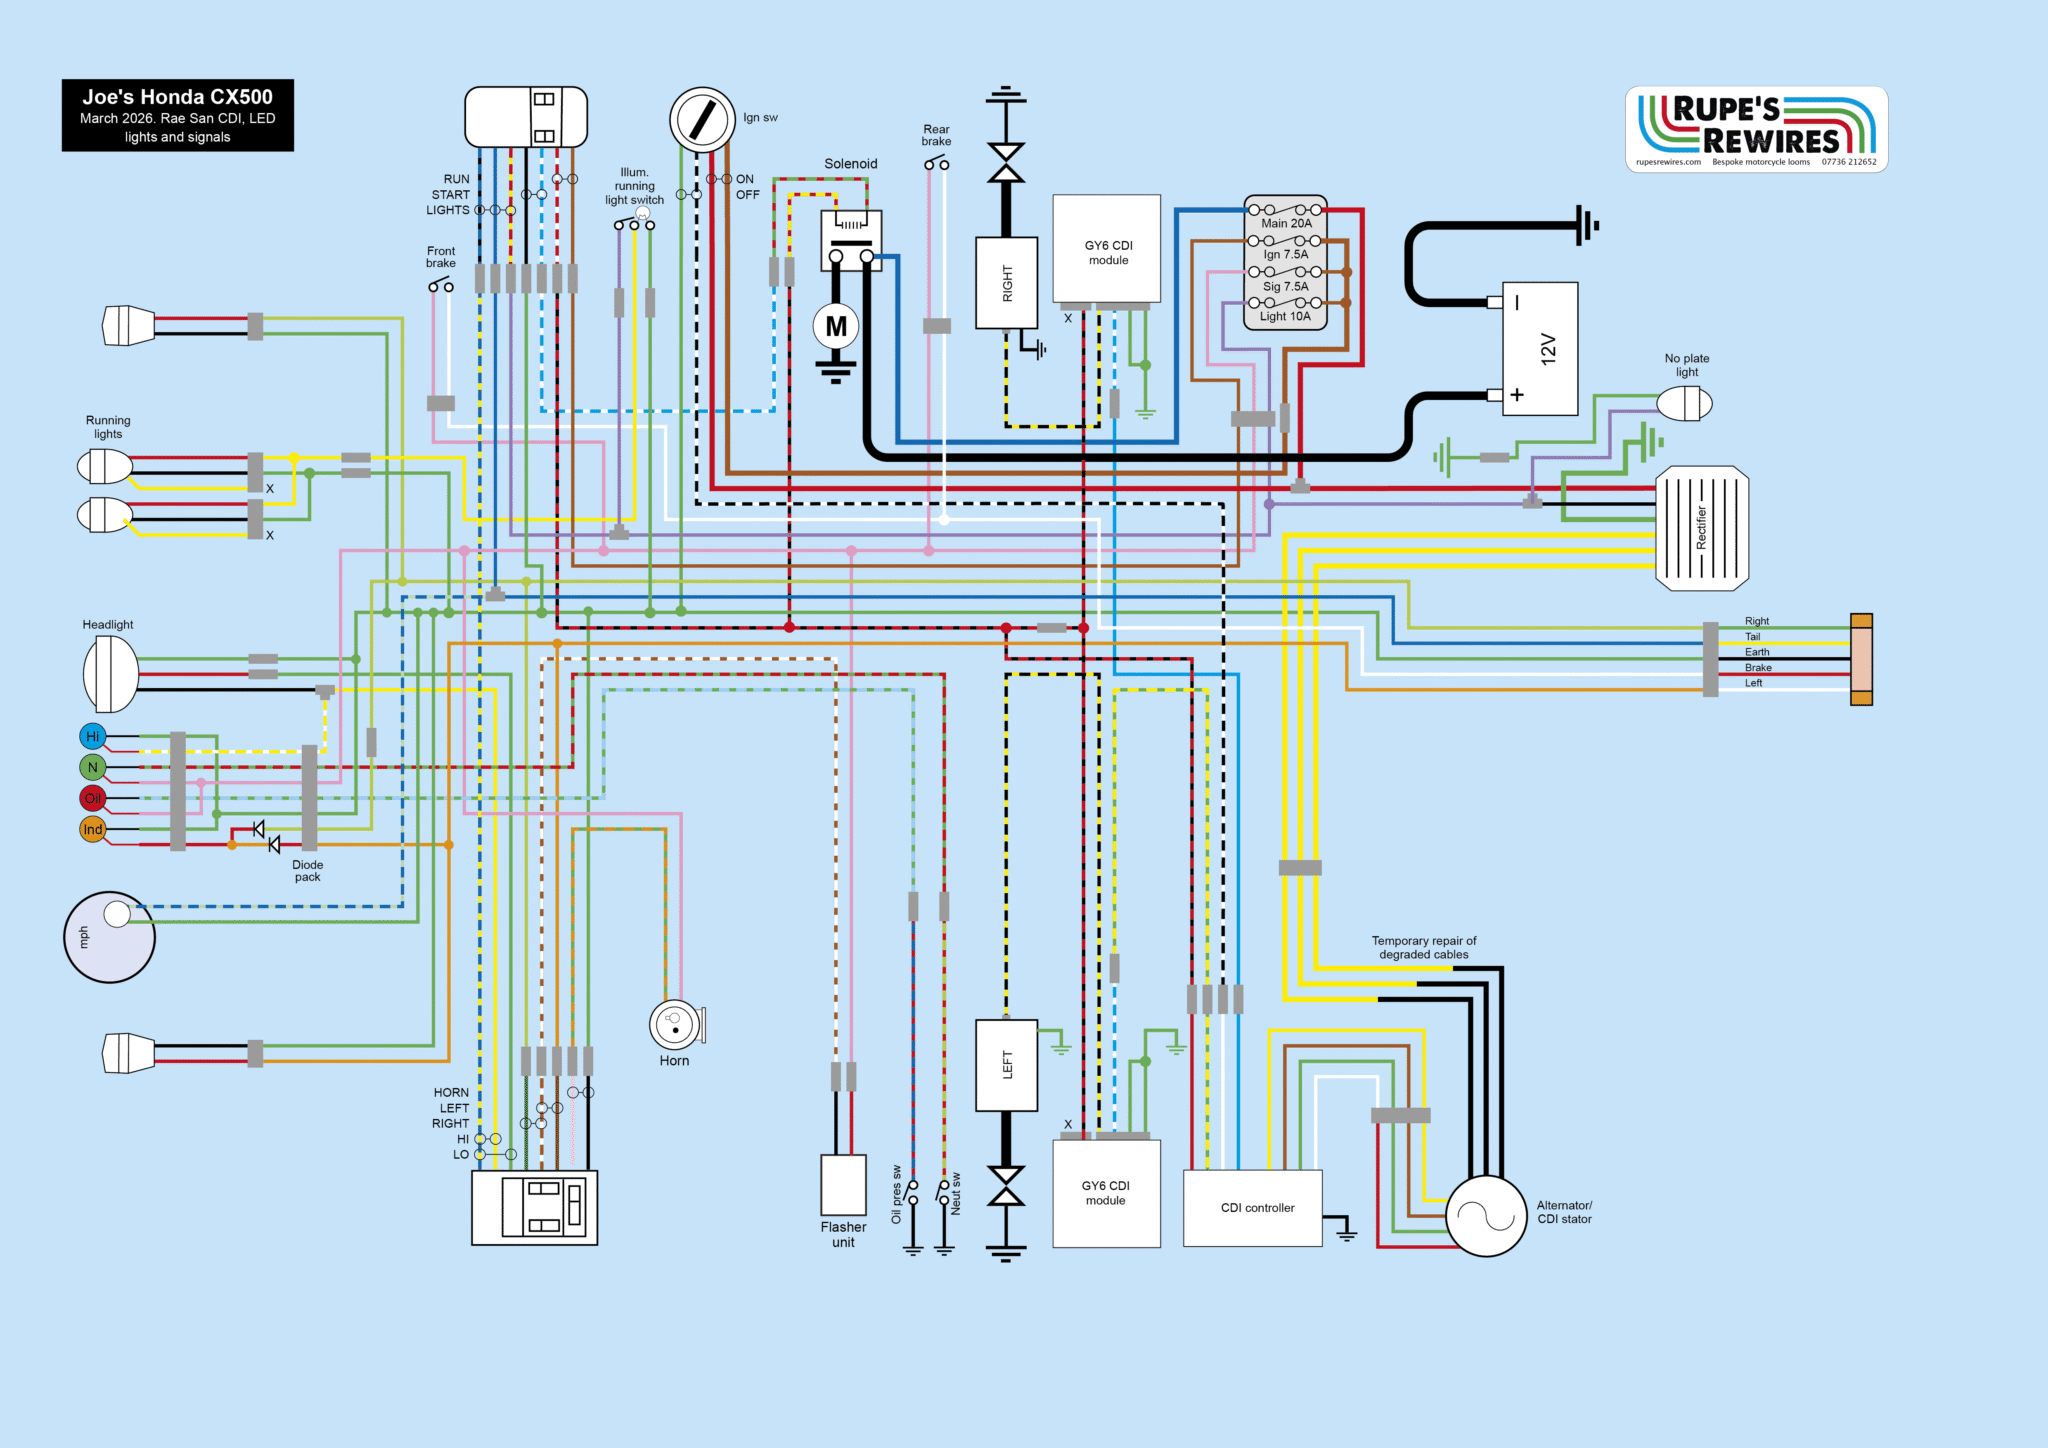
Joseph’s Honda CX500 special
Joseph has owned this CX for eight years, working on it in his garden as time and money allows. It’s had some neat upgrades: a Hagon rear shock, new Mikuni carbs, a new alternator, and a replacement ignition from an Australian outfit called Rae San.
Nevertheless, age and outdoor life were starting to tell on the electrics. By the time the bike arrived it wasn’t running reliably, and lifting the tank and seat hinted at why. The moribund handlebar switch didn’t help.
It was soon obvious Joseph’s CX was going to be an epic job. It went something like this:
- Fetch the old loom off, clean the bike, inspect all the electrical bits.
- Discover half of them are knackered, and order fresh.
- Figure out where everything is best placed to go.
- Make brackets and spacers to mount everything securely.
- Build all the sub looms for stuff like the fuse box, brake switches and CDI.
- Draw a diagram.
- Build the loom.
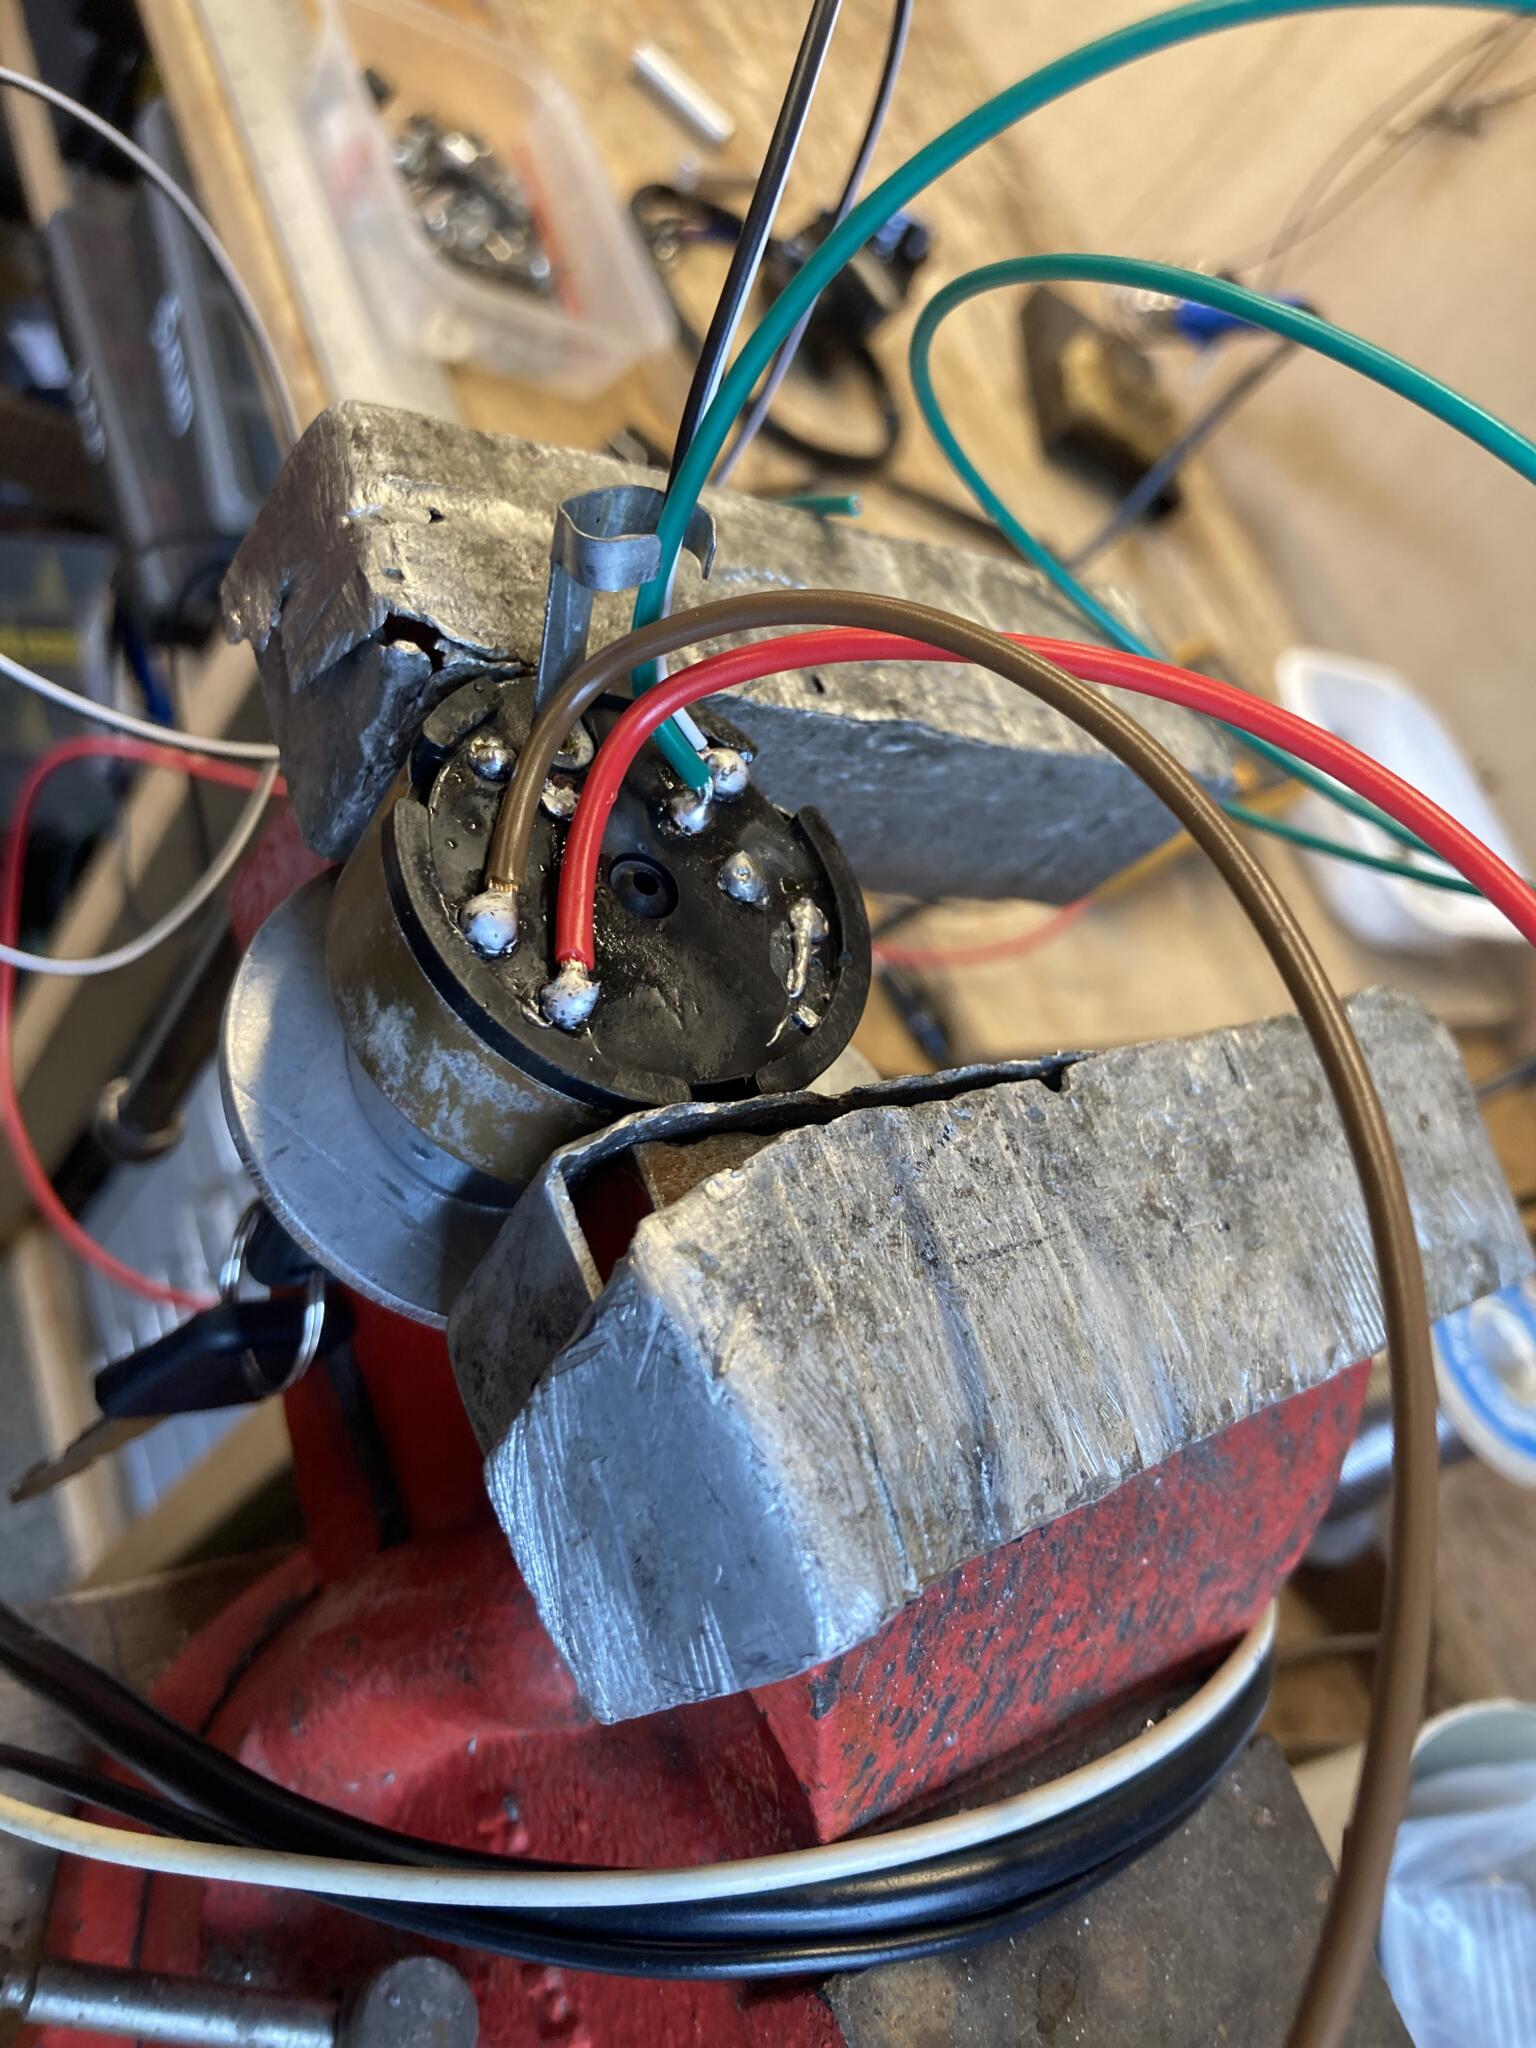
Early on in this adventure I made a grim discovery: the new alternator (a non-Honda product) was suffering from cable insulation rot. No idea why, but it looked like a material quality issue. We had a discussion, and agreed I’d repair it as best I could, and Joseph would get a new alternator later. As it’s an engine-out job I was glad to hear this. We don’t strip engines in my workshop!
I checked with Rae San in Australia that the CDI connections I had were correct, because the system is quite involved and there are multiple versions. The Rae San bloke is actually called Raymond Dekens, and he does a range of cunning electrical upgrades for CXs. He came straight back with a wiring diagram that worked perfectly.
Joseph is keen on being seen when he rides in London, so he’d fitted running LEDs which he needed a separate on/off switch for. We also had bar end indicators, and a warning light panel from an old CB500-4, which doubles up as the handlebar clamp. It presumably worked on the CB, but on the CX the bulb holes exited directly onto the handlebar, so much head scratching was going to be needed.
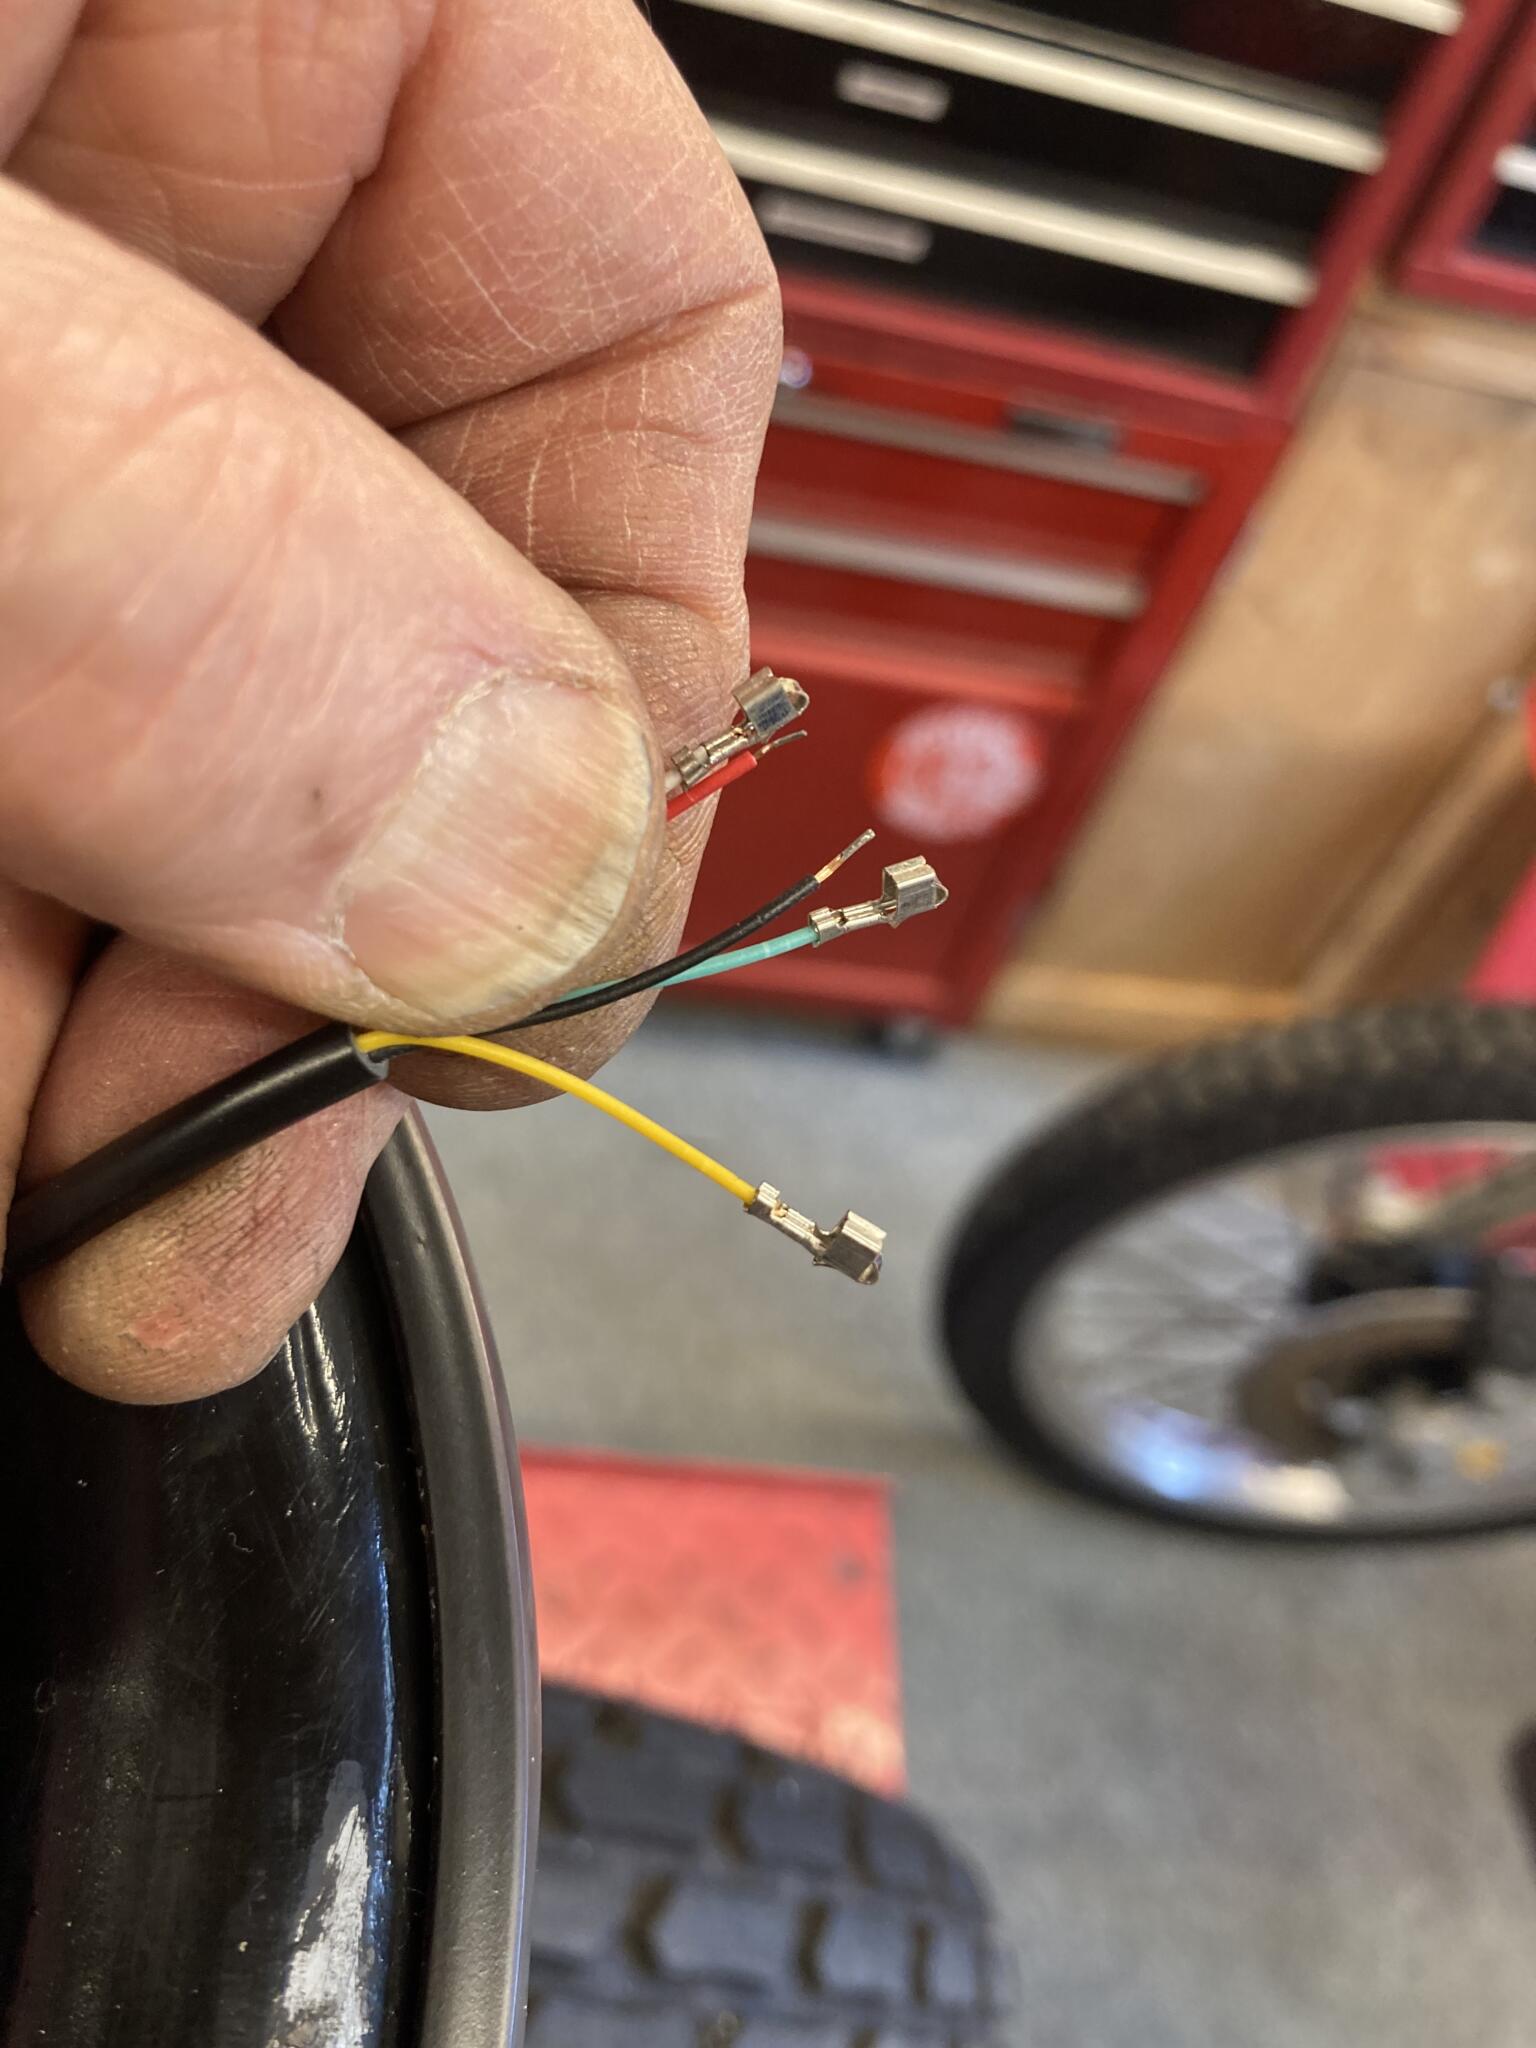
Aftermarket LEDs are amazing things, but difficult to fit because they are developed with zero thought as to how they will connect to a normal motorbike. The wires are about as thick as a needle, and cannot possibly fit into normal connectors. The best solution I’ve found are SM connectors, used in model airplanes and the like. They can handle skinny LED wires on one side of the plug, and 11 amp cable on the other side. 11 amp is just big enough to form part of a normal loom.
It was a good feeling when Joseph’s CX was finally finished, and everything worked. And it’s only April. Let’s see if anyone else can beat this job for complication in 2026.
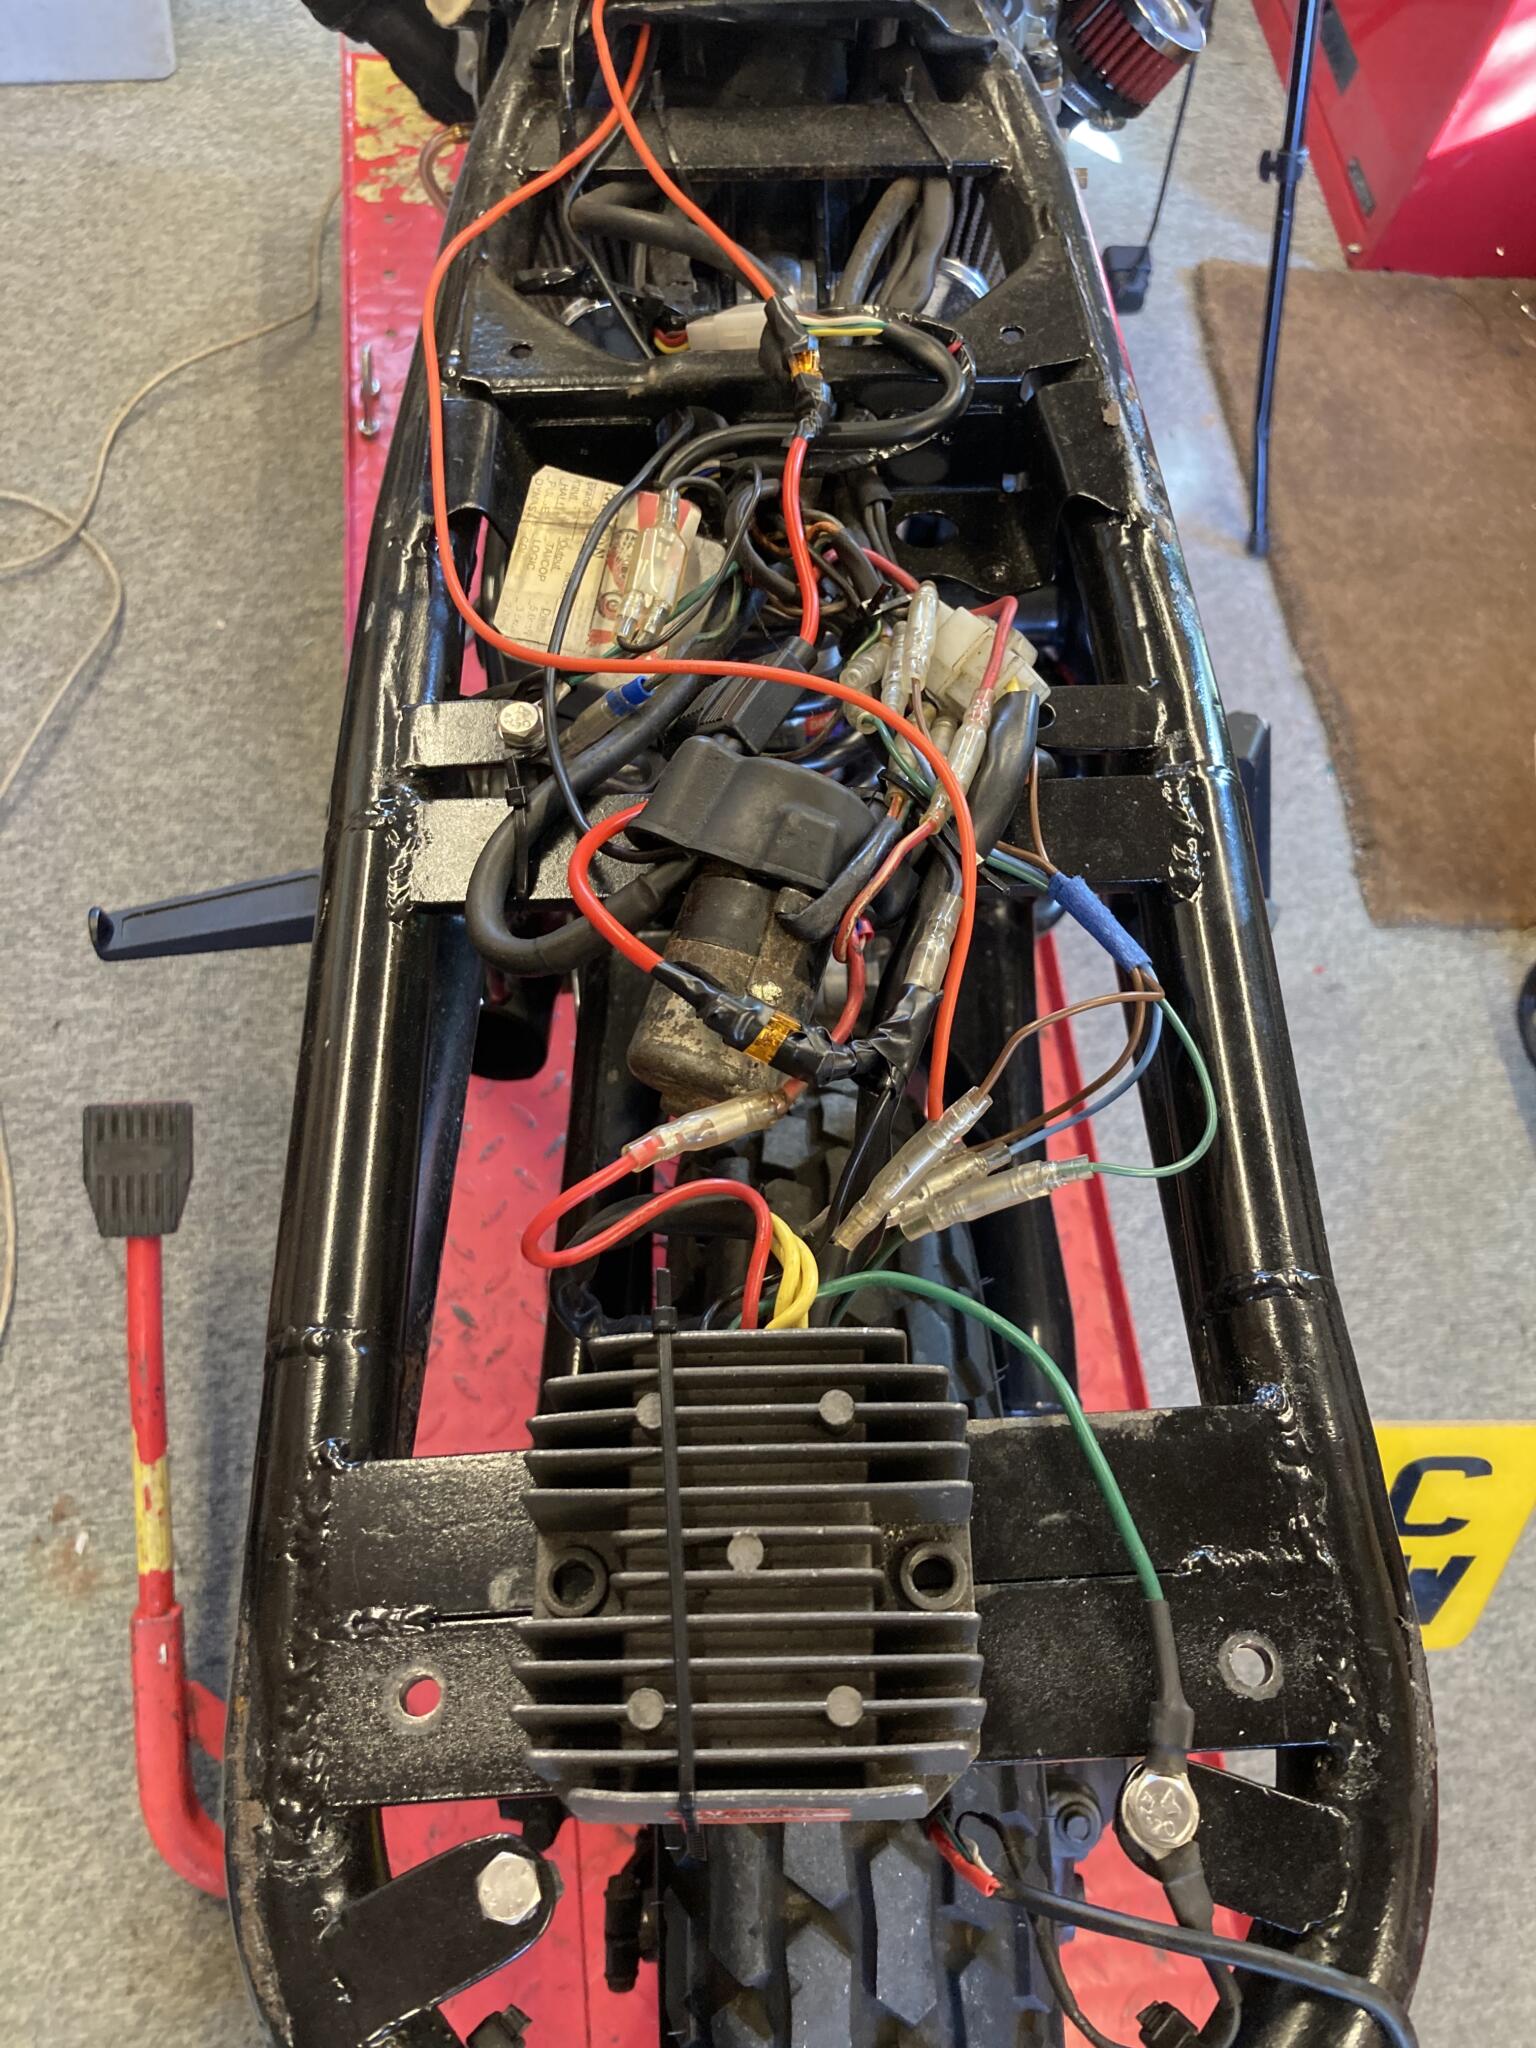
Here’s how the back end looked to start with
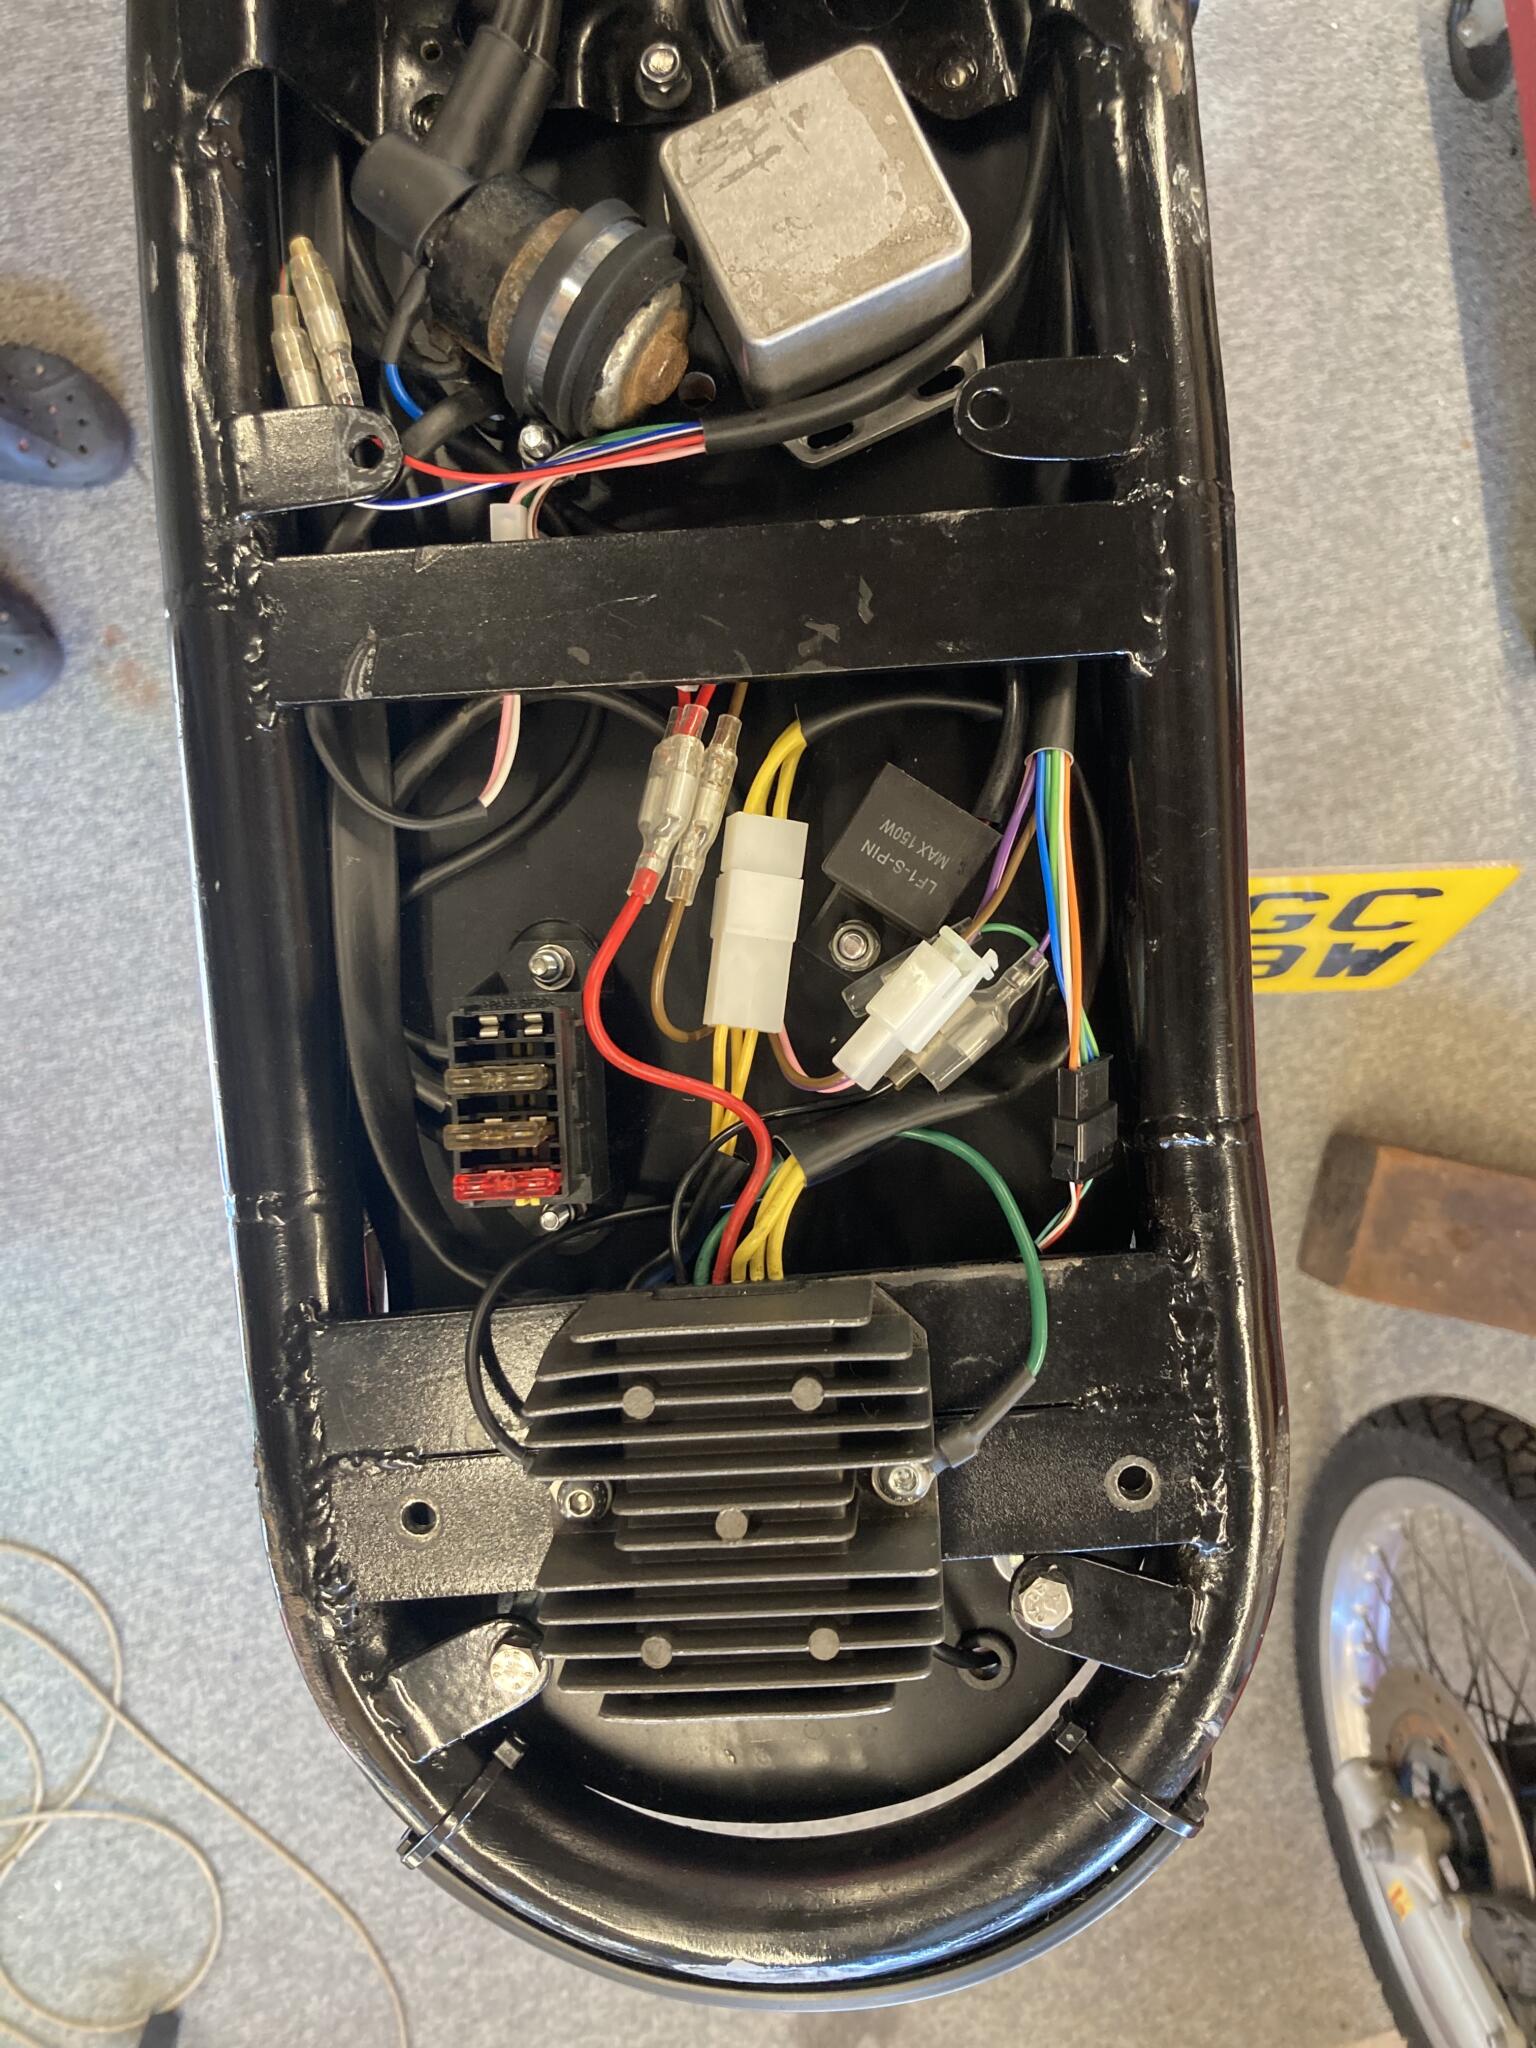
Here it is a little later. The silver square thing is part of the CDI ignition
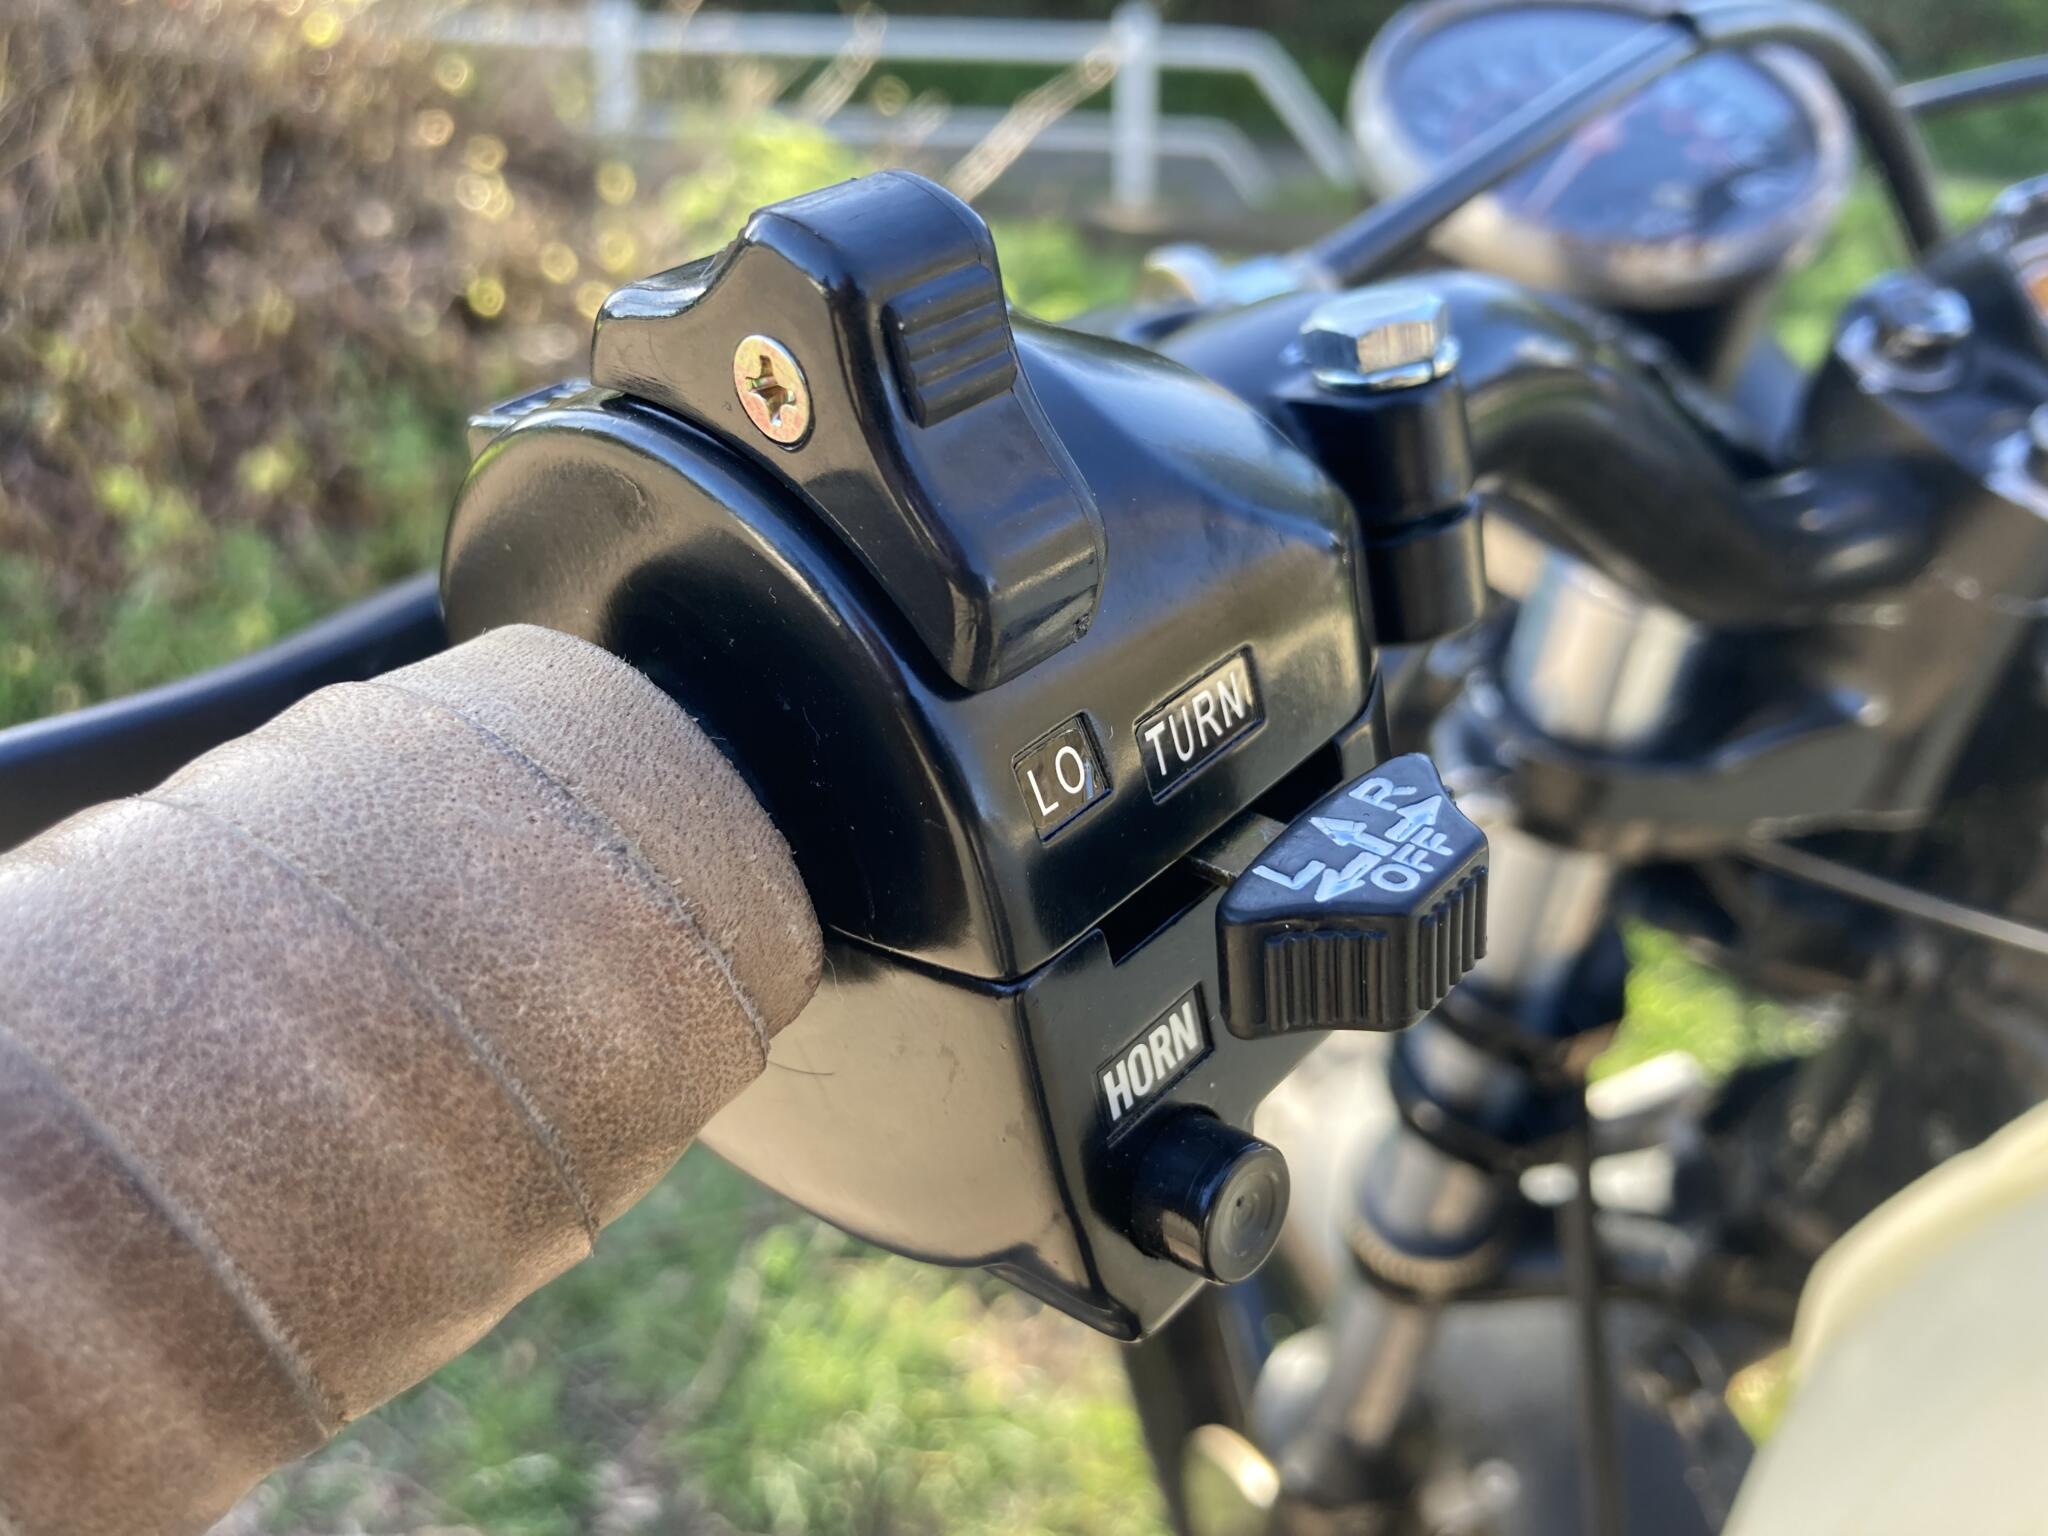
With the original Honda switchgear kaput, Joseph went for replica Yamaha XS650. When you build a new loom it doesn’t make any difference what switchgear you use
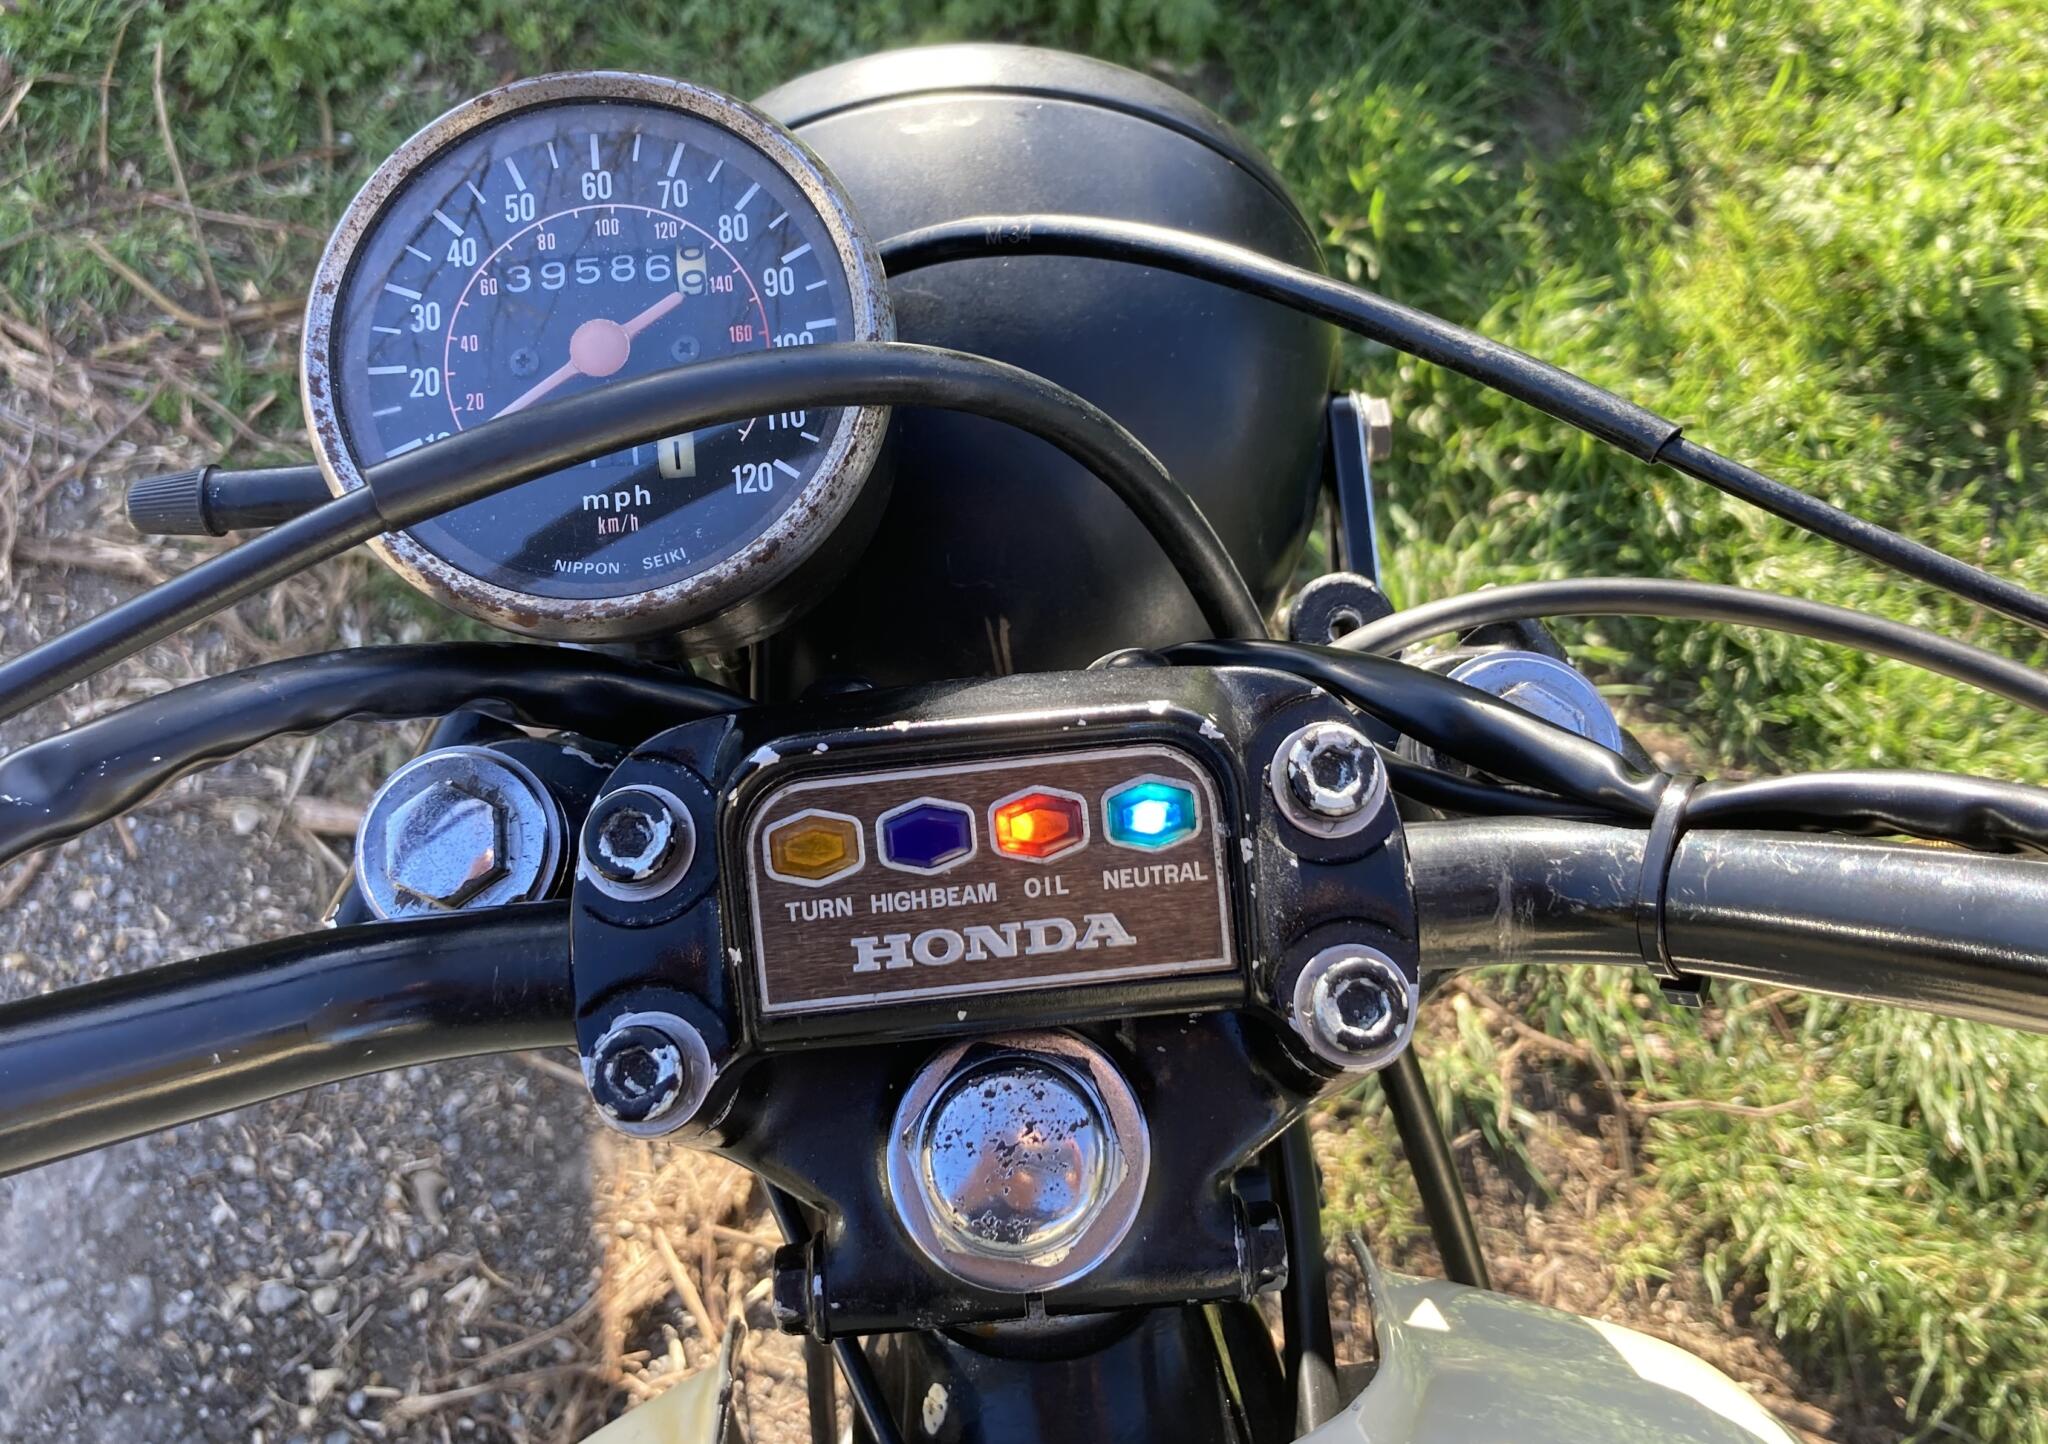
The warning lights run eBay LEDs hot-glued inside the bulb housings. The tiny wires get round the handlebar OK. I don’t know why the neutral light is blue. Maybe it was green in 1975
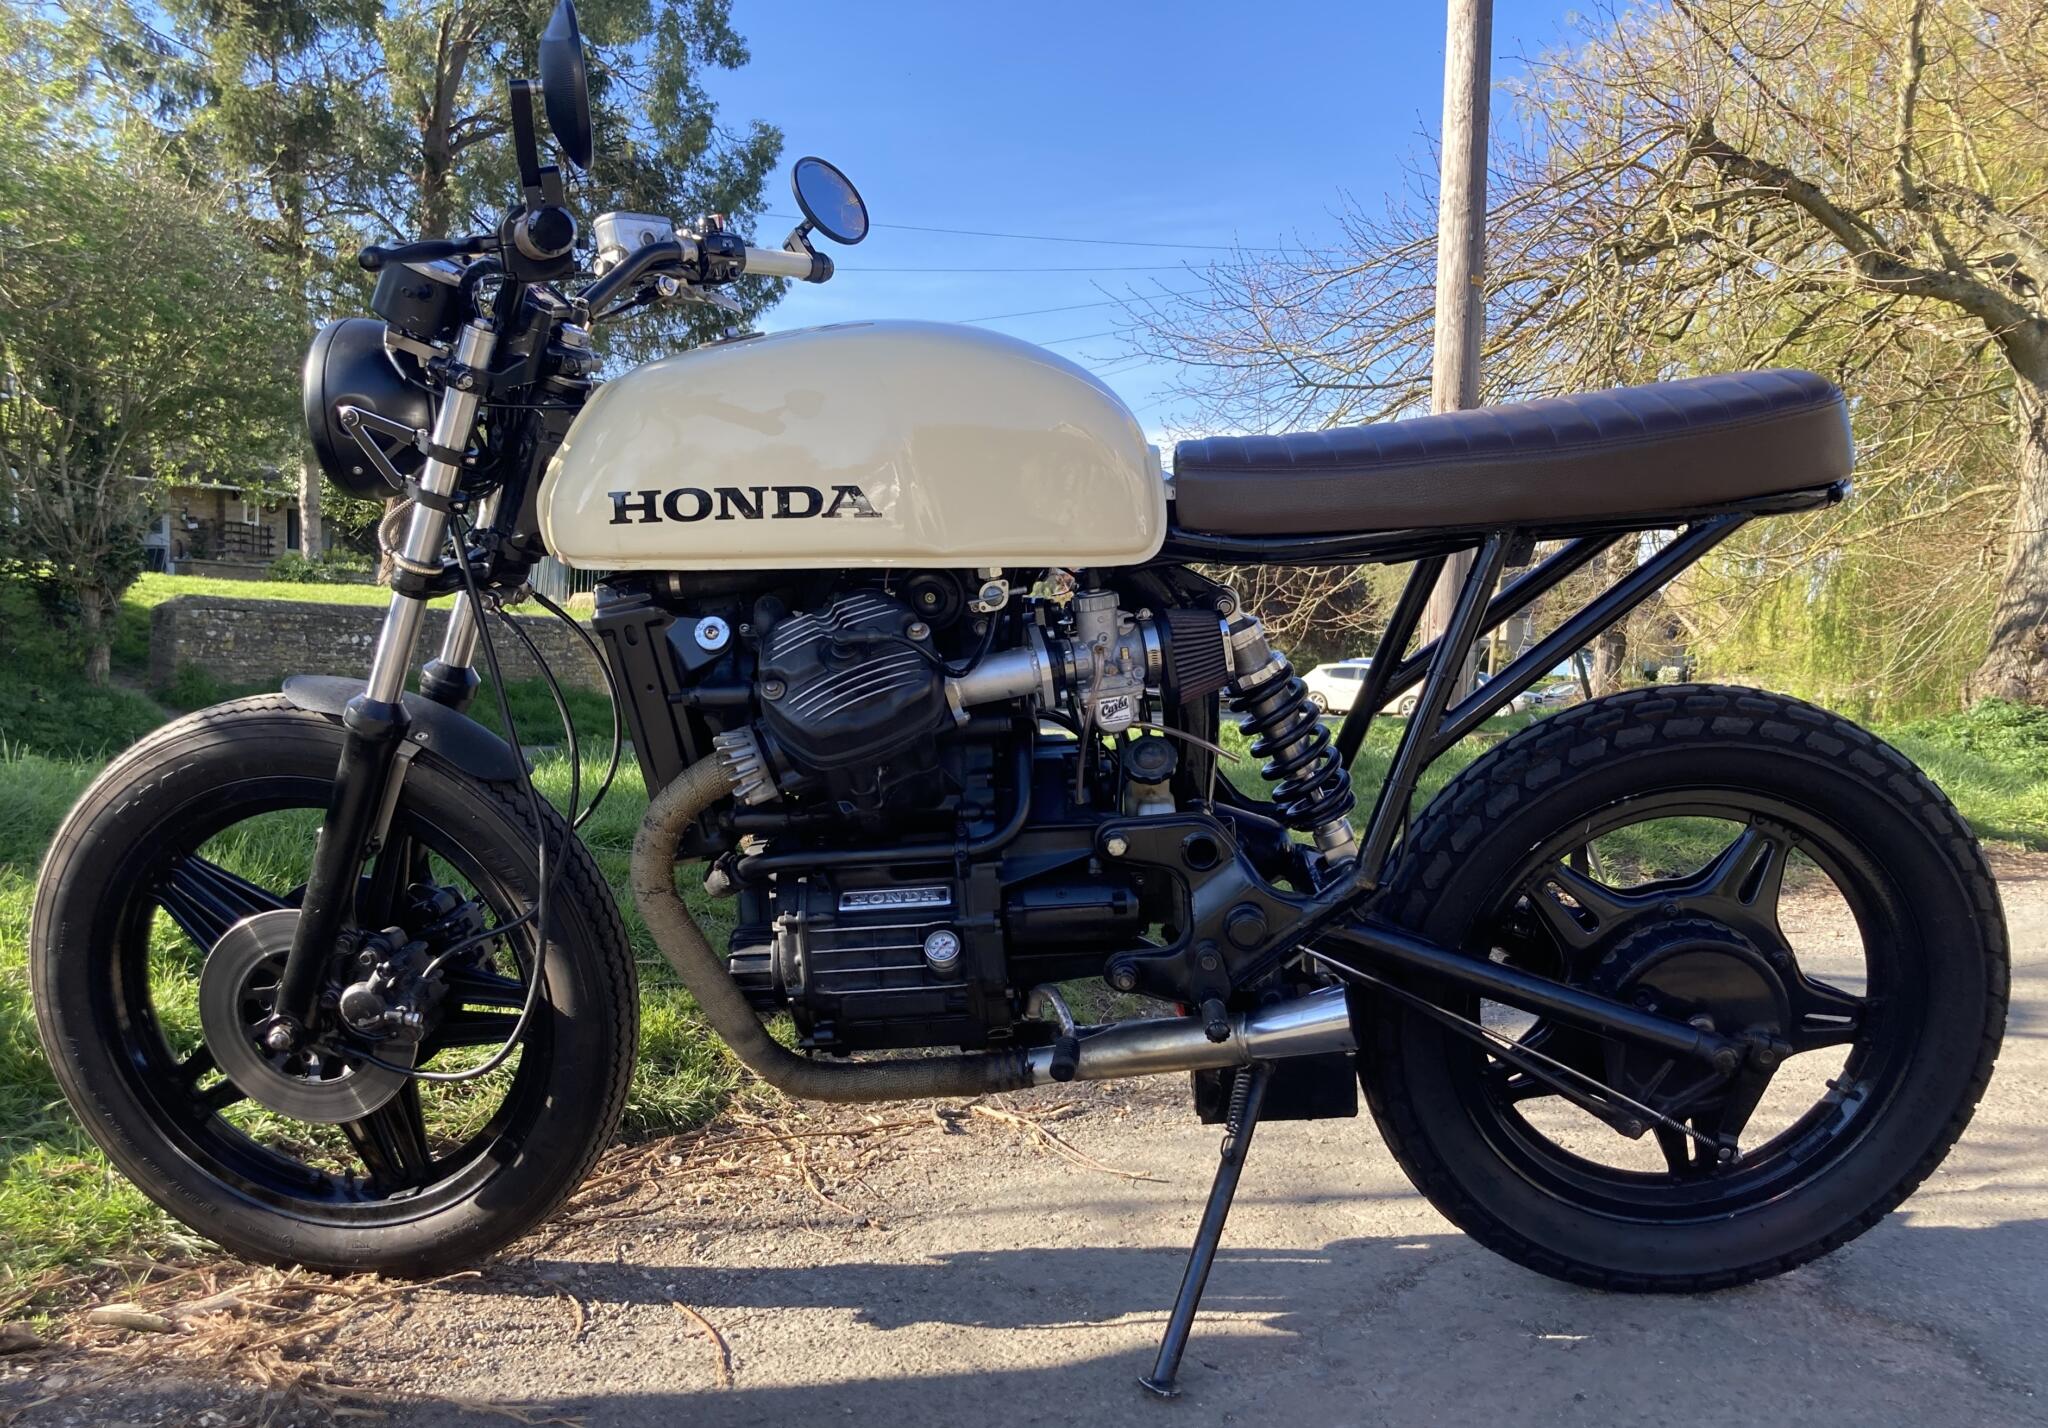
Almost ready for the street once more
